A Researcher's Guide to Reducing Contamination in Low-Biomass Microbiome Studies
This article provides a comprehensive guide for researchers and drug development professionals tackling the unique challenges of low-biomass microbiome studies.
A Researcher's Guide to Reducing Contamination in Low-Biomass Microbiome Studies
Abstract
This article provides a comprehensive guide for researchers and drug development professionals tackling the unique challenges of low-biomass microbiome studies. Covering foundational concepts to advanced applications, it details the critical sources of contamination—from reagents and the lab environment to well-to-well leakage—and their disproportionate impact on low-biomass samples. The content outlines robust experimental designs, including the essential use of process controls and proper personal protective equipment (PPE). It further explores a suite of computational decontamination tools like micRoclean, Squeegee, and strain-resolved analysis, offering guidance on their selection and implementation to preserve biological signals. Finally, the article synthesizes best practices for data validation, comparing methodological performance and emphasizing the importance of transparent reporting to ensure the reliability and reproducibility of findings in biomedical and clinical research.
Understanding the Critical Challenge of Contamination in Low-Biomass Systems
Troubleshooting Common Low-Biomass Research Challenges
FAQ: Addressing Frequent Experimental Issues
Q: Our negative controls contain microbial sequences that also appear in our low-biomass samples. How do we determine if they are true contaminants?
A: This is a common challenge. Follow this decision framework:
- Compare Abundance Profiles: If the sequence is significantly more abundant in your biological samples than in the negative controls, it might be a true signal [1].
- Use Advanced Bioinformatics: Employ tools like
Decontam(frequency or prevalence method) orSourceTrackerto statistically identify contaminants [2]. For features present in both samples and controls, avoid complete removal; instead, use tools likeSCRuBormicRocleanthat can subtract only the contaminant proportion of reads [3]. - Validate with Complementary Methods: Use techniques like fluorescence in situ hybridization (FISH) or qPCR to confirm the physical presence of the microbe in the sample.
Q: Our sequencing results show unexpected microbial profiles. What are the potential sources of contamination?
A: Unexpected profiles often stem from several key sources introduced at different stages:
- Reagent DNA: Trace microbial DNA in extraction kits and PCR reagents [4] [5].
- Cross-Contamination: Leakage between adjacent wells on a plate during library preparation (the "splashome") [5].
- Human Operator & Environment: DNA from skin, aerosols, or the laboratory environment introduced during sample collection or processing [4].
- Sampling Equipment: Non-sterile swabs, containers, or solutions [4].
Q: How can we design a study to avoid confounding batch effects with biological signals?
A: Batch effects are a major pitfall where technical variations are misinterpreted as biological findings [5].
- Active De-confounding: Do not process all samples from one experimental group (e.g., "cases") in a single batch. Use tools like
BalanceITto randomize and distribute samples across processing batches [5]. - Include Multiple Controls: Incorporate various control types (extraction blanks, no-template PCR controls, etc.) in every processing batch to account for batch-specific contaminants [5].
Essential Experimental Protocols & Workflows
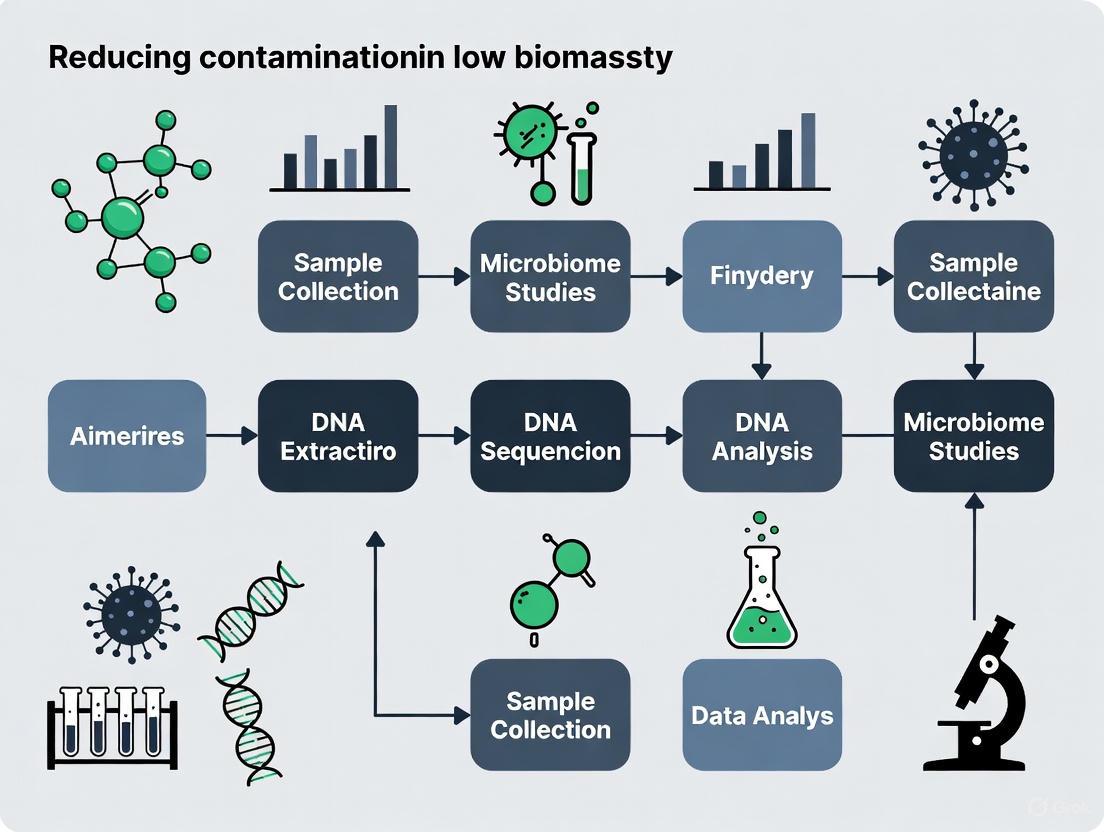
Comprehensive Sampling and Decontamination Workflow
The following diagram outlines the critical steps for preventing contamination from sample collection through data analysis.
Protocol: Implementing a Contamination-Aware Study Design
Objective: To collect low-biomass samples while minimizing and tracking contaminant introduction at every stage.
Materials:
- Single-use, DNA-free consumables (swabs, collection tubes)
- Personal Protective Equipment (PPE): gloves, mask, clean lab coat or coveralls
- Nucleic acid degradation solution (e.g., dilute bleach, commercial DNA removal kits)
- Materials for multiple negative controls (e.g., sterile swabs, empty tubes)
Procedure:
Pre-Sampling Preparation:
- Equipment Decontamination: Treat all re-usable equipment and surfaces with 80% ethanol to kill cells, followed by a nucleic acid degrading solution (e.g., 0.5-1% sodium hypochlorite) to remove trace DNA. Rinse with DNA-free water if necessary [4].
- PPE: Wear gloves, a mask, and a clean suit or lab coat to minimize contamination from skin, hair, and aerosols [4].
During Sampling:
- Use single-use, pre-sterilized equipment wherever possible.
- Handle samples as little as possible. Change gloves between samples if there is a risk of cross-contamination.
- Crucial Step: Collect multiple types of negative controls simultaneously with your biological samples [4] [5]. These should include:
- Process Blanks: An empty, unused collection tube that undergoes the exact same preservation, extraction, and sequencing process.
- Field Blanks: A tube opened and exposed to the air in the sampling environment.
- Swab Controls: A sterile swab rubbed on the operator's gloves or a cleaned surface.
Laboratory Processing:
- Batch Processing: Ensure all sample types and experimental groups are distributed evenly across DNA extraction and library preparation batches. Never process all samples from one group in a single batch [5].
- Include Controls: Include extraction blanks and no-template PCR controls in every processing batch to capture contaminants from reagents and the lab environment [5].
- Prevent Cross-Contamination: Use plate seals to prevent well-to-well leakage during PCR. Meticulously record the well location of every sample and control [5].
Computational Decontamination & Data Analysis
Guide to Selecting a Decontamination Tool
Choosing the right computational tool is critical for accurate results. The table below summarizes key methods.
| Tool Name | Method Type | Key Principle | Best Use Case | Considerations |
|---|---|---|---|---|
| Decontam [2] | Control- & Sample-based | Identifies contaminants via prevalence in negative controls or inverse correlation with DNA concentration. | General-purpose decontamination; studies with well-characterized negative controls. | Removes entire features (OTUs/ASVs) identified as contaminants. |
| SCRuB [3] | Control-based | Models and subtracts contamination sources, including well-to-well leakage. | Estimating original sample composition; studies with significant cross-contamination concerns. | Can perform partial read subtraction; requires spatial (well location) information. |
| SourceTracker [2] | Control-based | Uses Bayesian approach to estimate proportion of sequences coming from "source" environments (like controls). | When contamination sources are well-defined and the experimental environment is known. | Performance drops if experimental environment is unknown [2]. |
| micRoclean [3] | Multi-pipeline | Offers two pipelines: "Original Composition" (based on SCRuB) and "Biomarker Identification". | Low-biomass studies where the research goal dictates the decontamination strategy. | Provides a filtering loss statistic to help avoid over-filtering. |
Protocol: Executing a Basic Decontam Analysis in R
Objective: To identify and remove contaminant sequences from a feature table using the decontam package.
Procedure:
Prepare Input Data: You will need:
- A feature table (count matrix) of OTUs/ASVs across all samples.
- A metadata table that includes a column specifying which samples are negative controls (e.g.,
TRUEfor controls,FALSEfor biological samples).
Install and Load Package:
Identify Contaminants: Use the "prevalence" method, which is more robust for low-biomass studies [2].
Filter Feature Table: Create a new, clean feature table by removing the contaminants.
Generate Report: Note the number and identity of taxa removed for your reporting.
Research Reagent Solutions & Essential Materials
Using the correct materials is fundamental to contamination control. The following table lists key items and their functions.
| Item/Category | Function & Importance | Implementation Example |
|---|---|---|
| DNA-Free Collection Kits | Pre-packaged, sterilized swabs and tubes ensure no exogenous DNA is introduced at the critical first step. | Use for sampling human tissues (e.g., skin, respiratory tract) or sterile environments [4]. |
| Personal Protective Equipment (PPE) | Creates a barrier between the operator and the sample, preventing contamination from skin cells and aerosols. | Wear gloves, mask, and a clean suit during sample collection and in clean lab spaces [4]. |
| Nucleic Acid Removal Solutions | Degrades contaminating DNA present on surfaces and equipment that survives autoclaving. | Decontaminate lab surfaces and reusable tools with dilute sodium hypochlorite (bleach) solution [4]. |
| UV-Irradiated Reagents | Pre-treatment with UV-C light destroys contaminating DNA in PCR reagents and water without affecting enzyme performance. | Use for preparing PCR master mixes for 16S rRNA gene amplification [4]. |
| Multiple Negative Controls | Serves as a positive control for contamination; essential for bioinformatic decontamination. | Include process blanks, extraction blanks, and no-template PCR controls in every batch [4] [5]. |
In low-biomass microbiome studies, where microbial DNA is minimal, contamination from external sources presents a fundamental challenge. Contaminating DNA often outweighs the true biological signal, potentially leading to spurious results and incorrect conclusions [6] [4]. Such environments include certain human tissues (e.g., placenta, lungs, blood), treated drinking water, hyper-arid soils, and the deep subsurface [4]. Contamination can originate from a myriad of sources, primarily reagents, laboratory kits, the environment, and human operators [4] [7]. Recognizing, mitigating, and accounting for these contaminants is not merely a best practice but a necessity for producing robust and reliable data in this sensitive field [4] [5]. This guide outlines the major contamination sources and provides actionable troubleshooting advice to safeguard your research.
FAQ: Understanding Contamination in Low-Biomass Studies
What defines a "low-biomass" sample, and why is it so vulnerable?
A low-biomass sample contains very few microbial cells, meaning the amount of target microbial DNA is extremely low. These samples are vulnerable because the contaminating DNA from reagents, kits, or the laboratory environment can constitute a large proportion—sometimes even more than 90%—of the total DNA retrieved [6] [7]. In such cases, the contaminant "noise" can easily mask or be mistaken for the true biological "signal."
What are the most common types of contamination?
The two primary types are:
- External Contamination: DNA introduced from sources outside the sample, such as DNA extraction kits, PCR master mixes, laboratory surfaces, and human skin [6] [7].
- Cross-Contamination (Well-to-Well Leakage): The transfer of DNA between samples processed concurrently, for example, in adjacent wells on a 96-well plate during PCR setup [4] [5].
If I use sterile techniques, is that sufficient to prevent contamination?
No. Sterility is not the same as being DNA-free. While autoclaving and ethanol treatment effectively remove viable cells, they do not fully eliminate persistent, cell-free DNA fragments [4]. For surfaces and equipment that cannot be single-use, a two-step decontamination is recommended: treatment with 80% ethanol (to kill organisms) followed by a nucleic acid-degrading solution like sodium hypochlorite (bleach) or exposure to UV-C light to destroy residual DNA [4].
The table below summarizes the key contamination sources, their impacts, and specific solutions.
Table 1: Major Contamination Sources and Mitigation Strategies
| Contamination Source | Specific Examples | Potential Impact on Data | Prevention & Troubleshooting Strategies |
|---|---|---|---|
| Reagents & Kits | DNA extraction kits, PCR master mixes, water, and preservation solutions [6] [7] [8]. | Reagent-derived bacterial DNA can dominate the microbial profile, creating a false "kitome" or "mixome" signal [6]. | - Treat PCR reagents with a commercial double-stranded DNase (dsDNase) prior to use, which has been shown to reduce contaminating bacterial reads by over 99% [6].- Batch-test reagents and use the same lot number for an entire study [9].- Use DNA-free certified reagents and kits when available. |
| Laboratory Environment | Dust, aerosols, benchtop surfaces, and laboratory equipment [4] [7]. | Introduces sporadic and highly variable microbial signals (e.g., common environmental genera) that can be confounded with the sample type [7]. | - Maintain clean and dedicated workspaces for pre- and post-PCR steps.- Use UV-C lamps to irradiate hoods and surfaces before use [4].- Employ dedicated equipment (e.g., pipettes) for low-biomass work. |
| Human Operators | Skin, hair, breath, and clothing of the researcher [4]. | Introduces human-associated microbes (e.g., Staphylococcus, Propionibacterium), which is a significant concern for clinical and forensic studies [7]. | - Wear appropriate Personal Protective Equipment (PPE): gloves, masks, clean lab coats or coveralls, and hair nets [4].- Change gloves frequently and decontaminate them with ethanol and bleach between steps if touching surfaces is unavoidable. |
| Sample Collection Equipment | Collection swabs, tubes, and filters [4]. | Can be a direct source of contaminating DNA, especially if not pre-sterilized. | - Use single-use, DNA-free collection vessels whenever possible.- If reusing equipment is unavoidable, implement the two-step (ethanol + DNA removal) decontamination protocol [4]. |
| Cross-Contamination | Splashing or aerosol transfer between samples in a plate during pipetting or vortexing [4] [5]. | Can cause high-abundance taxa from one sample to appear as low-abundance taxa in adjacent samples, distorting community analyses [5]. | - Use physical barriers like cap locks or individual tube strips.- Work carefully to avoid splashing and cross-aerosolization.- Randomize or spatially separate samples from different groups on plates to prevent confounding [5]. |
Essential Experimental Protocols
Protocol 1: Implementing a Comprehensive Control Strategy
Including various control samples is non-negotiable for identifying contaminants and validating your data [4] [5] [8].
- Negative Controls:
- Collection/Kit Blank: Process an empty collection tube or swab through DNA extraction and sequencing.
- Extraction Blank: Include a tube containing only the lysis buffer or water during the DNA extraction process.
- No-Template Control (NTC): For the PCR step, use a sample of molecular-grade water instead of DNA template [4] [5] [8].
- Positive Controls:
- Use a mock microbial community—a defined mix of known microorganisms—to verify that your entire workflow (extraction, amplification, sequencing) is performing accurately and to detect any significant biases [8].
- Best Practice: Include at least one of each control type per processing batch (e.g., per DNA extraction run or per PCR plate) to account for batch-to-batch variability [5].
Protocol 2: dsDNase Treatment of PCR Master Mix
This protocol is highly effective for removing contaminating DNA from PCR reagents [6].
- Prepare Master Mix: Combine all PCR reagents except for the DNA polymerase and template DNA.
- Add dsDNase: Incorporate the commercial dsDNase enzyme according to the manufacturer's instructions.
- Incubate: Incubate the mixture at room temperature for a specified period (e.g., 30 minutes) to allow degradation of contaminating double-stranded DNA.
- Inactivate Enzyme: Heat-inactivate the dsDNase as per the kit protocol (often at 95°C for a few minutes).
- Complete the Mix: Allow the mixture to cool, then add the DNA polymerase and sample DNA template before proceeding with the PCR cycling.
The Scientist's Toolkit: Essential Reagent Solutions
Table 2: Key Research Reagents and Materials for Contamination Control
| Item | Function & Importance |
|---|---|
| Double-Stranded DNase (dsDNase) | Enzymatically degrades contaminating microbial DNA present in PCR master mixes and other reagents prior to sample addition [6]. |
| Molecular Grade Water | Certified to be nuclease-free and with minimal microbial DNA background; used for preparing solutions and as a negative control [7]. |
| Sodium Hypochlorite (Bleach) | A potent DNA-degrading agent used to decontaminate surfaces and non-disposable equipment, destroying residual cell-free DNA [4]. |
| UV-C Light Source | Used to sterilize surfaces, hoods, and some plasticware by damaging DNA; effective for destroying contaminating nucleic acids [4]. |
| Synthetic Mock Community | A defined mix of microbial cells or DNA from known species; serves as a critical positive control to benchmark performance and identify biases [8]. |
| DNA-Free Certified Tubes & Swabs | Single-use collection and processing materials that are certified to contain negligible amounts of contaminating DNA [4]. |
Visual Workflow: A Roadmap for Contamination Control
The following diagram outlines a logical workflow for planning and executing a low-biomass microbiome study, integrating contamination control at every stage.
Contamination Control Workflow
Managing contamination in low-biomass microbiome studies requires a vigilant, multi-layered strategy that spans from experimental design to data interpretation. There is no single solution; rather, reliability is achieved by systematically addressing each potential source of contamination. By adopting the practices outlined here—rigorous use of controls, strategic decontamination of reagents, disciplined laboratory techniques, and transparent reporting—researchers can significantly reduce contamination noise, thereby revealing the true biological signal and advancing the integrity of the field.
Why Contamination is Disproportionately Impactful in Low-Biomass Studies
FAQ 1: Why is contamination a particularly critical issue in low-biomass microbiome research?
In low-biomass environments, the amount of target microbial DNA (the "signal") is very small and approaches the limits of detection of standard DNA-based sequencing methods. Consequently, even tiny amounts of contaminating DNA from external sources can constitute a significant proportion of the sequenced material, creating a high level of "noise" that can obscure or distort the true biological signal [4] [5].
- Proportional Impact: In a high-biomass sample (like human stool), the contaminant DNA is negligible compared to the abundant target DNA. In a low-biomass sample, the same absolute amount of contaminant DNA can be equal to or even greater than the target DNA, making the results uninterpretable or misleading [4].
- Risk of False Conclusions: This disproportionate impact can lead to false positives, where contaminants are mistaken for authentic community members. This has fueled scientific debates, such as those surrounding the existence of a placental microbiome, where initial findings were later attributed to contamination [4] [5].
Contamination can be introduced at virtually every stage of the research workflow, from sample collection to data analysis [4]. The main sources are detailed in the table below.
Table 1: Key Contamination Sources in Low-Biomass Microbiome Studies
| Source Category | Specific Examples | Impact |
|---|---|---|
| Laboratory Reagents & Kits | DNA extraction kits, polymerase chain reaction (PCR) reagents, water [4] [10] | Can contain trace microbial DNA that is co-amplified and sequenced. |
| Sampling Equipment | Collection vessels, swabs, filters [4] | Directly introduces contaminants into the sample if not properly sterilized. |
| Human Operators | Skin, hair, aerosol droplets from breathing [4] [10] | A significant source of human-associated bacterial DNA. |
| Laboratory Environment | Airflow, water systems, cleanroom surfaces [10] | Environmental microbes can settle on samples or equipment. |
| Cross-Contamination | Well-to-well leakage on 96-well plates during DNA extraction or PCR setup [4] [5] | DNA from one sample "splashes" into adjacent wells, compromising other samples and controls. |
| Host DNA Misclassification | High abundance of host DNA (e.g., from human tissue) in metagenomic data [5] | Host sequences can be misidentified as microbial, generating noise and artifactual signals. |
FAQ 3: What are the best practices for preventing contamination during sample collection?
A contamination-informed sampling design is the first line of defense [4] [11].
- Decontaminate Equipment: Use single-use, DNA-free collection materials where possible. Reusable equipment should be decontaminated with 80% ethanol (to kill cells) followed by a nucleic acid-degrading solution like sodium hypochlorite (bleach) or UV-C light to destroy residual DNA [4].
- Use Personal Protective Equipment (PPE): Researchers should wear gloves, masks, goggles, and cleanroom suits to minimize the introduction of human-associated contaminants via skin, hair, or aerosols [4].
- Collect Comprehensive Controls: It is crucial to include various control samples to identify the contaminants present in your workflow. These should be processed alongside your real samples [4] [5]. Recommended controls include:
- Blank/Empty Collection Kits: To identify contaminants from the sampling vessels or swabs.
- Environmental Swabs: Swabs of the air, PPE, or surfaces the sample may contact.
- Process Blanks: Reagents that undergo the entire DNA extraction and sequencing process without any sample.
FAQ 4: Which experimental design factor is most critical for avoiding artifactual results?
Avoiding batch confounding is paramount [5]. This means ensuring that the groups you are comparing (e.g., case vs. control) are processed together in the same batch across all stages—DNA extraction, library preparation, and sequencing.
- The Pitfall: If all case samples are processed in one batch and all controls in another, any batch-specific contamination or processing bias will be perfectly correlated with the experimental groups, creating false associations [5].
- The Solution: Randomize or strategically balance samples from different experimental groups across all processing batches. This ensures that technical artifacts affect all groups equally and can be distinguished from true biological signals [5].
Experimental Protocol: A Framework for Low-Biomass Research
The following workflow integrates key steps for contamination prevention and control throughout the experimental process.
Troubleshooting Guide: Addressing Common Scenarios
Table 2: Troubleshooting Common Contamination Problems
| Problem Scenario | Potential Cause | Corrective Action |
|---|---|---|
| High abundance of common lab contaminants (e.g., Pseudomonas, Bacillus) in many samples. | Contaminated reagents or kit components. | Test new batches of reagents with blank controls; use DNA-free or certified low-biomass-grade reagents [4] [10]. |
| One sample shows unexpected, high-abundance taxa not seen in others. | Cross-contamination (well-to-well leakage) from a neighboring, high-biomass sample. | Re-design plate layouts to avoid placing low-biomass samples next to high-biomass ones; use physical barriers on plates; re-analyze suspect samples [4] [5]. |
| Control samples show a high microbial biomass and diversity. | Contamination introduced during handling or from a contaminated reagent batch. | The data is likely unreliable. Review and sterilize laboratory procedures, and repeat the experiment with new controls and reagents [4]. |
| Metagenomic sequencing yields >99% host reads, with very few microbial reads. | Overwhelming host DNA from the sample (e.g., tissue, blood). | Incorporate a host DNA depletion step during DNA extraction, such as kits that selectively lyse human cells or enzymatically degrade host DNA [5] [12]. |
The Scientist's Toolkit: Essential Research Reagent Solutions
Table 3: Key Reagents and Materials for Low-Biomass Studies
| Item | Function & Importance |
|---|---|
| DNA Decontamination Solutions | Sodium hypochlorite (bleach) or commercial DNA removal solutions are essential for destroying contaminating DNA on lab surfaces and non-disposable equipment [4]. |
| UV-C Crosslinker or Cabinet | Used to sterilize surfaces, tools, and plasticware by degrading contaminating DNA prior to use [4]. |
| Personal Protective Equipment (PPE) | Gloves, masks, and cleanroom suits act as a physical barrier to prevent contamination from researchers [4]. |
| Certified DNA-Free Water | A common source of contamination; using certified DNA-free water for all reagent preparation is critical [4] [10]. |
| Host Depletion Kits | Kits like the QIAamp DNA Microbiome Kit or NEBNext Microbiome DNA Enrichment Kit can selectively remove host DNA, greatly improving the recovery of microbial sequences in host-associated samples [12]. |
| Sample Preservation Buffers | Stabilizing agents (e.g., AssayAssure, OMNIgene·GUT) maintain microbial composition at room temperature when immediate freezing is not possible, preventing microbial growth shifts [11]. |
Advanced Consideration: The Critical Role of Sample Volume
For liquid low-biomass samples like urine, the sample volume used for DNA extraction directly impacts data quality. A 2025 study on the urobiome systematically evaluated this and found that using a sufficient volume is necessary to overcome the contaminant "noise floor" [12].
- Recommendation: The study concluded that using ≥ 3.0 mL of urine resulted in the most consistent and reliable microbial community profiles, as smaller volumes (e.g., 0.1-1.0 mL) were more significantly influenced by contaminating DNA introduced during processing [12].
- Application: When designing studies involving other low-biomass fluids (e.g., cerebrospinal fluid, synovial fluid), a pilot study to determine the optimal volume for DNA yield versus contamination burden is highly recommended.
The study of microbial communities in low-biomass environments—those with minimal microbial presence—presents unique and formidable challenges. The placental and tumor microbiomes represent two of the most debated low-biomass research areas, where contamination concerns have led to significant scientific controversies. In both fields, next-generation sequencing approaches have detected bacterial DNA signals, but the scientific community remains divided on whether these signals represent true microbial communities or contamination from various sources [13] [14] [15].
The core issue lies in the fundamental nature of low-biomass research: when working near the limits of detection, contaminating DNA from reagents, laboratory environments, sampling equipment, and personnel can easily overwhelm or masquerade as a true signal [14] [16]. This problem is particularly acute in microbiome studies of internal tissues like the placenta and tumors, where any legitimate microbial biomass is expected to be exceptionally low. The controversy has prompted leading researchers to call for more rigorous standards, improved controls, and heightened skepticism when interpreting data from low-biomass studies [13] [14] [17].
This technical support center provides troubleshooting guides, FAQs, and best practices to help researchers navigate these challenges, with a specific focus on lessons learned from the placental and tumor microbiome debates.
FAQ: Understanding the Core Controversies
What is the current evidence regarding the existence of a placental microbiome?
The existence of a placental microbiome remains hotly debated. The historical "sterile womb" paradigm has been challenged by DNA sequencing studies detecting bacterial signals in placental tissue, but these findings have been contested by others who attribute the signals to contamination.
Evidence Supporting a Placental Microbiome: Some studies using 16S rRNA gene sequencing have reported a unique placental microbiome dominated by Proteobacteria, Firmicutes, Bacteroidetes, and Actinobacteria, with variations observed in pregnancy complications like preterm birth [18]. One study suggested the placental microbiome could originate from maternal oral or vaginal cavities, with different patterns observed in term versus preterm births [18].
Evidence Challenging a Placental Microbiome: Multiple re-analyses of published datasets and controlled studies have concluded that detected bacterial signals likely derive from contamination. A 2023 critical review of 15 public datasets found that bacterial profiles of placental samples clustered primarily by study origin and mode of delivery rather than showing a consistent microbial community. After accounting for contaminants, evidence for a true placenta-specific microbiota disappeared [17]. Culture-based studies often fail to recover viable bacteria from placental tissue, and the existence of germ-free mammalian lines strongly counters the notion of a universal, indigenous placental microbiota [13] [19].
Expert Consensus: Many experts argue that current DNA-based evidence does not support the existence of a consistent, replicable placental microbiota in normal term pregnancies. Any microbial presence is likely transient or represents contamination rather than a true, established microbial community [13] [17].
How do controversies in tumor microbiome research mirror those in placental microbiome studies?
Tumor microbiome research faces nearly identical methodological challenges to placental microbiome studies, as both involve low-biomass environments where contaminant DNA can easily distort results.
Low-Biomass Challenges: Tumor tissues, like placental tissues, present a low microbial biomass environment where the microbial signal can be overwhelmed by human DNA and contaminated by reagents (the "kitome") [15]. This makes distinguishing true microbial inhabitants from contamination particularly difficult.
Confounding Factors: Both fields must account for potential contamination from adjacent tissues (e.g., skin during surgery for tumors, vaginal tract during delivery for placentas) and environmental sources during sample processing [14] [15].
Technical Limitations: The sensitivity limitations of shotgun metagenomics for low-biomass samples affect both fields. While 16S rRNA sequencing offers greater sensitivity for bacterial detection, it cannot distinguish between viable microbes and DNA fragments, and its application in tumors is complicated by the overwhelming presence of human DNA [15].
Interpretation Challenges: In both areas, researchers must carefully distinguish between direct microbial effects (microbes contacting the tissue) and indirect effects (e.g., gut microbiome influencing distant tumors via metabolites) [20].
Contamination can be introduced at virtually every stage of the research workflow, with the following being the most prevalent sources [14] [16]:
- Reagents and Kits: DNA extraction kits, PCR reagents, and water often contain trace microbial DNA that becomes detectable in low-biomass samples.
- Laboratory Environment: Airborne contaminants, laboratory surfaces, and equipment can introduce microbial DNA.
- Personnel: Microbial DNA from researchers' skin, hair, or breath can contaminate samples during collection or processing.
- Sampling Equipment: Contaminated gloves, collection vessels, swabs, or surgical instruments.
- Cross-Contamination: Transfer of DNA between samples during processing, such as through well-to-well leakage in plates [14].
What constitutes definitive evidence for a true microbiome in low-biomass environments?
Most experts agree that multiple lines of evidence are required to confirm a true microbiome in low-biomass environments [13] [14]:
- Consistency Across Studies: Microbial communities should be reproducible across different studies and research groups.
- Viability and Metabolic Activity: Evidence should extend beyond DNA detection to include microbial viability (through culture) and metabolic activity.
- Distinct from Controls: The microbial signal must be consistently distinguishable from negative controls and background contamination.
- Contextual Plausibility: Findings should be consistent with established biological principles (e.g., the ability to generate germ-free mammals argues against an essential placental microbiome) [13].
- Visualization: Corroboration through methods like fluorescence in situ hybridization (FISH) that can visually confirm microbial presence within tissues.
Troubleshooting Guides & Best Practices
Experimental Design Guide for Low-Biomass Studies
Proper experimental design is the most critical factor in ensuring valid low-biomass microbiome research. The following workflow outlines key decision points and considerations.
Key Considerations for Experimental Design:
- Sample Size Justification: Power calculations should account for expected effect sizes in low-biomass environments, which may require larger sample sizes than higher-biomass studies.
- Control Selection: Include multiple types of controls at each stage (see Table 1).
- Randomization: Process samples in random order to avoid batch effects correlating with experimental groups.
- Blinding: When possible, personnel conducting laboratory processing and data analysis should be blinded to sample groups to prevent unconscious bias.
Essential Controls for Low-Biomass Microbiome Studies
Implementing comprehensive controls is non-negotiable in low-biomass research. The table below outlines essential controls that should be incorporated into every study.
Table 1: Essential Controls for Low-Biomass Microbiome Studies
| Control Type | Description | Purpose | When to Include |
|---|---|---|---|
| Field/Collection Blanks | Sterile swabs or collection vessels exposed to the sampling environment but without actual sample collection. | Identifies contamination introduced during the sampling process itself. | Every sampling event; multiple per study. |
| Processing/Extraction Blanks | Reagents without sample taken through the entire DNA extraction process. | Detects contamination originating from laboratory reagents and kits. | Every DNA extraction batch; ideally 1 per 10 samples. |
| Positive Controls | Samples with known microbial composition added to the extraction process. | Verifies that the methodology can detect real signals and assesses technical variability. | Periodically to validate methods. |
| Sample-Specific Controls | Swabs of gloves, PPE, or surgical equipment used during collection. | Identifies contamination from personnel or equipment specific to certain samples. | When sampling procedures vary between groups. |
| Cross-Contamination Controls | Placement of blank samples adjacent to high-biomass samples in processing plates. | Detects well-to-well contamination during plate-based processing. | When using multi-well plates for processing. |
Step-by-Step Protocol for Minimizing Contamination
Sample Collection Phase:
- Pre-sampling Decontamination: Decontaminate all surfaces and equipment with 80% ethanol (to kill microorganisms) followed by a DNA degradation solution (e.g., dilute bleach, commercial DNA removal solutions) to remove trace DNA [14].
- Personal Protective Equipment (PPE): Wear appropriate PPE including gloves, masks, hair nets, and clean lab coats or coveralls. Change gloves between samples if handling multiple specimens.
- Sterile Collection Materials: Use single-use, DNA-free collection vessels, swabs, and instruments whenever possible [14].
- Environmental Controls: Collect field blanks by exposing sterile swabs to the air in the collection environment or rinsing collection vessels with sterile solution [14].
- Minimize Handling: Handle samples as little as possible and use sterile techniques throughout.
Laboratory Processing Phase:
- Clean Workspace: Perform DNA extractions in dedicated clean spaces, preferably in PCR workstations or laminar flow hoods that are regularly decontaminated with UV light and DNA removal solutions.
- Reagent Aliquoting: Aliquot reagents to minimize repeated exposure to potential contaminants.
- Negative Control Inclusion: Include extraction blanks (samples containing only reagents) with every batch of extractions, processed in parallel with experimental samples.
- Physical Separation: Physically separate pre- and post-PCR workspaces to prevent amplicon contamination.
- Equipment Dedication: Use dedicated equipment (pipettes, centrifuges) for low-biomass work when possible.
Data Analysis Phase:
- Contaminant Identification: Use bioinformatic tools like DECONTAM (R package) to identify and remove contaminants by comparing their prevalence in samples versus controls [17].
- Control Comparison: Statistically compare microbial profiles between experimental samples and controls to ensure signals are distinct.
- Biomass Assessment: Compare total bacterial load between samples and controls—true low-biomass samples should have significantly higher bacterial DNA than blanks [19].
- Reporting: Transparently report all controls used, contamination removal steps, and the impact of these steps on results.
The Scientist's Toolkit: Essential Research Reagents & Materials
Table 2: Key Research Reagent Solutions for Low-Biomass Microbiome Studies
| Item | Function | Considerations for Low-Biomass Studies |
|---|---|---|
| DNA/RNA Shield | Commercial nucleic acid preservation solution that stabilizes DNA and RNA at room temperature. | Prevents microbial growth and degradation between sample collection and processing; maintains accurate community representation [15]. |
| DNA-Free Reagents | Specifically certified DNA-free water, enzymes, and buffers. | Minimizes introduction of bacterial DNA from reagents themselves, a major concern in low-biomass work [14]. |
| DNA Degradation Solutions | Solutions containing sodium hypochlorite (bleach) or commercial DNA removal products. | Used to decontaminate surfaces and equipment before sampling; destroys contaminating DNA rather than just sterilizing [14]. |
| Ultra-Clean DNA Extraction Kits | Kits specifically designed for low-biomass or microbial DNA extraction. | Optimized for efficient lysis of difficult-to-break cells while minimizing reagent contamination; PowerSoil is commonly used [19]. |
| Mock Microbial Communities | Defined mixtures of microbial cells or DNA with known composition. | Served as positive controls to validate extraction efficiency, PCR amplification, and sequencing accuracy [13]. |
| Personal Protective Equipment (PPE) | Gloves, masks, hair nets, coveralls. | Creates a barrier between researcher and sample; reduces contamination from human-associated microbiota [14]. |
Technical Protocols: Key Methodological Approaches
Standardized Protocol for Placental Tissue Processing
Based on methodologies from multiple studies [17] [19], this protocol emphasizes contamination control:
- Sample Collection: After delivery, collect placental tissue using sterile surgical instruments. For chorionic villi sampling, dissect inward from the center of the placenta to avoid membrane contamination.
- Surface Decontamination: Some protocols recommend briefly searing the placental surface with a heated metal instrument or washing with sterile saline to remove surface contaminants before collecting internal tissue.
- Storage: Immediately place samples in sterile cryovials and flash-freeze in liquid nitrogen or place at -80°C. For DNA stabilization, consider using DNA/RNA Shield.
- DNA Extraction: Use mechanical lysis with bead beating (e.g., PowerSoil kit) for thorough cell disruption. Include extraction blanks with each batch.
- Inhibition Testing: Test DNA extracts for PCR inhibitors using exogenous internal positive controls before proceeding to sequencing [19].
- Library Preparation: Use minimal PCR cycles to reduce amplification bias. Include both negative (water) and positive (mock community) controls in sequencing runs.
Contaminant Identification in Sequencing Data
The following workflow is adapted from recent consensus guidelines and critical reviews [14] [17]:
Key Steps for Contaminant Identification:
- Sequence Processing: Process raw sequences through standard pipelines (DADA2, QIIME2, mothur) to generate amplicon sequence variants (ASVs) or operational taxonomic units (OTUs).
- Control Comparison: Use statistical packages like DECONTAM (implemented in R) to identify taxa that are either (a) more prevalent in negative controls than samples, or (b) show no significant difference in prevalence between controls and samples.
- Biomass Assessment: Compare total read counts between samples and controls—true low-biomass samples should have significantly higher read counts than extraction blanks.
- Taxonomic Evaluation: Scrutinize taxa commonly identified as contaminants (e.g., Aquabacterium, Burkholderia, Methylobacterium), but note that context matters as these can be genuine signals in some environments.
- Cross-Contamination Check: Examine whether samples processed adjacent to high-biomass samples show unusual similarity to those samples.
Lessons from the Placental Microbiome Debate
The controversial history of placental microbiome research offers several critical lessons for all low-biomass researchers:
The Importance of Mode of Delivery: Studies comparing placental samples from vaginal versus cesarean deliveries have shown that delivery method significantly influences the detected bacterial communities, highlighting how easily samples can be contaminated during the birth process [17]. This underscores the need for careful consideration of clinical variables in study design.
Database Dependency: Metagenomic analyses of placental tissue have shown that reported microbial communities can vary dramatically depending on the reference database used, suggesting that some reported "communities" may be artifacts of bioinformatic choices [19].
Discrepancy Between DNA and Culture Results: The frequent failure to culture bacteria from placental samples that show bacterial DNA signals suggests that detected DNA may come from non-viable organisms or contaminants rather than a living community [17] [19].
Multi-Method Validation: Studies that combine multiple methods (culture, qPCR, sequencing, FISH) generally provide more convincing evidence than those relying on sequencing alone. The most robust conclusions come from concordance across methods [19].
These lessons directly translate to tumor microbiome research and other low-biomass fields, emphasizing the need for rigorous controls, methodological transparency, and cautious interpretation of sequencing data alone.
Best Practices in Experimental Design and Contamination Control
Decontamination Protocols for Sampling Equipment and Surfaces
Frequently Asked Questions (FAQs)
Q1: Why is decontamination especially critical in low-biomass microbiome studies? In low-biomass samples, the amount of microbial DNA from the environment or sampling equipment can be proportionally much larger than the true biological signal from the sample itself. This contamination can severely distort results and lead to incorrect conclusions, such as falsely claiming the presence of microbes in sterile environments [4]. Stringent decontamination is therefore essential to ensure data accuracy.
Q2: What are the most common sources of contamination I need to control for? The primary sources of contamination include:
- Human operators: From skin, hair, or aerosols generated by breathing [4].
- Sampling equipment & collection vessels: If not properly sterilized [4] [11].
- Laboratory reagents & kits: Which can contain trace amounts of microbial DNA [4] [21].
- Cross-contamination between samples: Such as well-to-well leakage during PCR setup [4] [3].
- Laboratory surfaces and environments [21].
Q3: My negative controls still show contamination after decontamination. What should I do?
The presence of contaminants in your controls is a common challenge and should not be ignored. First, use this information to inform your data analysis by applying bioinformatic decontamination tools (e.g., decontam or SCRuB) to subtract the contaminant signal [4] [3]. Second, review your physical decontamination protocols. Ensure you are using a two-step process: first, an agent like ethanol to kill organisms, followed by a DNA-degrading solution like bleach or UV light to remove residual DNA [4].
Q4: Is bleach or UV light better for surface decontamination? The effectiveness depends on the target microorganism, as shown in the table below. A combination approach is often most robust.
Table 1: Efficacy of Different Decontamination Methods on Various Microorganisms
| Method | Key Efficacy Notes | Considerations |
|---|---|---|
| Sodium Hypochlorite (Bleach) | Effective for surface decontamination and removing external contamination from ticks [4] [22]. Immediate effect on some fungi (Aspergillus niger spores) but not on all bacterial spores [23]. | Can be corrosive. Must be followed by rinsing with sterile water or ethanol to neutralize [21] [22]. |
| Ultraviolet (UV) Light | Common for surface and equipment sterilization [4] [23]. Ineffective against highly UV-resistant organisms like Deinococcus radiodurans and Aspergillus niger spores [23]. | Cannot reach shaded areas; may degrade some materials over time [23]. |
| 70% Isopropyl Alcohol (IPA) | Effective for general surface disinfection and immediately sterilizes A. niger spores and some vegetative bacteria [23]. | Less effective against bacterial spores (e.g., B. atrophaeus) [23]. |
| Hydrogen Peroxide (H₂O₂) & Vaporized H₂O₂ | Effective against a range of vegetative bacteria [23]. VHP rapidly reduces viable spores [23]. | A non-residual method that breaks down into water and oxygen [23]. |
| Plasma Sterilization | Oxygen plasma sterilized D. radiodurans, while argon plasma was effective against B. atrophaeus spores [23]. | Mode of action (oxygen vs. argon) is microbe-specific [23]. |
Troubleshooting Guides
Issue 1: Persistent Contamination in Negative Controls
Problem: Even after cleaning, your no-template controls (NTCs) or sampling blanks (e.g., swabs of empty collection vessels) show microbial DNA.
Solutions:
- Audit Your Reagents: Use only certified low-bioburden DNA extraction kits and reagents. Aliquot reagents to minimize freeze-thaw cycles and frequent opening, which can introduce contaminants [21] [11].
- Enhance Physical Decontamination:
- For surfaces and tools: Implement a two-step clean: apply 10% bleach, let sit for 15 minutes, then wipe with 70% ethanol to neutralize [21].
- For sampling equipment: If reusable, decontaminate with 80% ethanol (to kill organisms) followed by a DNA-degrading solution (e.g., bleach, DNA removal solutions) before use [4].
- Review Lab Practices: Use filtered pipette tips and change them frequently. Never lean or hover over open samples or reagents. Calibrate pipettes regularly to ensure accuracy with low DNA amounts [21].
Issue 2: High Variation Between Sample Replicates in a Low-Biomass Study
Problem: Significant, inconsistent differences in microbiome profiles between technical or biological replicates, suggesting sporadic contamination or cross-contamination.
Solutions:
- Prevent Cross-Contamination: If using 96-well plates, ensure plates are properly sealed during shaking steps to prevent well-to-well leakage. If well location data is available, use analysis tools that can account for spatial contamination [3].
- Standardize Sample Collection: Use single-use, DNA-free collection vessels. For human subjects, standardize the method (e.g., catheter-collected vs. voided urine gives different results) and document it precisely [11].
- Use Appropriate Negative Controls: Include multiple types of controls, such as:
Issue 3: Ineffective Decontamination of Delicate Sampling Equipment
Problem: Equipment (e.g., sensors, specialized swabs) cannot withstand harsh decontamination like autoclaving or bleach.
Solutions:
- Use Alternative Sterilants: Consider Vaporized Hydrogen Peroxide (VHP) or plasma sterilization, which are effective for bulk bioburden reduction on non-heat-resistant components [23].
- Employ Physical Barriers: Use single-use, sterile protective casings or bags for equipment where possible [4].
- Validate the Protocol: Test your gentle decontamination method (e.g., with UV light or 70% IPA) on the equipment and then sample the surface to check for residual DNA using a sensitive method like qPCR [23].
Detailed Experimental Protocols
Protocol 1: Two-Step Surface Decontamination for Workstations
This protocol is designed for laboratory benches, hoods, and other large surfaces prior to handling low-biomass samples [21].
Materials Needed:
- Personal Protective Equipment (PPE): lab coat, gloves, protective mask [21]
- 10% (v/v) sodium hypochlorite (bleach) solution
- 70% (v/v) ethanol solution
- Sterile, DNA-free wipes
Methodology:
- Clear the surface of all equipment and reagents.
- Apply the 10% bleach solution generously to the entire surface.
- Allow the bleach to sit undisturbed for 15 minutes [21].
- After 15 minutes, use a sterile wipe to remove the bleach.
- Immediately apply the 70% ethanol solution to the entire surface and wipe thoroughly. This step neutralizes the bleach and prevents its interference with downstream molecular applications [21].
- Allow the surface to air dry completely before use.
Protocol 2: Decontamination of Ticks and Insect Specimens for Microbiome Analysis
This protocol, adapted from a study on tick microbiota, uses bleach to remove external contamination while aiming to preserve the internal microbiome for study [22].
Materials Needed:
- Live or preserved tick specimens
- 1% (v/v) laboratory-grade sodium hypochlorite (bleach) in sterile water
- Sterile water (e.g., Milli-Q grade)
- Sterile Petri dishes or microcentrifuge tubes
- Forceps
Methodology:
- Place the tick specimen in a sterile tube or dish.
- Submerge the tick in 1% bleach solution.
- Wash by inversion or gentle agitation for 30 seconds.
- Immediately transfer the tick to a wash of sterile water for 30 seconds. Repeat this sterile water wash for a total of three consecutive rinses to ensure all bleach is removed [22].
- Blot the tick on a sterile wipe or allow to air dry in a sterile hood before proceeding to DNA extraction. This protocol disrupts the external microbiota with minimal immediate impact on the internal microbiota [22].
Research Reagent Solutions
Table 2: Essential Reagents and Kits for Low-Biomass Microbiome Research
| Item | Function | Key Features for Contamination Control |
|---|---|---|
| Certified Low-Bioburden DNA Kit | Extracts DNA from samples with low microbial content. | Kits are manufactured in clean, HEPA-filtered environments and tested for minimal background bacterial DNA [21]. |
| DNase/RNase-Free Water | Used to elute DNA or prepare solutions. | Certified to be free of amplifiable DNA and RNases, often through processes like DEPC-treatment and autoclaving [21]. |
| DNA Degrading Solution | Destroys contaminating free DNA on surfaces and equipment. | Used after ethanol decontamination to remove DNA traces that could be amplified [4]. |
| Mechanical Lysis Beads | Used in DNA extraction for cell disruption. | Should be sterilized by baking at high temperatures (e.g., 250°C for 5 hours) to degrade any contaminating DNA [21]. |
| Sample Preservation Buffer | Stabilizes microbial community at room temperature for transport. | Helps maintain microbial integrity without freezing; choose one validated for low-biomass samples [11]. |
Experimental Workflow Diagram
The following diagram illustrates the integrated workflow for decontamination and contamination control, from sample collection to data analysis, as described in the guides and protocols above.
The Critical Role of Personal Protective Equipment (PPE) and Physical Barriers
Frequently Asked Questions (FAQs)
FAQ 1: Why is specialized PPE necessary for low-biomass microbiome studies when it's not always required for high-biomass samples? In low-biomass environments, the target microbial DNA signal is very faint. Contaminant DNA from researchers (e.g., from skin, hair, or breath) can constitute a large proportion of the detected signal, leading to spurious results. PPE acts as a critical physical barrier to this external human-derived contamination, which is proportionally less impactful in high-biomass samples where the target DNA "signal" far outweighs the contaminant "noise" [4].
FAQ 2: What is the difference between "sterile" and "DNA-free" in the context of sample handling? "Sterile" means the absence of viable microorganisms. "DNA-free" means the absence of all DNA, including from non-viable cells. Autoclaving or ethanol treatment can achieve sterility but may not remove persistent environmental or reagent-derived DNA. To achieve a DNA-free state, surfaces should be treated with DNA-degrading agents such as sodium hypochlorite (bleach), UV-C light, or hydrogen peroxide [4].
FAQ 3: What is "well-to-well contamination" and how can it be minimized? Well-to-well contamination is a previously undocumented form of cross-contamination where microbial material leaks between adjacent wells during DNA extraction or library preparation in plate-based workflows. It is highest in plate-based extraction methods compared to single-tube methods and occurs more frequently in low-biomass samples. To minimize it:
- Randomize samples across plates.
- Process samples of similar biomasses together.
- Consider using manual single-tube extractions or hybrid plate-based cleanups [24].
FAQ 4: Beyond PPE, what are the most critical physical barriers in the lab? The most critical physical barriers include:
- DNA-Free Consumables: Using pre-sterilized, DNA-free plasticware, glassware, and reagents.
- Decontaminated Equipment: Regularly cleaning work surfaces, instruments, and tools with ethanol and DNA-degrading solutions.
- Sample Containers: Using single-use, DNA-free collection vessels that remain sealed until the moment of sample collection [4].
Troubleshooting Guides
Problem 1: Consistent Detection of Human Skin Flora in Sterile Samples
Potential Cause: Inadequate PPE or improper use, allowing operator-derived contamination.
Solution:
- Audit PPE Protocol: Ensure that personnel are fully covered with appropriate PPE, including gloves, goggles, cleansuits or coveralls, and shoe covers. Gloves should be decontaminated with ethanol and DNA-degrading solution frequently and should not touch any surface before sample handling [4].
- Minimize Aerosols: Wear face masks to protect samples from aerosol droplets generated by breathing or talking [4].
- Include Controls: Process sampling controls (e.g., swabs of PPE, exposed air swabs) alongside your samples to identify the contamination source [4].
Problem 2: Contamination Detected in Negative Controls
Potential Cause: Contamination from laboratory reagents, kits, or the environment.
Solution:
- Identify the Source: Test different lots of DNA extraction kits and reagents to identify the contaminant source. Common contaminants include specific bacterial taxa from kit reagents [25].
- Computational Decontamination: If negative controls are available, use bioinformatics tools like Decontam (a prevalence-based method) to identify and remove contaminant sequences from your dataset [25].
- De Novo Detection: If negative controls are unavailable, use computational tools like Squeegee, which identifies contaminants by detecting species that are unexpectedly shared across samples from distinct ecological niches processed in the same batch [25].
Problem 3: Unexpected Similarity Between Microbiomes from Different Sample Types
Potential Cause: Well-to-well cross-contamination during plate-based processing.
Solution:
- Verify the Pattern: Check if the unexpected signal is strongest in samples that are physically adjacent on the extraction or PCR plate. Well-to-well contamination has a strong distance-decay relationship, being highest in neighboring wells [24].
- Re-design Workflow: For critical low-biomass samples, switch from a fully automated plate-based extraction system to a manual single-tube extraction protocol, which has been shown to reduce well-to-well transfer [24].
- Re-run Samples: Re-process key samples in a different plate layout, separating low-biomass samples from high-biomass samples and placing them far from potential contamination sources.
Table 1: Quantifying Well-to-Well Contamination
This table summarizes experimental findings on the factors influencing well-to-well contamination [24].
| Factor | Impact on Well-to-Well Contamination | Key Finding |
|---|---|---|
| Extraction Method | Plate-based methods showed higher levels of well-to-well contamination compared to manual single-tube methods. | Single-tube methods are preferable for low-biomass samples, though they may have different background contaminants. |
| Sample Biomass | Contamination frequency is higher in low-biomass "sink" wells compared to high-biomass wells. | Low-biomass samples are most vulnerable; process them together and randomize plate positions. |
| Physical Distance | The highest contamination rates occurred in immediately adjacent wells, with a strong distance-decay effect. | Contamination is primarily a local, physical transfer event, with rare events up to 10 wells apart. |
| Laboratory | Levels of contamination differed between the two testing laboratories. | Standardized protocols and cross-lab training are essential for reproducibility. |
Table 2: Essential Research Reagent Solutions for Contamination Control
This table details key reagents and materials used to prevent contamination in low-biomass studies [4].
| Item | Function in Contamination Control | Key Consideration |
|---|---|---|
| Sodium Hypochlorite (Bleach) | Degrades contaminating DNA on surfaces and equipment. | Effective for achieving a "DNA-free" state, which is more stringent than "sterile." |
| UV-C Light Source | Sterilizes surfaces and degrades DNA through ultraviolet radiation. | Used to pre-treat plasticware and work surfaces in cabinets or rooms. |
| DNA Removal Solutions | Commercial solutions designed to enzymatically degrade DNA. | A practical alternative to bleach for decontaminating sensitive equipment. |
| Ethanol (80%) | Kills contaminating microorganisms on surfaces, gloves, and tools. | Should be used in combination with a DNA degradation step for full effect. |
| Personal Protective Equipment (PPE) | Forms a physical barrier between the operator and the sample. | Must include gloves, masks, and body suits to prevent contamination from skin and aerosols. |
| DNA-Free Collection Vessels | Single-use, pre-sterilized containers for sample collection. | Must remain sealed until the moment of use to guarantee integrity. |
Experimental Protocols
Protocol 1: Implementing a Contamination-Informed Sampling Workflow
Objective: To collect a low-biomass sample (e.g., from the atmosphere, a sterile surface, or a low-microbial-load human tissue) while minimizing contamination introduction.
Materials:
- Appropriate, DNA-free personal protective equipment (PPE)
- Single-use, DNA-free sampling tools (e.g., swabs, filters)
- Sterile collection vessels
- DNA decontamination solutions (e.g., 10% bleach, commercial DNA removers)
- Reagents for sampling controls (e.g., empty collection tubes, preservation solution)
Methodology:
- Pre-Sampling Decontamination: Decontaminate all non-disposable equipment and surfaces with 80% ethanol followed by a DNA-degrading solution. Put on full PPE before entering the sampling area [4].
- Sample Collection: Using aseptic technique, collect the sample. Avoid unnecessary handling and exposure to the environment. Seal the sample in its container immediately [4].
- Collect Controls: Simultaneously, collect several types of sampling controls [4]:
- Equipment Blank: Pass a sterile swab or fluid through the sampling apparatus without collecting a sample.
- Environmental Blank: Expose an open collection vessel to the air in the sampling environment.
- Reagent Blank: Aliquot the preservation or transport solution used.
- Storage: Immediately freeze samples at -80°C or place in a validated preservative buffer if freezing is not possible [11].
- Documentation: Record all steps, including PPE used, decontamination procedures, and control samples taken.
Protocol 2: A Computational Workflow for Contaminant Identification (When Negative Controls Are Unavailable)
Objective: To identify putative contaminant sequences in a metagenomic dataset from a low-biomass study that lacks experimental negative controls.
Materials:
- Metagenomic sequencing data from your study (multiple samples from distinct niches/body sites)
- Computational tool: Squeegee
- Reference database (e.g., RefSeq)
Methodology:
- Input: Provide Squeegee with multiple samples from your study that were processed in the same batch (using the same DNA extraction kits and in the same lab) but are expected to have distinct microbial communities (e.g., skin, oral, and stool samples from a human study) [25].
- Taxonomic Classification: Squeegee performs taxonomic classification on all input samples to identify microbial species [25].
- Identify Candidate Contaminants: The algorithm searches for microbial species that are shared across the different sample types. The hypothesis is that truly resident microbes will be niche-specific, while contaminants from kits or the lab environment will be found across multiple, distinct sample types [25].
- Filter False Positives: Squeegee estimates pairwise similarity between samples and calculates genome coverage breadth and depth to filter out taxonomic classification errors, resulting in a high-confidence list of putative contaminant species [25].
Experimental Workflow Diagram
Contamination Control in Low-Biomass Studies
Frequently Asked Questions (FAQs)
1. What is the primary difference between process-specific and whole-experiment controls?
Process-specific controls are designed to identify contaminants from a single, specific source in your workflow (e.g., DNA extraction kits, sampling swabs, or laboratory surfaces). In contrast, whole-experiment controls (often called "blank controls") are samples that pass through the entire experimental process, from sample collection to sequencing, and are intended to capture the cumulative contamination from all sources. [5]
2. Why are these controls especially critical in low-biomass microbiome studies?
In low-biomass environments, the microbial signal from the sample is very faint. Any contaminating DNA introduced during the experimental process can constitute a large proportion, or even the majority, of the final sequenced data. This can lead to false positives and incorrect biological conclusions. Controls are essential to distinguish this contaminant "noise" from the true "signal." [4] [5]
3. How many control samples should I include in my study?
There is no universal consensus on an exact number, but the principle is that more controls provide a more robust profile of the contamination. Research suggests that two control samples are always preferable to one, and in cases where high contamination is expected, even more may be beneficial. The number should be determined by the scale of your study and the number of individual processing batches. [5]
4. What are some common sources of contamination I should control for?
Major contamination sources include:
- Reagents and Kits: DNA extraction kits, PCR master mixes, and water. [4]
- Sampling Equipment: Swabs, collection tubes, and filters. [4]
- Laboratory Environment: Human operators (from skin, hair, or breath), laboratory surfaces, and equipment like centrifuges. [4]
- Cross-Contamination: Other samples in the same experiment, known as "well-to-well leakage" or the "splashome." [4] [5]
5. My controls show significant microbial DNA. Does this invalidate my experiment?
Not necessarily. The presence of contamination in controls is expected. The critical step is how you use this information. The profile from your controls should be used during data analysis to identify and subtract contaminant sequences from your experimental samples using validated computational decontamination tools. [4] [5]
Troubleshooting Guides
Problem: Inconsistent Contamination Profiles Between Batches
Symptoms: The types and amounts of contaminants identified in your controls vary significantly between different DNA extraction batches or sequencing runs.
| Potential Cause | Solution |
|---|---|
| Different reagent lots. | Use reagents from the same manufacturing lot for an entire study. If impossible, include process-specific controls (e.g., blank extractions) for each new reagent lot. [5] |
| Variability in well-to-well leakage. | Randomize sample placement on 96-well plates to avoid confounding biological groups with plate location. Include multiple negative controls distributed across the plate. [5] |
| Insufficient number of controls. | Include multiple control replicates (not just one) per batch to account for stochastic variation and get a reliable estimate of the contamination background. [5] |
Problem: High Levels of Human DNA in Samples
Symptoms: Metagenomic sequencing results show an extremely high percentage of reads mapping to the host genome, leaving very few reads for microbial analysis.
| Potential Cause | Solution |
|---|---|
| Inefficient host DNA depletion. | Optimize or use a different host depletion method (e.g., selective lysis, enzymatic degradation). Note that these methods can introduce bias and should be validated. [5] |
| Sample type inherently rich in host cells. | This is often unavoidable in tissues like tumors or blood. Ensure your bioinformatic pipeline is optimized to accurately classify the small proportion of microbial reads and not misclassify host DNA as microbial. [5] |
Problem: Controls Reveal a "Splashome" or Cross-Contamination
Symptoms: Negative controls contain DNA from samples processed in adjacent wells on the same plate.
| Potential Cause | Solution |
|---|---|
| Aerosol formation during liquid handling. | Use sealed plate lids during pipetting and vortexing. Centrifuge plates with care before opening. Use filter pipette tips. [4] |
| Liquid spillover between wells. | Ensure plates are properly sealed during all shaking and centrifugation steps. Do not overfill wells. [4] |
| Contaminated laboratory equipment. | Regularly decontaminate work surfaces, pipettes, and other equipment with a DNA-degrading solution (e.g., 10% bleach, followed by ethanol to remove residual bleach). [4] |
Control Types and Their Applications
The following table summarizes key controls to incorporate into your experimental design. [4] [5]
| Control Type | Stage of Introduction | Purpose | Example |
|---|---|---|---|
| Sample Collection Control | Sampling | Identifies contaminants from the sampling equipment and immediate environment. | An empty, sterile collection tube opened at the sampling site; a swab exposed to the air. |
| Reagent Blank Control | DNA Extraction | Profiles contaminating DNA present in the DNA extraction kits and purification reagents. | A tube containing only the molecular-grade water and reagents used for extraction, with no sample. |
| No-Template Control (NTC) | Library Preparation | Detects contamination introduced during the PCR amplification and library preparation steps. | A reaction mix that contains all PCR reagents but no DNA template. |
| Whole-Experiment Control | Entire Workflow | Captures the cumulative contamination across all stages of the experiment. | A control that is included from the moment of sample collection and goes through every subsequent step. |
Research Reagent Solutions
This table lists essential materials and their functions for implementing a robust contamination control strategy. [4]
| Item | Function | Key Consideration |
|---|---|---|
| DNA-free Swabs & Tubes | Single-use, pre-sterilized collection materials to minimize introduction of contaminants during sampling. | Verify "DNA-free" certification from the manufacturer. |
| UV-C Light Chamber | To sterilize surfaces and equipment by degrading nucleic acids. | Effective for flat surfaces but may not penetrate complex equipment. |
| Sodium Hypochlorite (Bleach) | A DNA-degrading solution used for surface decontamination. | Typically used at 10% concentration; must be thoroughly rinsed to prevent reagent degradation. |
| Personal Protective Equipment (PPE) | Acts as a barrier to prevent contamination from the researcher (skin, hair, aerosols). | Should include gloves, mask, and a lab coat or coveralls. |
| Filter Pipette Tips | Prevent aerosol contaminants from entering pipette shafts and cross-contaminating samples. | Essential for all liquid handling steps. |
Experimental Workflow for Control Strategy
The following diagram illustrates the integration of process-specific and whole-experiment controls into a typical low-biomass study workflow.
Diagram showing the integration of controls at key process stages.
Contamination Source Identification Logic
When contamination is detected, use this logical pathway to identify its most likely source.
Decision tree for tracing contamination sources using process controls.
Troubleshooting Guides
Guide 1: Diagnosing and Correcting Batch Confounding in Low-Biomass Studies
Problem: Suspected batch effects are confounding your analysis, making it difficult to distinguish true biological signals from technical artifacts.
Explanation: Batch confounding occurs when technical processing batches are completely mixed up with your biological variables of interest (e.g., all case samples processed in one batch and all controls in another). This can make technical artifacts appear as biologically significant findings [5].
Step-by-Step Diagnosis:
- Examine Your Metadata: Create a table or visualization that crosses your primary biological variable (e.g., case/control status) with the technical batch variable (e.g., DNA extraction date, sequencing run). A perfect overlap indicates severe confounding [5].
- Analyze Negative Controls: Check if the microbial profiles of your negative controls cluster with specific batches or biological groups. If they cluster with a biological group, it suggests confounding [4].
- Use Exploratory Data Analysis: Perform a Principal Coordinate Analysis (PCoA). If samples cluster more strongly by batch than by the biological condition of interest, batch effects are likely present and potentially confounded [5].
Solutions:
- Redesign if Possible: If the study is in the early stages, the most robust solution is to re-randomize sample processing to ensure each batch contains a similar ratio of cases and controls [5] [4].
- Analytical Control: If redesign is impossible, explicitly test the generalizability of your results across batches rather than analyzing all data together [5].
- Leverage Advanced Algorithms: Use data integration or batch-correction methods designed for microbiome data, such as
MetaDICTorMelody, which can be robust to some level of unobserved confounding [26] [27].
Guide 2: Addressing Contamination in Low-Biomass Microbiome Data
Problem: Negative controls (blanks) contain a high number of sequences, indicating contamination that could skew your low-biomass results.
Explanation: In low-biomass studies, contaminating DNA from reagents, kits, or the lab environment can constitute a large portion, or even the majority, of your sequencing data. If this contamination is confounded with a phenotype, it can generate artifactual signals [5] [4].
Step-by-Step Diagnosis:
- Check Negative Controls: Always include multiple types of negative controls (e.g., extraction blanks, no-template PCR controls) processed alongside your samples [5] [4].
- Sequence the Controls: Sequence these controls using the same protocol as your samples.
- Identify Contaminants: Bioinformatically compare the taxa in your samples to those in the negative controls. Taxa that are disproportionately abundant in controls are likely contaminants.
Solutions:
- Bioinformatic Decontamination: Use control-based decontamination tools to subtract contaminants.
- Wet-Lab Best Practices: Prevention is the best cure.
Frequently Asked Questions (FAQs)
Q1: What is the single most important step to avoid batch confounding?
A1: Careful experimental design is paramount. Actively ensure that your biological groups of interest are evenly distributed across all technical batches (e.g., DNA extraction kits, sequencing runs). Do not rely on passive randomization; use tools like BalanceIT to plan an unconfounded design [5].
Q2: How many negative controls should I include in my study? A2: While there is no universal consensus, the general recommendation is to include multiple controls per contamination source. At least two controls are better than one, and the number should increase if high contamination is expected. Crucially, these controls must be included in every processing batch [5].
Q3: My study is already completed and I discovered severe batch confounding. What can I do? A3: While the optimal solution is a redesigned experiment, you can:
- Analyze batches separately to see if findings are consistent across them [5].
- Use data integration methods like
MetaDICTthat are specifically designed to be robust to unobserved confounders and heterogeneous datasets [26]. - Be transparent in your reporting by clearly stating the limitation.
Q4: Besides batch confounding, what other key challenges are there in low-biomass research? A4: Key challenges include [5]:
- External Contamination: DNA from reagents and the lab environment.
- Well-to-Well Leakage: Cross-contamination between samples on a sequencing plate.
- Host DNA Misclassification: In metagenomic studies, host DNA can be misidentified as microbial.
- Processing Bias: Variable efficiency in measuring different microbes.
Data Presentation
| Contamination Source | Description | Mitigation Strategy |
|---|---|---|
| Laboratory Reagents/Kits | Microbial DNA present in DNA extraction kits, PCR water, and other reagents [5]. | Use high-purity, sequenced reagents; include extraction blank controls; use bioinformatic decontamination [4]. |
| Cross-Contamination (Well-to-Well) | Spillage or aerosol transfer between adjacent samples on a plate during library preparation [5]. | Carefully remove plate seals, spin plates before opening, and maintain physical separation during pipetting [31]. |
| Amplicon Carryover | Aerosolized PCR products from previous amplifications contaminating new reactions [29]. | Physically separate pre- and post-PCR areas, use dedicated equipment and lab coats, and employ uracil-N-glycosylase (UNG) treatment [29] [30]. |
| Personnel & Environment | Microbial DNA from researchers' skin, hair, or clothing, or from lab surfaces [4]. | Wear appropriate PPE (gloves, lab coats, masks), decontaminate surfaces with bleach or UV light, and use laminar flow hoods [4]. |
Table 2: Essential Research Reagent Solutions for Low-Biomass Studies
| Item | Function in Low-Biomass Research |
|---|---|
| DNA/RNA Decontamination Solutions (e.g., 10-15% bleach, commercial DNA-removal sprays) | To thoroughly remove residual nucleic acids from work surfaces, equipment, and tools, which is more effective than ethanol alone [29] [4]. |
| Aerosol-Resistant Filtered Pipette Tips | To prevent aerosol-borne contaminants and sample carryover from entering the pipette shaft and contaminating subsequent samples and reagents [29] [30]. |
| Personal Protective Equipment (PPE) (gloves, masks, clean lab coats) | To act as a barrier, reducing the introduction of contaminating DNA from the researcher's skin, breath, and clothing [4]. |
| Certified DNA-Free Water & Reagents | To ensure that the reagents used in DNA extraction, PCR, and library preparation do not themselves contribute microbial DNA to the low-biomass sample [5] [4]. |
| Uracil-N-Glycosylase (UNG) | An enzyme added to PCR mixes to degrade carryover contamination from previous PCR amplifications (requires using dUTP in PCR mixes) [29]. |
Experimental Protocols
Protocol: A Standardized Workflow for 16S rRNA Gene Sequencing of Low-Biomass Samples
This protocol is benchmarked for respiratory microbiota but is applicable to other low-biomass environments [32].
Key Materials:
- Lysis buffer with zirconium beads (0.1 mm diameter)
- Agowa Mag DNA extraction kit (or equivalent optimized for low biomass)
- Phusion Hot Start II High-Fidelity DNA Polymerase
- Primers 515F/806R targeting the V4 region of the 16S rRNA gene with Illumina adapters and barcodes
- AMPure XP beads for purification
- ZymoBIOMICS Microbial Community Standard (positive control)
Detailed Methodology:
- DNA Extraction:
- Add 600 µl of lysis buffer with zirconium beads to the sample.
- Mechanically disrupt cells by bead-beating twice for 2 minutes at 3500 oscillations/minute, with a 2-minute pause on ice between cycles.
- Centrifuge for 10 minutes at 4500 × g.
- Transfer the aqueous phase to a new tube with binding buffer and magnetic beads. Shake for 30 minutes for DNA binding.
- Wash beads with wash buffers, air-dry, and elute DNA in elution buffer [32].
- CRITICAL: Include both a positive control (e.g., a diluted Zymo mock community) and negative controls (lysis buffer only) in every extraction batch [32] [4].
16S rRNA Gene Amplification & Library Preparation:
- Perform PCR in 25 µl reactions using 5 µl of template DNA.
- Use the following cycling conditions: 98°C for 30s; 30 cycles of 98°C for 10s, 55°C for 30s, 72°C for 30s; final extension at 72°C for 5 minutes [32].
- NOTE: The number of PCR cycles (30) has been benchmarked for low-biomass samples and should not be arbitrarily increased, as this can amplify background contamination [32].
Library Purification and Sequencing:
- Purify the pooled amplicon library using two consecutive rounds of AMPure XP bead clean-up.
- Sequence the library using an Illumina MiSeq platform with V3 reagent chemistry, as this combination has been shown to provide accurate microbiota profiles for low-biomass samples [32].
Workflow Diagrams
Diagram: Batch Confounding in Experimental Design
Diagram: Low-Biomass Microbiome Study Workflow
Computational Decontamination: Tools, Pipelines, and Overcoming Pitfalls
Frequently Asked Questions (FAQs)
Q1: Why is decontamination particularly critical for low-biomass microbiome studies?
In low-biomass samples (such as blood, plasma, or catheterized urine), the amount of genuine microbial DNA is very small [33] [34]. Consequently, contaminant DNA from reagents, kits, or the laboratory environment can make up a large proportion, or even the majority, of the sequenced DNA [33] [5]. This contamination can obscure true biological signals and lead to incorrect conclusions, making robust decontamination an essential step [4] [5].
Q2: What are the most common sources of contamination in microbiome sequencing?
Contamination can be introduced at virtually any stage of the experimental workflow. Key sources include:
- Reagents and Kits: DNA extraction kits and PCR master mixes are well-documented sources of contaminant DNA [34] [9].
- Laboratory Environment: Contaminants can come from personnel, dust, and surfaces [4] [35].
- Cross-Contamination: Also known as "well-to-well leakage," this occurs when DNA from one sample contaminates a neighboring sample during plate-based processing [33] [5].
- Sample Collection: Contamination can be introduced from skin, collection equipment, or preservative solutions [4] [11].
Q3: I don't have negative controls for my dataset. Can I still decontaminate it?
Yes, but your options are more limited. Sample-based methods (like the frequency filter in Decontam) that do not require negative controls can be used [28] [35]. Furthermore, novel computational tools like Squeegee have been developed specifically for de novo contaminant identification without negative controls by leveraging the principle that kit or lab-specific contaminants leave a recognizable taxonomic signature across samples from distinct ecological niches [35]. However, the scientific community strongly recommends always including negative controls in your study design for the most reliable contamination identification [4] [5].
Q4: How can I tell if my decontamination process has been too aggressive and removed true signals?
This is a key challenge. Some tools, like the micRoclean package, implement a filtering loss (FL) statistic to quantify the impact of decontamination on the overall data structure [33]. An FL value closer to 1 suggests the removed features contributed highly to the overall covariance, which could be a warning sign of over-filtering. It is also advisable to check whether known, expected taxa from the sampled environment are retained after decontamination [28].
Troubleshooting Guides
Issue: Inconsistent Findings After Decontamination
Problem: Different decontamination tools, or different parameters within the same tool, yield vastly different microbial profiles.
Solution:
- Benchmark with Realistic Mocks: Use staggered mock communities (where microbial abundances vary over multiple orders of magnitude) rather than even mock communities to test and optimize decontamination parameters, as they better represent natural samples [28].
- Use Unbiased Evaluation Metrics: Rely on metrics like Youden's index or the Matthews correlation coefficient to evaluate decontamination success, as traditional accuracy can be misleading when the number of true contaminants and true signals is imbalanced [28].
- Align Tool with Research Goal: Select a decontamination strategy based on your primary objective.
- For characterizing the original composition as closely as possible (e.g., ecological studies), use pipelines designed for that purpose, like the "Original Composition Estimation" pipeline in
micRocleanwhich leverages tools likeSCRuB[33]. - For biomarker identification (e.g., clinical studies), use a stricter pipeline that prioritizes removing all likely contaminants, such as the "Biomarker Identification" pipeline in
micRoclean[33].
- For characterizing the original composition as closely as possible (e.g., ecological studies), use pipelines designed for that purpose, like the "Original Composition Estimation" pipeline in
Issue: Suspected Well-to-Well Leakage (Cross-Contamination)
Problem: Contamination is observed between samples processed in close proximity on the same plate.
Solution:
- Prevention: During experimental design, randomize sample locations on plates to avoid confounding biological groups with plate location [5].
- Detection and Correction: If well location data is available, use tools like
SCRuB(integrated withinmicRoclean) that can explicitly model and correct for spatial leakage between wells [33]. If well data is unavailable, some packages can estimate pseudo-locations, but a warning is typically issued if the estimated leakage is high [33].
Methodologies & Data Comparison
The established decontamination methodologies can be broadly classified into three categories, each with its own mechanisms and representative tools [33] [28].
Table 1: Overview of Decontamination Methodologies
| Methodology | Underlying Principle | Data Requirements | Representative Tools | Key Advantages | Key Limitations |
|---|---|---|---|---|---|
| Blocklist | Removes taxa that are pre-defined in a list of common contaminants [33] [28]. | A predefined list of contaminant taxa (e.g., from literature) [33]. | GRIMER [33] |
Simple and fast to apply; does not require control samples. | Inflexible; cannot identify novel or study-specific contaminants. |
| Sample-Based | Identifies contaminants based on their behavior across all samples, e.g., a negative correlation with total DNA concentration [33] [28]. | Sample metadata (e.g., DNA concentration) [28]. | Decontam (frequency filter) [33] [28] |
Does not require negative control samples. | May fail if contamination is correlated with biomass or the phenotype of interest. |
| Control-Based | Identifies contaminants based on their higher abundance and/or prevalence in negative control samples compared to true samples [33] [28]. | Sequencing data from negative controls (e.g., blank extractions) processed alongside samples [33] [28]. | Decontam (prevalence filter), MicrobIEM, SCRuB, Green Cleaner, SourceTracker [33] [28] [34] |
Directly targets and removes lab/kit-specific contamination; often considered the gold standard. | Requires well-designed experiments with multiple negative controls. |
Recent benchmarking studies have compared the performance of various tools. The following table summarizes quantitative results from evaluations using mock communities, which have a known composition of true and contaminant sequences.
Table 2: Benchmarking Performance of Select Decontamination Tools
| Tool | Methodology | Reported Performance Metrics | Context of Benchmark |
|---|---|---|---|
| Green Cleaner | Control-Based | Outperformed SCRuB with higher accuracy, F1-score, and lower beta-dissimilarity across all contamination levels [34]. |
Vaginal microbiome dilution series used as a proxy for low-biomass urine samples [34]. |
| MicrobIEM | Control-Based | The ratio filter performed as well as or better than established tools. Effectively reduced contaminants while keeping skin-associated genera in a real dataset [28]. | Benchmarked on even and staggered mock communities and a skin microbiome dataset [28]. |
| Squeegee | De novo (No controls needed) | Weighted Precision: 0.856 (genus level). Weighted Recall: 0.958 (genus level) [35]. | Evaluated on a real dataset with available negative controls to establish ground truth [35]. |
| Decontam (Prevalence) | Control-Based | Effectively reduced common contaminants while keeping skin-associated genera [28]. | Benchmarked on even and staggered mock communities [28]. |
Experimental Protocols
Detailed Protocol: Implementing a Control-Based Decontamination withMicrobIEM
MicrobIEM is highlighted for its user-friendliness and effective performance in benchmarks [28].
Principle: Identifies contaminants based on their relative abundance in negative controls compared to true samples and their consistent occurrence in these controls [28].
Workflow:
Steps:
- Input Preparation: Prepare your feature table (ASV/OTU counts) and a metadata file that clearly identifies which samples are negative controls (e.g., blank extractions) and which are true biological samples [28].
- Tool Execution:
MicrobIEMcan be run either via a command-line script or through its unique graphical user interface (GUI), which is designed for users without coding experience [28]. - Parameter Selection: The tool provides interactive plots that visualize the abundance of taxa in negative controls versus samples. This allows the user to make an informed decision when setting the filtering parameters [28].
- Application of Ratio Filter: The core algorithm applies a ratio filter that removes features (ASVs/OTUs) based on their prevalence and abundance in controls relative to true samples [28].
- Output: The tool generates a new feature table with the identified contaminant features removed.
Protocol: A Multi-Method Approach withmicRoclean
The micRoclean R package provides two distinct pipelines tailored to different research goals [33].
Workflow:
Steps:
- Input: Provide a sample-by-feature count matrix and corresponding metadata, which must include a column specifying if a sample is a control and a batch column if multiple batches exist [33].
- Pipeline Selection:
- Select
research_goal = "biomarker"if the aim is to strictly remove all likely contaminants for downstream analyses like disease association studies. This pipeline is based on a multi-batch decontamination framework [33]. - Select
research_goal = "orig.composition"if the goal is to estimate the sample's original microbial composition as closely as possible (e.g., for ecological profiling). This pipeline uses theSCRuBmethod and can automatically handle multiple batches and account for well-to-well leakage if well location data is provided [33].
- Select
- Output and Validation: The function returns a decontaminated count table and a Filtering Loss (FL) statistic. The FL value helps quantify the impact of decontamination on the overall data structure, with values closer to 1 indicating a high contribution from removed features and a potential risk of over-filtering [33].
The Scientist's Toolkit: Essential Research Reagents & Materials
The following reagents and materials are critical for conducting robust decontamination in low-biomass studies.
Table 3: Essential Reagents and Materials for Effective Decontamination
| Item | Function & Importance | Best Practice Guidelines |
|---|---|---|
| Blank Extraction Controls | Contains contaminant DNA introduced during the DNA extraction process. Serves as a direct profile of kit/reagent contaminants [5] [34]. | Process at least one control per extraction batch. For large studies, include multiple controls to better capture variability [5]. |
| PCR No-Template Controls (NTCs) | Contains contaminants introduced during the PCR amplification step, such as those present in the polymerase or master mix [28] [5]. | Include in every PCR batch to identify amplification-stage contaminants. |
| Mock Communities | Samples with a known composition of microbial cells or DNA. Used to validate the entire wet-lab and computational workflow, including decontamination accuracy [28]. | Use staggered mock communities (with uneven taxon abundances) for more realistic benchmarking of decontamination tools [28]. |
| DNA Removal Solution | Used to decontaminate surfaces and equipment. Critical because sterility (killing cells) is not the same as being DNA-free; autoclaving and ethanol may not remove persistent environmental DNA [4]. | Decontaminate surfaces and reusable equipment with a solution like sodium hypochlorite (bleach) or commercial DNA removal products to degrade contaminating DNA [4]. |
| Personal Protective Equipment (PPE) | Acts as a barrier to prevent contamination of samples from the researcher (e.g., skin cells, hair, aerosols from breathing) [4]. | Use gloves, lab coats, masks, and hair nets. For ultra-sensitive low-biomass work, consider more extensive PPE like cleanroom suits [4]. |
In 16S-rRNA microbiome studies, low-biomass samples (such as blood, plasma, skin, and certain environmental samples) present unique challenges as contaminant DNA from cross-contamination and environmental sources can obscure true biological signals. The micRoclean R package addresses this critical issue by providing structured decontamination pipelines specifically designed for such challenging samples [3]. This tool is particularly valuable given that standard practices suitable for higher-biomass samples may produce misleading results when applied to low microbial biomass environments [4].
The package integrates and expands on existing decontamination methods while introducing a novel filtering loss statistic to help quantify the impact of contaminant removal and prevent over-filtering [3]. This technical support guide will help you implement micRoclean effectively within your research workflow.
Troubleshooting Guides & FAQs
Pipeline Selection Guidance
How do I choose between the two main pipelines in micRoclean?
The choice between pipelines depends primarily on your primary research goal and study design [3].
Table: micRoclean Pipeline Selection Guide
| Pipeline Name | Research Goal | Optimal Use Cases | Key Methodology | Batch Handling |
|---|---|---|---|---|
| Original Composition Estimation | Characterize sample's original composition prior to contamination | Studies with well location information; concerns about well-to-well leakage; single-batch designs | Implements and expands SCRuB method for partial contaminant removal | Automatically decontaminates multiple batches in one code execution |
| Biomarker Identification | Strictly remove all likely contaminant features | Downstream biomarker identification analyses; multi-batch study designs | Architecture derived from established four-step pipeline | Requires multiple batches for effective decontamination |
Common Error Resolution
What does the "high well-to-well contamination" warning mean, and how should I address it?
If the well2well function detects a well-to-well contamination level exceeding 0.10, the package will return a warning message [3].
- Implication: This indicates potential sample leakage between adjacent wells in your plating setup, which could compromise results.
- Recommended Action:
- Obtain actual well location information for your experimental setup
- Utilize the Original Composition Estimation pipeline, as it can specifically account for well-to-well leakage contamination through its SCRuB implementation
- Verify your sample plating strategy to minimize cross-contamination risks in future experiments
How should I interpret the Filtering Loss (FL) statistic in my results?
The Filtering Loss (FL) statistic quantifies the impact of contaminant removal on the overall covariance structure of your data [3].
- Calculation: ( FLJ = 1 - \frac{\|Y^TY\|F^2}{\|X^TX\|_F^2} ), where ( X ) is the pre-filtering count matrix and ( Y ) is the post-filtering count matrix [3]
- Interpretation: Values approaching 1 indicate significant impact on your data structure, potentially suggesting over-filtering of true biological signals
Input Requirements & Data Preparation
What input data format does micRoclean require?
Proper data formatting is essential for successful pipeline execution [3]:
- Primary Input: A samples (n) × features (p) count matrix generated from 16S-rRNA sequencing
- Metadata Requirements:
- Must include sample identifiers corresponding to count matrix rows
- Must specify which samples are controls
- Must include group names for samples
- Optional but recommended: batch information and sample well location columns
When should I use the pseudo-location assignment feature?
The well2well function can automatically assign pseudo-locations in a 96-well plate format when actual well location information is unavailable [3].
- Best Applications: This approach works reasonably well when samples follow a consistent vertical or horizontal ordering pattern
- Limitations: For complex or randomized plating designs, actual well locations are strongly recommended for accurate contamination modeling
The Scientist's Toolkit: Essential Research Reagents & Materials
Table: Essential Components for Low-Biomass Microbiome Studies
| Component Category | Specific Examples | Function/Application | Contamination Control Considerations |
|---|---|---|---|
| Sample Collection Materials | DNA-free swabs, collection vessels | Maintain sample integrity during acquisition | Use single-use, pre-sterilized materials; decontaminate with 80% ethanol + DNA removal solutions [4] |
| Personal Protective Equipment (PPE) | Gloves, cleansuits, face masks, shoe covers | Create barriers between samples and human operators | Minimizes contamination from skin, hair, aerosol droplets, and clothing [4] |
| Laboratory Reagents | Preservation solutions, DNA extraction kits | Stabilize and extract microbial DNA | Verify reagents are DNA-free; include aliquot controls in processing [4] |
| Negative Controls | Empty collection vessels, swabbed surfaces, air-exposed swabs | Identify contamination sources during sampling | Process alongside actual samples through all downstream steps [4] |
| Decontamination Solutions | Sodium hypochlorite (bleach), UV-C light, hydrogen peroxide | Remove contaminating DNA from surfaces and equipment | Note that sterility ≠ DNA-free; implement specific DNA removal protocols [4] |
Experimental Workflow & Implementation
The following diagram illustrates the logical decision process for implementing micRoclean in your low-biomass microbiome study:
Frequently Asked Questions
Can micRoclean handle studies with multiple sequencing batches?
Yes, the Original Composition Estimation pipeline specifically addresses this challenge by automatically splitting data by batch, applying decontamination, and properly recombining results [3]. This prevents the common error of incorrectly running multiple batches together through methods designed for single-batch processing.
How does micRoclean compare to other decontamination tools like decontam?
Unlike methods that remove entire features identified as contaminants, micRoclean offers more nuanced approaches [3]:
- The Original Composition Estimation pipeline performs partial removal of contaminant reads rather than complete feature elimination
- The package integrates multiple decontamination strategies while adding the novel FL statistic for impact quantification
- It provides guided pipeline selection based on research objectives rather than a one-size-fits-all approach
What are the minimal reporting standards for contamination in publications?
When publishing low-biomass microbiome studies, you should report [4]:
- All contamination controls implemented during sampling and processing
- The specific decontamination pipeline and parameters used
- Filtering Loss statistics and their interpretation
- Any well-to-well contamination levels detected
- Justification for your chosen pipeline based on research goals
Leveraging Strain-Resolved Analysis to Detect Cross-Contamination
Frequently Asked Questions
1. What is cross-contamination, and how does it differ from external contamination? Cross-contamination, specifically well-to-well leakage, occurs when DNA from one biological sample in a study spills over into another sample during processing (e.g., on a 96-well DNA extraction plate). In contrast, external contamination originates from outside the study, such as from laboratory reagents, kits, or the environment. Because the contaminant DNA in cross-contamination comes from other samples in your experiment, it cannot be identified by simply looking for species present in negative controls [36].
2. Why is strain-resolved analysis particularly powerful for detecting cross-contamination? Strain-resolved analysis provides nucleotide-level resolution, allowing you to distinguish between different strains of the same bacterial species. This high resolution enables you to match contaminant strains in a control or low-biomass sample to their exact source strain in another well on the same extraction plate. This level of specificity is required to confidently trace the path of cross-contamination [36].
3. My negative controls are clean. Does that mean my dataset is free from contamination? Not necessarily. Relying solely on negative controls is a common pitfall. Cross-contamination can occur between biological samples without affecting the negative controls. It is critical to also examine strain-sharing patterns among all samples, particularly those processed on the same plate, to rule out well-to-well leakage [36].
4. In which samples is contamination most critical? Contamination has the most significant impact on low-biomass samples, where the contaminant DNA can constitute a large proportion of the total sequenced DNA, thereby distorting the true biological signal and potentially leading to false conclusions [36] [4].
5. Can I use standard taxonomic analysis tools to detect cross-contamination? Standard species-level composition tools lack the resolution to distinguish between highly similar strains. Detecting cross-contamination requires high-resolution, strain-level tools (e.g., StrainScan) that can identify specific strain variants across samples [37].
Troubleshooting Guide: Identifying and Investigating Cross-Contamination
Step 1: Recognize the Symptoms
Be alert to these warning signs in your data:
- Unexpected Strain Sharing: You detect identical bacterial strains in samples that are not biologically related (e.g., from different human subjects or different environmental sites) [36].
- Plate-Location Patterns: The unexpected strain sharing follows a pattern on your extraction plate, where samples that are immediate neighbors or in the same column/row share strains [36].
- Controls with Biological Signal: Your negative control wells show the presence of microbial strains that are also found in biological samples processed on the same plate [36].
Step 2: Conduct a Strain-Resolved Analysis
Follow this workflow to systematically investigate potential cross-contamination.
Step 3: Analyze Strain-Sharing Patterns
Once you have identified instances of unexpected strain sharing, map these relationships onto your DNA extraction plate layout. The table below summarizes the key differences between well-to-well contamination and other contamination types.
| Feature | Well-to-Well Contamination | External Contamination (e.g., from kits) |
|---|---|---|
| Source | Other biological samples in the study [36] | Laboratory reagents, kits, or the environment [4] |
| Pattern | Strong correlation with proximity on the extraction plate (e.g., adjacent wells) [36] | Appears across multiple plates and batches, not correlated with well proximity [36] |
| Detection Method | Strain-resolved analysis of all samples to find matching strains [36] | Analysis of negative controls (e.g., blank extractions) [4] |
| Example Organisms | Any strain present in the study samples [36] | Common skin or environmental commensals (e.g., Cutibacterium acnes) [36] |
Diagnostic Criteria: Contamination is likely well-to-well if the proportion of nearby sample pairs sharing strains is significantly higher than that of distant pairs. Statistical tests like the Wilcoxon rank-sum test can be used to validate this spatial dependency [36].
Experimental Protocol: Detecting Cross-Contamination via Strain Tracking
Objective: To identify cross-contamination between samples processed on the same 96-well DNA extraction plate using a strain-resolved metagenomic workflow.
1. Sample and Data Preparation
- Input: Metagenomic short-read sequences from all samples and negative controls [36].
- Reference Database: A curated set of bacterial strain genomes relevant to your study system. For customized analysis, tools like StrainScan allow you to input your own set of reference genomes in FASTA format [37].
2. Strain-Level Profiling
- Map sequencing reads from every sample and control to your reference genome set.
- Use a high-resolution strain-level analysis tool (e.g., StrainScan) to identify which specific strains are present in each sample. StrainScan employs a novel hierarchical k-mer indexing structure to accurately distinguish between highly similar strains, which is crucial for this application [37].
- Detection Threshold: A common threshold for positive detection is having reads map to ≥50% of a representative genome [36].
3. Identify Unexpected Strain Sharing
- Construct a matrix of strain sharing across all samples.
- Flag instances where the exact same strain is found in two or more samples that are not expected to be related (e.g., from different infants, or between a fecal sample and a negative control) [36].
4. Map Findings to Plate Layout
- Create a visual representation of your extraction plate.
- For each instance of unexpected strain sharing, mark the involved samples on the plate layout.
- Analyze the pattern: Determine if the sharing occurs predominantly between samples that are immediate neighbors or located in the same column/row [36].
5. Statistical Validation
- Statistically test for spatial dependency by comparing the rate of strain sharing between "near" sample pairs (e.g., adjacent wells) and "far" sample pairs (e.g., wells on opposite sides of the plate). A p-value < 0.05 (e.g., via Wilcoxon rank-sum test) supports the well-to-well contamination hypothesis [36].
The Scientist's Toolkit: Key Research Reagent Solutions
| Item | Function in Contamination Prevention / Detection |
|---|---|
| Negative Controls | Reagent-only blanks (e.g., blank extractions) are essential for identifying DNA contamination originating from kits and laboratory environments [4]. |
| Positive Controls | Defined microbial community standards (e.g., ZymoBIOMICS Standard) verify DNA extraction and sequencing efficiency [36]. |
| DNA Decontamination Solutions | Solutions containing sodium hypochlorite (bleach) or commercial DNA removal kits are used to eliminate contaminating DNA from work surfaces and equipment [4]. |
| Unique Dual Indexed (UDI) Primers | These primers minimize the phenomenon of index hopping during sequencing, which can be mistaken for bioinformatic cross-contamination [36]. |
| Strain-Level Bioinformatics Tools | Software like StrainScan provides the high-resolution analysis needed to track specific strains across samples and identify well-to-well leakage [37]. |
| Personal Protective Equipment (PPE) | Gloves, masks, and lab coats act as a barrier to prevent the introduction of contaminant DNA from researchers onto samples, which is critical for low-biomass studies [4]. |
Welcome to the Squeegee Technical Support Center
This resource is designed for researchers and scientists utilizing the Squeegee algorithm for computational contamination detection in low microbial biomass microbiome studies. The following guides and FAQs address common technical and experimental challenges to ensure you can effectively integrate Squeegee into your research workflow for more reliable and reproducible results.
Frequently Asked Questions (FAQs)
Q1: What is the core principle behind Squeegee? Squeegee operates on the principle that contaminants from external sources (e.g., DNA extraction kits, lab environments) leave taxonomic "bread crumbs" by appearing across multiple samples from distinct ecological niches or body sites. It identifies these shared organisms as candidate contaminants without needing negative control samples [38] [39].
Q2: On what types of samples is Squeegee most effective? Squeegee is particularly valuable for the analysis of low microbial biomass environments. These are samples that contain very little microbial DNA, such as breastmilk, placenta, amniotic fluid, and other human tissues, where contaminating sequences can severely impact data interpretation [39] [40].
Q3: What input data does Squeegee require? The software takes multiple metagenomic samples—specifically, sequencing data collected from distinct microbiomes—as input. It then performs taxonomic classification on this data to begin its detection process [38].
Q4: How does Squeegee's performance compare to other methods like Decontam? Benchmarking against Decontam has shown that Squeegee can achieve high precision. In one evaluation, Squeegee demonstrated an unweighted precision of 0.714 at the species level and 0.833 at the genus level, outperforming Decontam's unweighted precision of 0.140 (species) and 0.174 (genus) on the same dataset. Furthermore, Squeegee correctly identified the contaminant species that made up over 76% of the cumulative relative abundance in the ground truth set [38].
Q5: Where can I find and download Squeegee? Squeegee is a freely available, open-source tool. The complete source code is publicly accessible on GitLab at: https://gitlab.com/treangenlab/squeegee [39] [40].
Troubleshooting Guides
Issue 1: Installation and Dependency Errors
- Problem: Failure to install Squeegee or its dependencies.
- Solution:
- Ensure you are using the official source code from the GitLab repository.
- Carefully review the
READMEfile for a list of system requirements and dependencies. - Verify that all third-party software and libraries (e.g., Python packages, taxonomic classifiers) are correctly installed and configured in your environment.
Issue 2: High False Positive Predictions
- Problem: Squeegee is flagging an unexpectedly high number of taxa as contaminants.
- Solution:
- Verify Input Sample Diversity: Squeegee's hypothesis relies on identifying shared species across distinct sample types. Ensure your input dataset comprises samples from genuinely different ecological niches (e.g., different body sites like stool, skin, and oral). A lack of diversity in input samples can lead to false positives [38].
- Check Taxonomic Classification: The quality of Squeegee's predictions is dependent on the accuracy of the initial taxonomic classification. Validate the performance of your chosen classifier on your data type.
Issue 3: Low Recall or Missed Contaminants
- Problem: Squeegee fails to identify known contaminants present in the data.
- Solution:
- Assess Sequencing Depth: Contaminants that are very low abundance might be missed if the sequencing depth is insufficient for their detection.
- Review Classifier Database Coverage: A candidate contaminant might not be identified if its genome is not present in the reference database used by the taxonomic classifier.
Issue 4: Computational Performance and Memory Issues
- Problem: The analysis runs very slowly or fails due to insufficient memory.
- Solution:
- Start with a Subset: Test the pipeline on a smaller subset of your samples to gauge memory requirements.
- Allocate More Resources: For large-scale metagenomic studies, ensure the analysis is run on a server or computing cluster with adequate RAM and CPU resources.
Experimental Protocols and Methodologies
Key Experimental Workflow for Squeegee Validation
The following workflow is based on the original study that introduced and validated Squeegee [38].
1. Input Data Preparation:
- Dataset Curation: Collect metagenomic sequencing datasets from at least two different body sites or environments. The original study used data from the Human Microbiome Project (HMP), including samples from oral, nasal, skin, stool, throat, and vaginal sites [38].
- Data Format: Ensure sequencing data is in a format compatible with standard taxonomic classification tools (e.g., FASTQ files).
2. Taxonomic Classification:
- Tool Selection: Perform taxonomic classification on all samples. The Squeegee study utilized the Kraken classifier for this step [38].
- Output: The result is a taxonomic profile for each sample, detailing the species (or genera) present and their relative abundances.
3. Executing Squeegee:
- Run the Algorithm: Execute the Squeegee pipeline, providing the taxonomic classification results from all samples as input.
- Core Operations: Squeegee will:
- Identify candidate contaminant species that are shared across samples from different body sites.
- Estimate pairwise similarity between samples based on the presence of these candidates.
- Calculate the breadth and depth of genome coverage by aligning reads to the reference genomes of candidate species.
- Filter out taxonomic classification errors to generate a final list of high-confidence contaminant predictions [38].
Performance Data and Benchmarks
The tables below summarize quantitative performance data from the original Squeegee publication, comparing it to the Decontam method using a permissive ground truth contaminant set [38].
Table 1: Unweighted Performance Metrics (Species & Genus Level)
| Metric | Squeegee (Species) | Squeegee (Genus) | Decontam (Species) | Decontam (Genus) |
|---|---|---|---|---|
| Precision | 0.714 | 0.833 | 0.140 | 0.174 |
| Recall | 0.323 | 0.625 | 0.774 | 0.750 |
| F-score | 0.444 | 0.714 | 0.238 | 0.282 |
Table 2: Abundance-Weighted Performance Metrics (Species Level)
| Metric | Squeegee | Decontam |
|---|---|---|
| Weighted Precision | 0.580 | 0.928 |
| Weighted Recall | 0.728 | 0.494 |
| Weighted F-score | 0.645 | 0.645 |
Workflow and Data Relationship Visualizations
The following diagram illustrates the logical workflow of the Squeegee algorithm and the relationship between its core components.
The Scientist's Toolkit: Essential Research Reagents and Materials
Table 3: Key Research Reagent Solutions for Squeegee-Based Studies
| Item | Function in the Context of Squeegee |
|---|---|
| DNA Extraction Kits | To isolate microbial DNA from low-biomass samples. The specific kit used is a primary source of contaminants that Squeegee is designed to detect [38] [39]. |
| Metagenomic Sequencing Kits | For preparing sequencing libraries from the extracted DNA. Provides the raw data (FASTQ files) that serve as the primary input for the Squeegee pipeline. |
| Taxonomic Classifier (e.g., Kraken) | Software used to assign taxonomic labels to sequencing reads. This classification is the foundational input for the Squeegee algorithm [38]. |
| Reference Genome Databases | Curated collections of microbial genomes (e.g., RefSeq). Essential for the taxonomic classifier to identify species and for Squeegee to perform genome coverage analysis [38]. |
| High-Performance Computing (HPC) Cluster | A computing environment with substantial RAM and CPU resources. Necessary for processing large metagenomic datasets through the classification and Squeegee analysis steps [38]. |
Evaluating Decontamination Success and Ensuring Reproducibility
Frequently Asked Questions (FAQs)
1. What are the main categories of bioinformatic decontamination tools? Bioinformatic decontamination approaches are generally divided into three categories:
- Control-based methods: These require negative controls (e.g., pipeline negative controls, PCR controls) processed alongside your samples. Contaminants are identified based on their prevalence or abundance in these controls. Examples include the Decontam prevalence filter and MicrobIEM's ratio filter [28].
- Sample-based methods: These do not require negative controls and instead identify contaminants based on patterns within the sample data itself. For instance, the Decontam frequency filter assumes contaminants are more abundant in samples with lower total DNA concentration [28].
- Blacklist-based methods: These tools remove taxa based on pre-established lists of common contaminants, independent of the specific samples or controls in your experiment [28].
2. How do I choose the right decontamination tool for my low-biomass study? The choice depends on your experimental design and sample composition. The following table summarizes the performance of various tools based on a benchmark using mock microbial communities [28]:
Table 1: Benchmarking Tool Performance in Different Mock Communities
| Tool / Algorithm | Tool Category | Performance in Even Mock Community | Performance in Staggered Mock Community (Low-Biomass) |
|---|---|---|---|
| Sample-based algorithms (e.g., Decontam frequency filter) | Sample-based | Best separation of mock and contaminant sequences [28] | Lower performance in low-biomass samples [28] |
| Control-based algorithms (e.g., Decontam prevalence filter, MicrobIEM's ratio filter) | Control-based | Good performance [28] | Better performance, particularly in low-biomass samples (≤ 10^6 cells) [28] |
| MicrobIEM's Ratio Filter | Control-based | Performs better or as well as established tools [28] | Effectively reduces contaminants while keeping true skin-associated genera [28] |
3. My decontamination tool removed a known pathogen. Is this a false positive? Not necessarily. Common laboratory contaminants can include species that are also known pathogens. The tool may be correctly identifying a contaminant sequence. You should cross-reference the removed taxon with lists of known kit and reagent contaminants. Furthermore, ensure your negative controls are processed with the same kits and in the same batch as your samples to accurately capture the contaminant profile of your specific lab workflow [4].
4. What should I do if I don't have negative controls for my dataset? The absence of negative controls is a significant limitation. However, some computational tools are designed for this scenario. For example, Squeegee is a de novo contamination detection tool that identifies potential contaminants by looking for microbial species that are unexpectedly shared across samples from very different ecological niches or body sites [41]. One study reported that Squeegee achieved a weighted recall of 0.763 for high-abundance contaminants even without using control data [41].
5. How do I report decontamination in my manuscript to meet current standards? Recent consensus guidelines specify minimal standards for reporting. You should clearly detail:
- The type and number of negative controls used (e.g., pipeline negative controls, PCR controls) [4].
- The specific bioinformatic tool and algorithm used for decontamination (e.g., Decontam prevalence filter, MicrobIEM ratio filter) [4].
- All key parameters selected for the tool (e.g., threshold in MicrobIEM) [28] [4].
- The number or proportion of reads and taxa removed during the decontamination step [4].
Troubleshooting Guides
Issue 1: Poor Decontamination Performance After Tool Implementation
Problem: After running a decontamination tool, your low-biomass samples still appear dominated by contaminants, or true microbial signals have been incorrectly removed.
Solution: Follow this diagnostic workflow to identify the root cause:
Issue 2: Inconsistent Microbial Signatures After Cross-Cohort Validation
Problem: A machine learning model trained on microbiome data from one cohort (e.g., a specific geographic location) performs poorly when validated on data from another cohort, often due to batch effects and unaccounted contamination.
Solution: This is a common challenge, as technical and biological confounders can dominate true signals [42]. To improve generalizability:
- Employ Meta-Analysis Frameworks: Use compositionally-aware meta-analysis tools like Melody. This framework harmonizes summary statistics from multiple studies to identify stable, generalizable microbial signatures, reducing the impact of batch effects and compositionality [27].
- Utilize Combined-Cohort Classifiers: Instead of training a classifier on a single cohort, build a model on samples combined from multiple cohorts. This approach has been shown to improve cross-cohort validation performance for non-intestinal diseases [42].
- Report Confounders Transparently: Document and, if possible, computationally adjust for known confounders such as participant age, BMI, geography, and medication use (e.g., proton pump inhibitors, metformin) which can significantly alter microbiome composition and be mistaken for disease signals [42].
The Scientist's Toolkit: Key Research Reagent Solutions
The following table outlines essential materials and their functions for conducting robust low-biomass microbiome studies, from sample collection to analysis.
Table 2: Essential Reagents and Materials for Low-Biomass Microbiome Research
| Item | Function / Application | Key Considerations |
|---|---|---|
| DNA-Free Collection Swabs/Tubes | Sample collection from low-biomass sites (e.g., skin, respiratory tract). | Pre-treated to be sterile and DNA-free. Single-use is ideal to prevent cross-contamination [4]. |
| Personal Protective Equipment (PPE) | Barrier to limit contamination from operators during sampling. | Should include gloves, masks, and clean lab coats. For ultra-sensitive work, consider cleanroom suits [4]. |
| Nucleic Acid Degrading Solution | Decontamination of surfaces and equipment. | Used after ethanol cleaning to remove residual DNA from sampling equipment and work surfaces [4]. |
| DNA Extraction Kits | Isolation of microbial DNA from samples. | A major source of contaminating DNA. Record the kit lot number, as contaminant profiles can vary [4] [41]. |
| PCR Grade Water | Negative control for the DNA extraction and amplification steps. | Used in pipeline negative controls to identify contaminants introduced from reagents and the laboratory environment [28] [4]. |
Experimental Protocol: Benchmarking a Decontamination Tool Using a Staggered Mock Community
This protocol allows you to empirically test the performance (Precision, Recall, and Youden's index) of a decontamination tool in your own lab.
1. Experimental Design and Sample Preparation
- Create a Staggered Mock Community: Create a mock microbial community with 15+ strains where absolute cell counts differ by at least two orders of magnitude (e.g., from 18% to 0.18%). This staggered composition more accurately represents natural, complex microbiomes than an even community [28].
- Prepare a Dilution Series: Prepare a serial tenfold dilution of the mock community, ranging from a high-biomass point (e.g., 10^9 cells) to a low-biomass point (e.g., 10^3 cells). Perform this in multiple technical replicates [28].
- Include Essential Controls: Process at least three pipeline negative controls (containing only reagents) and three PCR controls alongside your mock community samples [28].
2. Laboratory Processing
- DNA Extraction and Sequencing: Extract DNA from all samples and controls using your standard kit. Amplify and sequence the V4 region of the 16S rRNA gene on an Illumina MiSeq platform [28].
- Bioinformatic Pre-processing: Process raw sequencing reads using a standard pipeline (e.g., DADA2 for denoising and the SILVA database for taxonomic annotation) [28].
3. Tool Benchmarking and Analysis
- Define Ground Truth: Classify Amplicon Sequence Variants (ASVs) as "mock" if they are present in the undiluted sample and match an expected reference sequence. Classify all other ASVs as "contaminants" [28].
- Run Decontamination Tools: Apply one or more decontamination tools (e.g., Decontam prevalence filter, MicrobIEM) to the dataset. Test a range of tool-specific parameters.
- Calculate Performance Metrics: For each tool and parameter setting, calculate the following metrics by comparing the tool's classification to your ground truth [28]:
- Precision: The proportion of taxa identified as contaminants that are true contaminants. (Minimizes false positives).
- Recall (Sensitivity): The proportion of true contaminants that were correctly identified. (Minimizes false negatives).
- Youden’s Index: A more unbiased metric that combines sensitivity and specificity (Youden’s Index = Sensitivity + Specificity - 1) [28].
In low-biomass microbiome studies—which investigate environments like blood, plasma, skin, or upper respiratory tissues—the amount of genuine microbial DNA is minimal [33] [5] [43]. Consequently, contaminant DNA from reagents, the laboratory environment, or cross-contamination between samples can constitute a significant proportion of the sequenced data, potentially obscuring true biological signals [5] [4]. Decontamination and filtering are therefore critical preprocessing steps. However, overly aggressive filtering can lead to the loss of true biological signals, a problem known as over-filtering [33] [44]. To address this, the filtering loss (FL) statistic has been developed as a novel metric to quantify the impact of contaminant removal on the overall structure of the dataset, providing researchers with a data-driven tool to avoid over-filtering [33].
Key Concepts: What is Filtering Loss?
The Filtering Loss (FL) statistic, first introduced by Smirnova et al. (2019) and implemented in packages like micRoclean, is a metric that quantifies the contribution of filtered features (whether partially or fully removed) to the overall covariance structure of the microbiome samples [33].
In practical terms, the FL value is a single number that helps you understand how much your decontamination process has altered the fundamental relationships between samples in your dataset.
- FL Value Close to 0: Indicates that the removed features contributed little to the overall sample covariance. This suggests minimal impact from filtering and a low risk of over-filtering.
- FL Value Close to 1: Indicates that the removed features made a large contribution to the overall covariance. This serves as a warning that the decontamination may have been too aggressive, potentially removing true biological signal alongside contaminants [33].
The mathematical formulation of FL is presented as a ratio of the covariance matrices after and before filtering. For a pre-filtering count matrix ( X ) and a post-filtering matrix ( Y ), the FL statistic is defined as:
[ FLJ = 1 - \frac{||Y^TY||F^2}{||X^TX||_F^2} ]
where ( ||\cdot||_F^2 ) denotes the squared Frobenius norm, which approximates the total covariance in the matrix [33].
Frequently Asked Questions (FAQs)
Q1: Why is preventing over-filtering particularly crucial for low-biomass studies?
In low-biomass samples, the absolute amount of true microbial DNA is small. While this makes the data more susceptible to contamination, it also means that the true signal is inherently less abundant and can be easily mistaken for noise. Aggressive filtering methods designed for high-biomass samples (like stool) can inadvertently strip away these fragile but genuine biological signals, leading to false conclusions. The FL statistic provides an objective measure to guide the stringency of filtering, ensuring that the decontamination process is balanced and evidence-based [33] [5].
Q2: My study doesn't have negative controls. Can I still use the filtering loss statistic?
Yes. A significant advantage of the FL statistic is that it is calculated based on the data's covariance structure and does not require negative control samples. This makes it particularly valuable for analyzing existing datasets where such controls were not collected. However, for the most robust decontamination, it is always recommended to use the FL statistic in conjunction with control-based methods if controls are available [33] [44].
Q3: How does filtering loss complement other decontamination methods like decontam or SCRuB?
The FL statistic is not a decontamination method itself but rather an evaluation tool. Methods like decontam (control- or prevalence-based) and SCRuB (which can account for well-to-well leakage) are used to identify and remove contaminants [33] [5]. The FL statistic is then applied to quantify the impact of that removal. They are complementary steps in a robust workflow: first decontaminate, then use FL to check if the filtering was too extreme [33].
Q4: What is an acceptable threshold for the FL statistic?
There is no universal "safe" threshold for FL, as its interpretation can depend on the specific study and the level of initial contamination. The key is to interpret the FL value in context. A high FL value should prompt a careful re-examination of the decontamination parameters and the features that were removed. It may be necessary to iterate with a less stringent decontamination approach and re-calculate the FL value to find an optimal balance [33].
Troubleshooting Guide: Common Scenarios and Solutions
| Problem Scenario | Potential Causes | Recommended Solutions |
|---|---|---|
| High Filtering Loss (FL) after decontamination. | Overly aggressive contaminant identification; removal of true signal mistaken for contamination. | 1. Re-run decontamination with less stringent thresholds.2. Manually inspect the list of removed taxa for known, plausible commensals or pathogens.3. Consider using a different decontamination pipeline (e.g., "Original Composition Estimation" in micRoclean which performs partial read removal instead of full feature removal) [33]. |
| Low Filtering Loss (FL) but known contaminants are still visually present in ordination plots. | The decontamination method was too weak and failed to remove impactful contaminants. | 1. Apply a more stringent decontamination method or threshold.2. If available, leverage negative control samples to inform the decontamination process using a tool like decontam [44] [5].3. Use the FL statistic to validate that the new, more stringent filtering does not cause a high loss of covariance. |
| Inconsistent FL values across different batches of samples. | Batch effects; contamination profiles or levels may differ significantly between processing batches. | 1. Decontaminate and calculate FL separately for each batch.2. Apply batch effect correction methods after decontamination [45] [5].3. Ensure the study design avoids batch confounding (e.g., cases and controls processed in the same batch) [5]. |
Experimental Protocols and Workflows
Protocol: Implementing Filtering Loss withmicRoclean
The micRoclean R package provides a streamlined framework that integrates decontamination with the calculation of the FL statistic. It offers two primary pipelines, and choosing the correct one is vital [33].
1. Choosing the Right Pipeline:
- Research Goal = "orig.composition" (Original Composition Estimation Pipeline): This pipeline is ideal when the goal is to estimate the sample's original microbial composition as accurately as possible. It is the best choice if you are concerned about well-to-well leakage and have well location information for your samples. This pipeline implements the SCRuB method, which can partially remove reads instead of entire features, thus preserving some signal from contaminated taxa [33].
- Research Goal = "biomarker" (Biomarker Identification Pipeline): This pipeline is designed to be more stringent, aiming to remove all likely contaminant features to minimize false discoveries in downstream biomarker analysis. It is particularly suited for multi-batch studies [33].
2. Step-by-Step Methodology:
- Input Data: Prepare your data as a sample (n) by feature (p) count matrix and a corresponding metadata dataframe. The metadata must include a column identifying control samples and a column specifying batch information [33].
- Run micRoclean: Execute the
micRocleanfunction with your chosenresearch_goalparameter. - Automatic Well-to-Well Check: The function will automatically run the
well2wellsub-function. If the estimated level of well-to-well contamination is above 0.10, a warning will be issued, recommending the use of the "orig.composition" pipeline with actual well-location data [33]. - Output: The function returns a decontaminated count matrix and the calculated Filtering Loss (FL) value [33].
- Interpretation: Use the FL value as described in Section 2 to assess the severity of the filtering impact.
The workflow for this protocol, including the pivotal decision point between pipelines, is summarized in the following diagram:
Protocol: Complementary Use of Filtering and Control-Based Decontamination
Research shows that prevalence-based filtering and control-based decontamination have complementary effects and are advised to be used in conjunction [44]. This protocol outlines how to combine them.
1. Preprocessing with Prevalence Filtering:
- Action: Apply a prevalence filter to remove taxa that are present in a small number of samples with low counts. A common rule of thumb is to remove taxa with a relative abundance below 0.01% in fewer than 5-10% of samples [44] [46]. This reduces data sparsity and technical noise.
- Tool: This can be done using R packages like
phyloseqorgenefilter[44] [45].
2. Application of Control-Based Decontamination:
- Action: Use a tool like
decontam(with its "prevalence" or "frequency" mode) to identify contaminants based on their pattern in negative control samples [44] [5]. - Tool: R package
decontam.
3. Quantifying Impact with Filtering Loss:
- Action: After running
decontam, calculate the FL statistic on the resulting filtered count matrix. This quantifies the collective impact of both the initial prevalence filtering and the subsequent control-based decontamination [33] [44].
The Scientist's Toolkit: Essential Research Reagents and Materials
For a methodologically sound low-biomass microbiome study, the wet-lab and dry-lab tools must work in concert. The following table lists key reagents and materials critical for generating reliable data and enabling effective decontamination and filtering loss analysis.
| Item | Function in Low-Biomass Research | Key Considerations |
|---|---|---|
| Negative Controls (e.g., blank extraction, no-template controls) [5] [4] | Serves as a profile of contaminating DNA from reagents and the laboratory environment. Essential for control-based decontamination tools. | Should be included for every batch of samples. Multiple types of controls (e.g., kit blanks, water blanks) are recommended to capture different contamination sources [5]. |
| DNA Removal Solution (e.g., bleach, UV-C light, commercial kits) [4] | Decontaminates sampling equipment, work surfaces, and tools to minimize the introduction of external DNA during sample collection and processing. | Sterility (killing cells) is not the same as being DNA-free. A DNA removal or degradation step is critical for low-biomass work [4]. |
| Personal Protective Equipment (PPE) [4] | Acts as a barrier to prevent contamination of samples from the researcher (e.g., skin cells, saliva droplets). | More extensive PPE (e.g., cleanroom suits, masks, multiple glove layers) is recommended for the lowest biomass samples to reduce human-derived contamination [4]. |
| Standardized Mock Communities [44] [47] | Positive controls with a known composition of microbes. Used to validate the entire workflow, from DNA extraction to bioinformatics, including the accuracy of decontamination and filtering. | Helps distinguish between technical artifacts and true biological signal, providing a benchmark for method performance. |
R Packages: micRoclean, decontam, phyloseq, `PERFect [33] [44] [45] |
Software tools for decontamination, filtering, calculating the FL statistic, and general microbiome data analysis. | micRoclean directly calculates FL. decontam requires negative controls. PERFect offers a permutation-based filtering approach. Choosing the right tool depends on the study design and goals [33] [44]. |
The table below synthesizes key quantitative findings and thresholds related to filtering and decontamination from the cited literature, providing a quick reference for researchers.
| Metric or Threshold | Quantitative Value / Range | Context and Interpretation | Source |
|---|---|---|---|
| Well-to-Well Contamination Warning | > 0.10 (10%) | In micRoclean, a well-to-well leakage estimate above this threshold triggers a warning, suggesting the "Original Composition Estimation" pipeline should be used with actual well-location data. |
[33] |
| Typical Species in Human Gut (Shotgun) | 150 - 400 | The number of bacterial species typically detected per sample in human gut metagenomic studies using MetaPhlAn4, providing a benchmark for expected feature space in a high-biomass environment. | [46] |
| Common Prevalence Filtering Threshold | Relative abundance >= 0.01% in >= 5-20% of samples | A commonly used rule-of-thumb for prevalence filtering to remove rare taxa while preserving core signals, especially for co-occurrence network analysis. | [46] |
| Filtering Loss (FL) Statistic Range | 0 to 1 | The theoretical range of the FL statistic. A value near 0 indicates minimal covariance loss (good), while a value near 1 indicates major structural change and potential over-filtering (bad). | [33] |
Comparative Analysis of Decontam, SCRuB, and micRoclean
The investigation of microbial communities in low-biomass environments—such as human blood, tissues, placenta, and other extreme environments—presents unique challenges that distinguish it from high-biomass microbiome research [4] [5]. In these environments, where microbial DNA is scarce, contamination from external sources can constitute a substantial proportion of the sequenced DNA, potentially obscuring true biological signals and generating artifactual findings [3] [48]. This contamination problem has been at the center of several scientific controversies, most notably in debates surrounding the existence of a placental microbiome [49] [48]. The research community has responded by developing computational methods to identify and remove contaminating sequences, with Decontam, SCRuB, and micRoclean representing three prominent approaches with distinct methodological foundations and applications.
Contamination in microbiome studies primarily originates from two sources: external contamination from reagents, laboratory environments, or personnel; and cross-contamination between samples, often termed "well-to-well leakage" [4] [5]. The proportional impact of these contamination sources is dramatically amplified in low-biomass samples, where the authentic microbial signal may be minimal. Consequently, specialized computational tools have become essential for accurate biological interpretation [3] [48]. This technical support document provides a comprehensive comparative analysis of three leading decontamination tools, offering practical guidance for researchers navigating the challenges of low-biomass microbiome research.
Key Characteristics of Decontam, SCRuB, and micRoclean
Table 1: Overview of Decontamination Tools for Low-Biomass Microbiome Data
| Feature | Decontam | SCRuB | micRoclean |
|---|---|---|---|
| Primary Methodology | Statistical classification using prevalence/frequency patterns | Probabilistic source-tracking modeling | Dual-pipeline framework integrating existing methods |
| Contamination Model | Binary classification (contaminant vs. non-contaminant) | Partial removal accounting for mixed origins | Pipeline-dependent (partial or full removal) |
| Well-to-well Leakage Handling | No | Yes | Yes (via SCRuB integration) |
| Multiple Batch Support | Limited | Limited | Yes (automated batch processing) |
| Input Requirements | Feature table + DNA concentration OR negative controls | Feature table + negative controls + spatial information (optional) | Feature table + metadata (control info, batch, well location) |
| Output | Filtered feature table with contaminants removed | Decontaminated count matrix with partial contaminants removed | Decontaminated count matrix + filtering loss statistic |
| Best Suited For | Initial contaminant screening in standard designs | Precision decontamination with well-to-well leakage | Multi-batch studies with clear research goals |
Methodological Approaches and Theoretical Foundations
Decontam employs straightforward statistical classification based on two reproducible patterns of contamination: contaminants typically appear at higher frequencies in low-DNA-concentration samples and demonstrate higher prevalence in negative controls compared to true samples [48] [50]. The package offers two complementary identification methods: frequency-based detection, which identifies contaminants through their inverse relationship with sample DNA concentration, and prevalence-based detection, which identifies contaminants through their overrepresentation in negative control samples [48] [50]. This approach operates on binary classification, completely removing features identified as contaminants.
SCRuB implements a more sophisticated probabilistic framework inspired by source-tracking methods [49]. Rather than binary classification, SCRuB models each sample as a mixture of true biological content and contamination from shared sources, enabling partial removal of contaminant sequences [49]. This nuanced approach is particularly valuable for taxa that may be both genuine community members and contaminants. A key innovation in SCRuB is its explicit modeling of well-to-well leakage, which accounts for the transfer of material between adjacent samples during processing [49].
micRoclean represents a meta-framework that integrates and extends existing decontamination approaches [3]. Its innovation lies in providing two distinct pipelines tailored to different research goals: an "Original Composition Estimation" pipeline (based on SCRuB) for characterizing sample compositions as accurately as possible, and a "Biomarker Identification" pipeline for aggressively removing all likely contaminants to protect downstream association analyses [3]. Additionally, micRoclean introduces a filtering loss statistic to quantify the impact of decontamination on the overall covariance structure of the data, helping researchers avoid over-filtering [3].
Performance Characteristics and Quantitative Comparisons
Performance Metrics and Benchmarking Results
Table 2: Performance Comparison Based on Data-Driven Simulations
| Performance Metric | Decontam | SCRuB | micRoclean |
|---|---|---|---|
| Accuracy (No Well-to-well Leakage) | Moderate (improves over no decontamination) | High (15-20x improvement over alternatives) | Matches or outperforms similar tools |
| Accuracy (With Well-to-well Leakage) | Poor (can perform worse than no decontamination) | High (maintains performance with 5-25% leakage) | Maintains performance (via SCRuB pipeline) |
| Low-Biomass Optimization | Limited (frequency method breaks down when C~S or C>S) | Robust across biomass levels | Specifically designed for low-biomass |
| Handling of Mixed-Source Taxa | Binary removal (all or nothing) | Partial removal (proportional to contamination) | Pipeline-dependent (partial or full) |
| Multi-Batch Processing | Manual processing required | Manual processing required | Automated batch handling |
Empirical evaluations demonstrate that SCRuB outperforms alternative methods by an average of 15-20x in data-driven simulations across various contamination levels (5-25%) and well-to-well leakage scenarios (5-25%) [49]. This performance advantage is particularly pronounced when well-to-well leakage is present, as SCRuB's explicit modeling of spatial contamination maintains accuracy where other methods deteriorate [49]. Decontam shows reasonable performance in the absence of well-to-well leakage but can perform worse than no decontamination when leakage is present [49]. micRoclean matches or outperforms tools with similar objectives, with the additional advantage of automated multi-batch processing [3].
Technical Support Center: Troubleshooting Guides and FAQs
Frequently Asked Questions
Q1: How do I choose between Decontam, SCRuB, and micRoclean for my specific research study?
The choice depends on your research goals, experimental design, and the specific challenges of your dataset:
- Select Decontam for straightforward contaminant identification when you have either DNA concentration data or negative controls, and when well-to-well leakage is not a major concern [48] [50].
- Choose SCRuB when dealing with significant well-to-well leakage, when you have access to negative controls and spatial information, and when precision decontamination with partial removal of mixed-origin taxa is needed [49].
- Opt for micRoclean when working with multiple processing batches, when you need guidance on pipeline selection based on research goals, or when you want to quantify potential over-filtering through the filtering loss statistic [3].
Q2: What are the minimal control requirements for effective decontamination with each tool?
- Decontam: Requires either (1) quantitative DNA measurements for all samples for frequency-based method OR (2) negative controls for prevalence-based method [48] [50].
- SCRuB: Requires negative controls; spatial information (well locations) is optional but strongly recommended to account for well-to-well leakage [49].
- micRoclean: Requires a metadata matrix specifying control samples and group names; batch and well location columns are optional but recommended [3].
Q3: I'm working with extremely low-biomass samples where contaminants may dominate. Which tool is most appropriate?
For extremely low-biomass samples where contaminant DNA may approach or exceed authentic signal (C~S or C>S), Decontam's frequency-based method may break down [48] [51]. In these scenarios, SCRuB or micRoclean's Original Composition Estimation pipeline (which uses SCRuB) are generally more appropriate as they can handle cases where biological material is minimal [3] [49]. Additionally, the filtering loss statistic in micRoclean can help identify potential over-filtering in these challenging datasets [3].
Q4: How do I handle decontamination when my samples were processed in multiple batches?
When working with multiple batches, micRoclean provides distinct advantages as it automatically handles batch processing within a single line of code, preventing improper decontamination that can occur when batches are processed separately [3]. With Decontam or SCRuB, users must manually split data by batch, decontaminate separately, and recombine, which introduces potential for error [3] [49].
Q5: What should I do if I don't have well location information for my samples?
If well location information is unavailable, micRoclean can assign pseudo-locations by assuming a common order of samples in a 96-well plate format, then estimate well-to-well leakage using SCRuB's spatial functionality [3]. If the estimated leakage exceeds 10%, the package will flag this concern and recommend obtaining proper well location data [3].
Troubleshooting Common Issues
Problem: Unexpected removal of seemingly abundant taxa after decontamination.
- Possible Cause: True contaminants can be abundant, particularly in low-biomass samples where they may dominate the signal.
- Solution: Validate removal decisions by cross-referencing with known contaminant databases and literature for your sample type. With micRoclean, check the filtering loss statistic - values closer to 1 may indicate over-filtering [3].
Problem: Poor decontamination performance with evidence of well-to-well leakage.
- Possible Cause: Most decontamination tools except SCRuB do not account for well-to-well leakage, which can violate their assumptions.
- Solution: Implement SCRuB directly or through micRoclean's Original Composition Estimation pipeline, ensuring you provide well location data [49].
Problem: Inconsistent results between Decontam's frequency and prevalence methods.
- Possible Cause: The two methods identify different aspects of contamination and may not always agree.
- Solution: Use both methods complementarily - sequences identified as contaminants by either method likely represent true contaminants, while those identified by both methods with high confidence are the strongest candidates for removal [50].
Experimental Design and Protocol Guidance
Essential Research Reagent Solutions
Table 3: Essential Controls and Reagents for Effective Decontamination
| Reagent/Control Type | Function | Implementation in Decontamination |
|---|---|---|
| Extraction Blank Controls | Identifies contaminants introduced during DNA extraction | Used in Decontam (prevalence), SCRuB, and micRoclean to identify reagent-derived contaminants |
| PCR No-Template Controls | Detects contamination introduced during amplification | Used primarily in Decontam's prevalence method to identify amplification contaminants |
| Sample Collection Blanks | Identifies contaminants from collection materials and procedures | Provides comprehensive contamination profile across all methods |
| DNA Quantification Data | Measures total DNA for frequency-based contaminant identification | Essential for Decontam's frequency method; not required for SCRuB or micRoclean's prevalence modes |
| Spatial Layout Maps | Documents well locations for leakage correction | Critical for SCRuB and micRoclean's well-to-well leakage correction |
Protocol Implementation: Step-by-Step Guide
Implementing Decontam with Prevalence Method:
- Prepare a feature table (samples × features) and import into R as a phyloseq object or matrix.
- Create a logical vector indicating negative control samples (TRUE for controls, FALSE for true samples).
- Run the prevalence method:
contamdf.prev <- isContaminant(ps, method="prevalence", neg="is.neg"). - Inspect results:
table(contamdf.prev$contaminant)shows number of contaminants identified. - Remove contaminants:
ps.noncontam <- prune_taxa(!contamdf.prev$contaminant, ps)[50].
Implementing micRoclean's Biomarker Identification Pipeline:
- Prepare a sample × feature count matrix and corresponding metadata with control indicators.
- Run the biomarker pipeline:
micRoclean_output <- micRoclean(count_matrix, metadata, research_goal = "biomarker"). - Review the filtering loss statistic in the output to assess potential over-filtering.
- Extract the decontaminated count matrix for downstream analysis [3].
Implementing SCRuB with Spatial Information:
- Prepare count data and metadata including well locations for all samples and controls.
- Run SCRuB:
scrub_output <- SCRuB(count_matrix, control_indices, well_locations). - The output will contain a decontaminated count matrix with partial contaminants removed [49].
Workflow Visualization and Decision Framework
Diagram 1: Decision Framework for Selecting Decontamination Tools. This workflow guides researchers in selecting the most appropriate decontamination tool based on their experimental design and research objectives.
The comparative analysis of Decontam, SCRuB, and micRoclean reveals a maturation of computational approaches for addressing contamination in low-biomass microbiome studies. Each tool offers distinct strengths: Decontam provides accessibility and straightforward implementation, SCRuB offers superior accuracy particularly when well-to-well leakage is present, and micRoclean delivers flexibility and batch processing convenience. The optimal choice depends fundamentally on the specific research context, experimental design, and analytical goals.
For researchers planning low-biomass studies, we recommend the following integrated best practices:
- Implement comprehensive controls during experimental design, including extraction blanks, PCR controls, and collection blanks to enable effective computational decontamination [4] [5].
- Document spatial information including well locations during laboratory processing to facilitate correction of well-to-well leakage [49].
- Avoid batch confounding by ensuring experimental batches contain balanced representation of sample groups to prevent artifactual associations [5].
- Validate decontamination results through multiple approaches, including comparison with known contaminant databases and assessment of biological plausibility.
As low-biomass microbiome research continues to evolve, these decontamination tools will play an increasingly critical role in ensuring the accuracy and reliability of scientific findings. By selecting the appropriate tool for their specific research context and implementing it with careful attention to experimental design, researchers can dramatically improve their ability to distinguish true biological signals from technical artifacts in challenging low-biomass environments.
Reporting Standards and Checklists for Transparent Contamination Management
In low-biomass microbiome studies, where microbial DNA is minimal, contamination management is not merely a procedural step but a foundational element of research integrity. Environments such as certain human tissues (placenta, blood, lungs), the atmosphere, and treated drinking water are particularly vulnerable, as contaminating DNA can drastically outweigh the true biological signal, leading to spurious conclusions [4] [5]. This technical support center provides a structured framework of guidelines, troubleshooting guides, and standard operating procedures to help researchers navigate the complex challenge of contamination. Adopting these practices is crucial for producing reliable, reproducible, and interpretable data in this sensitive field.
Frequently Asked Questions (FAQs) and Troubleshooting
Q1: My negative controls still show microbial signals after DNA extraction and sequencing. Does this invalidate my entire study?
Not necessarily. The presence of microbial DNA in negative controls is expected and, in fact, demonstrates that your controls are working. The critical step is how you account for this in your data analysis.
- Actionable Solution: Utilize computational decontamination tools that leverage your control data. Methods such as
Squeegee(a de novo algorithm) ordecontam(common in R) are designed to identify and subtract contaminants present in both your controls and true samples [52]. The key is to report the contaminants you have removed and the method used transparently, as per the STORMS and other reporting checklists [53] [4].
Q2: How can I tell if a microbe we've detected is a true signal or contamination?
There is no single definitive test, but a combination of approaches increases confidence.
- Check for Ubiquity: Is the microbe consistently found in your negative controls? If so, it is likely a contaminant [4] [7].
- Consider the Source: Is the microbe a known reagent contaminant (e.g., Comamonadaceae, Burkholderiaceae)? Does its presence make biological sense for the sample type? [5] [7]
- Abundance Correlation: In your true samples, is the abundance of the microbe significantly higher than its level in your controls? True signals are often more abundant [4].
- Use Computational Tools: Apply contamination identification algorithms that can flag sequences likely originating from contaminants, even in the absence of a perfect control [52].
Q3: What is the single most important step I can take during experimental design to avoid contamination issues?
The most critical step is to avoid batch confounding. This means ensuring that your groups of interest (e.g., cases vs. controls) are not processed in separate, non-randomized batches (e.g., all cases extracted on one day and all controls on another) [5].
- Actionable Solution: Actively randomize or balance your sample processing order so that each DNA extraction batch, sequencing run, and other processing steps contain a similar mix of cases, controls, and all relevant sample types. Tools like
BalanceITcan help design unconfounded batches [5]. This prevents technical artifacts from being misinterpreted as biological signals.
Q4: We are collecting clinical samples in a busy hospital with limited access to a cleanroom. How can we ensure sample integrity?
While ideal conditions are not always available, several practical measures can significantly reduce contamination risk during sampling.
- Use PPE: Consistently use sterile gloves, masks, and lab coats to minimize contamination from personnel [4] [11].
- Single-Use, Sterile Materials: Utilize single-use, DNA-free swabs and collection vessels whenever possible [4].
- On-Site Controls: Collect multiple types of field controls, such as swabs of the air, the patient's skin near the sampling site, or an aliquot of sterile solution exposed to the air during the procedure [4] [5]. These are essential for contextualizing your findings.
- Immediate Preservation: Use preservative buffers (e.g., AssayAssure, OMNIgene·GUT) designed to maintain microbial stability if immediate freezing at -80°C is not feasible [11].
Experimental Protocols for Contamination Management
Protocol 1: Designing and Implementing Process Controls
Process controls are blank samples that undergo the entire experimental workflow alongside your real samples to capture contaminating DNA from all sources [4] [5].
Detailed Methodology:
- Types of Controls to Include:
- Kit/Reagent Blanks: Include an empty tube from the moment of sample collection or add sterile water to a DNA extraction kit to profile contaminants inherent to your reagents and kits [5].
- Extraction Blanks: Process a tube containing only the lysis or preservation buffer used in your samples through the DNA extraction and library preparation process [5].
- Library Preparation Controls: Include a no-template control (water) during the PCR amplification and library preparation steps [5].
- Replication and Placement: For each type of control, include at least two replicates. Distribute them across your entire experiment—in every sample plating scheme, every DNA extraction batch, and every sequencing run—to account for spatial and temporal variation in contamination [5].
- Documentation: Meticulously log the manufacturer and lot numbers for all kits and reagents used, as contamination profiles can vary between production batches [53] [11].
Protocol 2: Decontaminating Sampling Equipment and Environment
For equipment that must be re-used, proper decontamination is essential to remove both viable cells and trace DNA.
Detailed Methodology:
- Initial Cleaning: Physically clean the equipment to remove any residue.
- Cell Inactivation: Soak or wipe the equipment with 80% ethanol to kill contaminating microorganisms [4].
- DNA Destruction: Treat the equipment with a DNA-degrading agent. A 1-10% (v/v) sodium hypochlorite (bleach) solution is highly effective. Alternatively, UV-C light irradiation or commercial DNA removal solutions can be used [4].
- Critical Note: Autoclaving and ethanol alone do not fully remove persistent DNA fragments. A dedicated DNA-destruction step is crucial for low-biomass work [4].
- Rinsing and Storage: Rinse the equipment thoroughly with DNA-free water (if applicable) and store in a sealed, clean container to prevent recontamination.
Workflow Visualization
The following diagram illustrates the integrated workflow for contamination management, from experimental design to final reporting, as recommended by current guidelines [4] [53] [5].
The Scientist's Toolkit: Essential Materials and Reagents
The table below lists key solutions and their functions for effective contamination management in low-biomass microbiome research.
| Item | Function in Contamination Management | Key Considerations |
|---|---|---|
| Sodium Hypochlorite (Bleach) | Degrades contaminating DNA on surfaces and non-disposable equipment [4]. | Typically used at 1-10% (v/v). Requires rinsing with DNA-free water after use. |
| UV-C Light Source | Sterilizes surfaces and equipment by damaging DNA and preventing amplification [4]. | Effective for destroying airborne contaminants and sterilizing clean benches and plasticware. |
| DNA Removal Solutions | Commercial solutions designed to enzymatically degrade DNA residues [4]. | Often more specific and less corrosive than bleach. Follow manufacturer's instructions. |
| Preservative Buffers | Stabilize microbial community DNA at room temperature or 4°C when immediate freezing is not possible [11]. | Effectiveness varies; validation for specific sample types is recommended (e.g., AssayAssure, OMNIgene·GUT). |
| Personal Protective Equipment | Forms a physical barrier to prevent contamination from researchers (skin, hair, aerosols) [4] [11]. | Should include sterile gloves, masks, coveralls, and hairnets. Gloves should be changed frequently. |
| Computational Tools | Identifies and removes contaminant sequences from final datasets [52]. | Tools like Squeegee can operate without dedicated controls; others like decontam use control data. |
Adherence to standardized reporting checklists is paramount for transparency and reproducibility. The following table summarizes quantitative and qualitative elements that should be reported regarding contamination management.
| Reporting Aspect | Specific Element to Report | Source Guideline |
|---|---|---|
| Study Design | Description of how batch effects were controlled (e.g., randomization). | STORMS [53] |
| Sample Collection | Types of field controls collected (e.g., air swabs, kit blanks). | Low-Biomass Guidelines [4] |
| Laboratory Methods | Number and type of process controls per batch (e.g., extraction blanks). | Low-Biomass Guidelines [4] [5] |
| Decontamination Protocols | Detailed methods for equipment decontamination (e.g., "1% bleach treatment"). | Low-Biomass Guidelines [4] |
| Data Analysis | Name and version of decontamination algorithm used, and details of contaminants removed. | STORMS, Low-Biomass Guidelines [4] [53] |
| Reagent Information | Manufacturer and lot numbers for all kits and reagents used. | STORMS [53] |
Conclusion
Successfully navigating low-biomass microbiome research requires a holistic and vigilant approach that integrates meticulous experimental design with sophisticated computational correction. There is no single solution; rather, reliability is achieved by combining rigorous contamination-aware sampling, a comprehensive strategy of process controls, and the judicious application of bioinformatic tools tailored to the study's goals. The field is moving towards standardized reporting and more powerful, strain-resolved methodologies to further enhance reproducibility. As these practices become mainstream, they will solidify the foundation of low-biomass microbiome science, enabling robust discoveries that can confidently inform future diagnostic and therapeutic applications in biomedicine.
References
- 1. How to deal with contaminations that might be partly real [https://forum.qiime2.org/t/how-to-deal-with-contaminations-that-might-be-partly-real/1292]
- 2. for Controlling in Contaminants - Low 16S rRNA Gene... Biomass [https://pubmed.ncbi.nlm.nih.gov/31164452/]
- 3. Frontiers | micRoclean: an R package for decontaminating... [https://www.frontiersin.org/journals/bioinformatics/articles/10.3389/fbinf.2025.1556361/full]
- 4. Guidelines for preventing and reporting contamination in ... [https://www.nature.com/articles/s41564-025-02035-2]
- 5. Planning and analyzing a low-biomass microbiome study [https://pmc.ncbi.nlm.nih.gov/articles/PMC12445924/]
- 6. Identification and removal of contaminating microbial DNA from PCR... [https://pubmed.ncbi.nlm.nih.gov/30383890/]
- 7. Contamination in Low Microbial Biomass Microbiome Studies [https://www.sciencedirect.com/science/article/abs/pii/S0966842X18302531]
- 8. Issues and current standards of controls in microbiome ... [https://pmc.ncbi.nlm.nih.gov/articles/PMC6469980/]
- 9. Optimizing methods and dodging pitfalls in microbiome research [https://microbiomejournal.biomedcentral.com/articles/10.1186/s40168-017-0267-5]
- 10. Comprehensive Microbial Control Strategy [https://www.bioprocessintl.com/qa-qc/beyond-traditional-microbiology-testing-developing-a-comprehensive-strategy-for-microbial-control-and-detection]
- 11. Best Practice Guidelines for Collecting Microbiome ... [https://www.sciencedirect.com/science/article/abs/pii/S2405456924002657]
- 12. Evaluating urine volume and host depletion methods to ... [https://microbiomejournal.biomedcentral.com/articles/10.1186/s40168-025-02191-x]
- 13. Lessons learned from the prenatal microbiome controversy [https://microbiomejournal.biomedcentral.com/articles/10.1186/s40168-020-00946-2]
- 14. Guidelines for preventing and reporting contamination in... [https://www.nature.com/articles/s41564-025-02035-2?error=cookies_not_supported&code=0502396d-230e-464c-a7a6-e0ca12082356]
- 15. Challenges and Opportunities in Analyzing Cancer- ... [https://pmc.ncbi.nlm.nih.gov/articles/PMC12419811/]
- 16. in Contamination Microbial Low ... Biomass Microbiome Studies [https://pubmed.ncbi.nlm.nih.gov/30497919/]
- 17. Is there a placental microbiota? A critical review and re ... [https://pmc.ncbi.nlm.nih.gov/articles/PMC10024458/]
- 18. Exploring the composition of placental microbiome and its ... [https://pmc.ncbi.nlm.nih.gov/articles/PMC11779731/]
- 19. Evidence for contamination as the origin for bacteria found in ... [https://journals.plos.org/plosone/article?id=10.1371/journal.pone.0237232]
- 20. The Cancer Microbiome: Distinguishing Direct and Indirect ... [https://pmc.ncbi.nlm.nih.gov/articles/PMC7098063/]
- 21. Tips & Tricks to Reduce Bioburden for Microbiome Analyses [https://www.zymoresearch.com/blogs/blog/tips-tricks-to-reduce-bioburden?srsltid=AfmBOordPyznHMT0dm_l3OPRnt1U7wksM_PsrUQ0wb-rgQYE0vFJ_xzm]
- 22. affect the internal microbiota of ticks - PMC Decontamination protocols [https://pmc.ncbi.nlm.nih.gov/articles/PMC10249182/]
- 23. Bacterial and fungal bioburden reduction on material ... [https://www.frontiersin.org/journals/microbiology/articles/10.3389/fmicb.2023.1253436/full]
- 24. Quantifying and Understanding Well-to- ... [https://pmc.ncbi.nlm.nih.gov/articles/PMC6593221/]
- 25. De novo identification of microbial contaminants in low ... [https://pmc.ncbi.nlm.nih.gov/articles/PMC9649624/]
- 26. Microbiome data integration via shared dictionary learning [https://www.nature.com/articles/s41467-025-63425-y]
- 27. Melody: meta-analysis of microbiome association studies for ... [https://genomebiology.biomedcentral.com/articles/10.1186/s13059-025-03721-4]
- 28. Benchmarking MicrobIEM – a user-friendly tool ... - BMC Biology [https://bmcbiol.biomedcentral.com/articles/10.1186/s12915-023-01737-5]
- 29. Avoiding Contamination | Thermo Fisher Scientific - ES [https://www.thermofisher.com/us/en/home/life-science/pcr/real-time-pcr/real-time-pcr-learning-center/real-time-pcr-basics/good-laboratory-practice-avoid-contamination-qpcr-experiments.html]
- 30. Seven tips for avoiding DNA contamination in your PCR [https://www.takarabio.com/about/bioview-blog/tips-and-troubleshooting/avoid-dna-contamination-in-pcr?srsltid=AfmBOop9Fzi8TKASLljVAQhJ71PcIFd0g-1ib7ltu8Ag2j86_6LdRagp]
- 31. How to Reduce Sample Contamination [https://blog.omni-inc.com/blog/how-to-reduce-sample-contamination]
- 32. Benchmarking laboratory processes to characterise low ... [https://www.nature.com/articles/s41598-021-96556-5]
- 33. micRoclean: an R package for decontaminating - low ... biomass [https://pmc.ncbi.nlm.nih.gov/articles/PMC12095030/]
- 34. Green Cleaner: Advanced Decontamination ... | Research Square [https://www.researchsquare.com/article/rs-4921725/v1]
- 35. De novo identification of microbial contaminants in low microbial... [https://www.nature.com/articles/s41467-022-34409-z?error=cookies_not_supported&code=c2451476-ec46-470f-8fc0-233345d72f80]
- 36. Using strain-resolved analysis to identify contamination in ... [https://microbiomejournal.biomedcentral.com/articles/10.1186/s40168-023-01477-2]
- 37. High-resolution strain-level microbiome composition analysis ... [https://microbiomejournal.biomedcentral.com/articles/10.1186/s40168-023-01615-w]
- 38. identification of microbial De in low microbial... novo contaminants [https://www.nature.com/articles/s41467-022-34409-z?error=cookies_not_supported&code=349345e8-33aa-466c-8acc-b05a71fe0548]
- 39. Meet Squeegee: A new contamination detection tool for ... [https://blogs.bcm.edu/2022/12/06/from-the-labs-meet-squeegee-a-new-contamination-detection-tool-for-low-microbial-biomass-microbiomes/]
- 40. Meet Squeegee : A new contamination detection tool for... | ScienceDaily [https://www.sciencedaily.com/releases/2022/12/221206204817.htm]
- 41. De novo identification of microbial contaminants in low ... [https://www.nature.com/articles/s41467-022-34409-z]
- 42. Performance of Gut Microbiome as an Independent Diagnostic ... [https://pmc.ncbi.nlm.nih.gov/articles/PMC10161951/]
- 43. Protocol for microbial profiling of low-biomass upper ... [https://www.sciencedirect.com/science/article/pii/S2666166725001467]
- 44. Frontiers | Effects of Rare Microbiome Taxa Filtering on Statistical... [https://www.frontiersin.org/journals/microbiology/articles/10.3389/fmicb.2020.607325/full]
- 45. pre-processing for analyzing Data – A mini review... microbiome data [https://pmc.ncbi.nlm.nih.gov/articles/PMC10569954/]
- 46. Rescaling after relative abundance filtering of gut microbiome data [https://www.biostars.org/p/9615831/]
- 47. ASVs/OTUs via mutual information-based Filtering ... microbiome [https://bmcbioinformatics.biomedcentral.com/articles/10.1186/s12859-022-04919-0]
- 48. Simple statistical identification and removal of contaminant ... [https://microbiomejournal.biomedcentral.com/articles/10.1186/s40168-018-0605-2]
- 49. Contamination source modeling with SCRuB improves cancer ... [https://pmc.ncbi.nlm.nih.gov/articles/PMC10504420/]
- 50. Introduction to decontam [https://benjjneb.github.io/decontam/vignettes/decontam_intro.html]
- 51. Decontam with extremely low biomass samples · Issue #50 [https://github.com/benjjneb/decontam/issues/50]
- 52. Researchers develop algorithm to identify microbial ... [https://www.bcm.edu/news/researchers-develop-algorithm-to-identify-microbial-contaminants-in-low-microbial-biomass-microbiomes]
- 53. Reporting guidelines for human microbiome research [https://www.nature.com/articles/s41591-021-01552-x]