SYPRO Ruby Staining for Biofilm Matrix Proteins: A Complete Guide from Principles to Advanced Applications
This comprehensive guide explores the application of SYPRO Ruby stain for visualizing extracellular proteins within the complex structure of biofilm matrices.
SYPRO Ruby Staining for Biofilm Matrix Proteins: A Complete Guide from Principles to Advanced Applications
Abstract
This comprehensive guide explores the application of SYPRO Ruby stain for visualizing extracellular proteins within the complex structure of biofilm matrices. Tailored for researchers and drug development professionals, it covers fundamental principles, optimized staining protocols for various biofilm samples, advanced troubleshooting for common issues, and validation data comparing SYPRO Ruby with alternative techniques. The article synthesizes current methodologies and recent research findings to provide a complete resource for enhancing analytical capabilities in biofilm research, medical device development, and antimicrobial discovery.
Understanding SYPRO Ruby: Fundamental Principles for Biofilm Matrix Analysis
What is SYPRO Ruby? Defining the Fluorescent Protein Stain
SYPRO Ruby is a sensitive, ready-to-use fluorescent stain designed for the detection of proteins separated by polyacrylamide gel electrophoresis (PAGE). It is a premier tool in proteomics, offering significant advantages over traditional stains like Coomassie Blue and silver stain, particularly due to its wide dynamic range and minimal protein-to-protein variation [1]. Its application is also being explored in other research areas, including the study of the extracellular polymeric matrix (EPM) of biofilms, where it helps in visualizing the protein components of the matrix [2].
Key Properties and Advantages
SYPRO Ruby dye is a ruthenium-based compound that binds non-covalently to proteins through a mechanism believed to involve interaction with basic amino acids [1]. This binding is highly sensitive, allowing for detection of as little as 0.25 to 1 nanograms (ng) of protein in a gel spot [1]. Its fluorescent signal provides a linear dynamic range over three orders of magnitude, facilitating more reliable and accurate quantitative assessments of protein abundance compared to many other staining methods [1].
Fluorescence Profile
The table below summarizes the key spectral characteristics of SYPRO Ruby protein gel stain.
Table 1: Spectral Properties of SYPRO Ruby Protein Gel Stain
| Property | Specification | Source/Context |
|---|---|---|
| Excitation Peak(s) | 280 nm, 450 nm, ~467 nm [3] [1] | Can be excited with UV or blue light sources. |
| Emission Peak | ~610 nm, 631 nm [3] [1] | Emits in the red/far-red region. |
| Recommended Excitation Filter Sets | Blue light excitation filter sets (e.g., Nikon B-2A: 470/40 nm excitation, 515 nm LP emission) [4] | Compatible with standard UV or blue-light transilluminators and laser scanners. |
For researchers, this means SYPRO Ruby is compatible with standard imaging equipment equipped with appropriate filters, such as UV transilluminators, blue-light transilluminators, or laser scanners with 488 nm or 473 nm lasers [1]. The table below compares SYPRO Ruby with other common protein gel stains.
Table 2: Comparison of SYPRO Ruby with Other Protein Gel Stains
| Stain | Sensitivity | Dynamic Range | Staining Protocol | Compatibility with Downstream Analysis |
|---|---|---|---|---|
| SYPRO Ruby | 0.25 - 1 ng [1] | > 3 orders of magnitude [1] | Simple, one-step; no destaining required [1] | Compatible with MS and Edman sequencing [1] |
| Coomassie Blue | Slightly less than 1 ng (as infrared fluorescent stain) [5] | Linear dynamic range exceeds Sypro Ruby [5] | Multi-step; requires destaining [1] | Compatible [1] |
| Silver Stain | High (often < 1 ng) | Narrow, non-linear | Complex, multi-step; time-sensitive | Often incompatible due to cross-linking [1] |
| SYPRO Orange | 4 - 8 ng [1] | 3 orders of magnitude [1] | Rapid, 10-60 minutes [1] | Compatible with MS [1] |
A key comparative study noted that while SYPRO Ruby may detect marginally more protein spots (0.6% more of the proteome) in complex 2D gel analyses, Coomassie Blue when used as a near-infrared fluorescent stain offers a significantly broader linear dynamic range and a fraction of the cost, making it a viable alternative for many gel-based proteomics applications [5].
Application in Biofilm Matrix Research
In biofilm research, characterizing the components of the extracellular polymeric matrix (EPM) is crucial for understanding biofilm structure and function. The EPM is chemically complex, with proteins and carbohydrates as its major components, along with extracellular DNA (eDNA) [6]. SYPRO Ruby has been adapted as a FilmTracer stain specifically for labeling proteins within the biofilm matrix, enabling researchers to visualize this key structural element using tools like confocal laser scanning microscopy (CLSM) [2].
A core objective in this field is to understand the role of each matrix component. This is often investigated through enzymatic disruption experiments. For instance, proteinase K, an enzyme that degrades proteins, is used to specifically target and break down the proteinaceous parts of the biofilm matrix [6]. Treating a biofilm with proteinase K followed by staining with SYPRO Ruby can reveal the extent and importance of the protein network within the EPM.
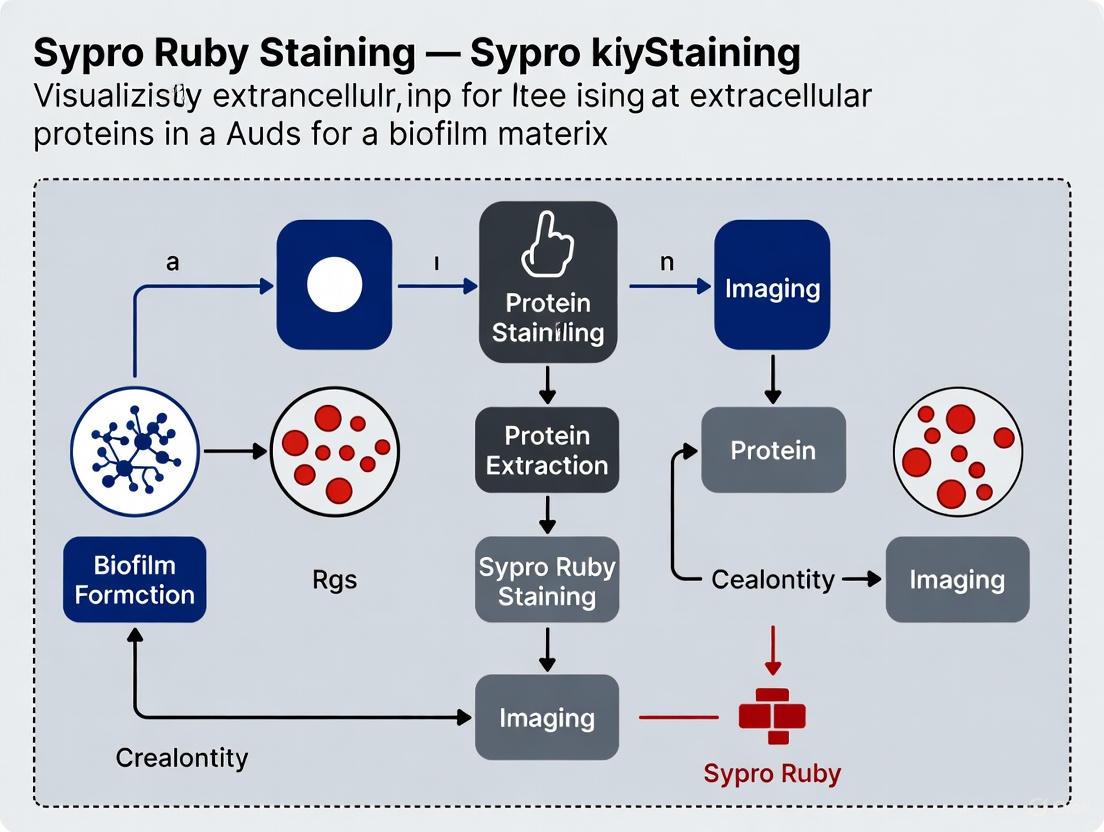
The following diagram illustrates a generalized experimental workflow for studying biofilm proteins using SYPRO Ruby staining and enzymatic treatment:
Detailed Protocol: SYPRO Ruby Staining of Biofilms
This protocol outlines the procedure for staining protein components in a mature biofilm, incorporating steps for enzymatic treatment based on established research methodologies [6].
Materials Required:
- FilmTracer SYPRO Ruby Biofilm Matrix Stain (Invitrogen, catalog #F10318) or equivalent [2].
- Proteinase K (e.g., supplied ready-to-use or as a lyophilized powder) [6].
- Appropriate buffer (e.g., Phosphate-Buffered Saline (PBS) or Tris-HCl).
- Biofilm samples grown on a suitable substrate (e.g., glass coverslip, in a petri dish).
- Fixative solution (e.g., 2-4% paraformaldehyde or methanol).
- Confocal microscope or other fluorescence imaging system with appropriate filters (excitation ~467 nm/emission ~631 nm) [3] [4].
Procedure:
- Biofilm Cultivation: Grow biofilms using a dynamic (e.g., flow cell) or static model (e.g., in petri dishes) under relevant conditions for your bacterial species (e.g., anaerobic for P. gingivalis) [6].
- Fixation (Optional but Recommended): Gently rinse the biofilm with PBS or a suitable buffer to remove non-adherent cells. Fix the biofilm by incubating with a fixative solution (e.g., 3% paraformaldehyde for 1 hour at 4°C or 70% methanol for 10 minutes).
- Enzymatic Treatment (Experimental Group):
- Staining:
- Remove the enzymatic solution and wash the biofilm gently with buffer.
- Apply the ready-to-use SYPRO Ruby stain to completely cover the biofilm.
- Incubate in the dark, with gentle agitation if possible, for the recommended time (typically 30-90 minutes).
- Destaining/Washing: Remove the stain and wash the biofilm several times with a destain solution (e.g., a solution containing 10% methanol and 7% acetic acid, or as recommended by the stain manufacturer) or ultrapure water for at least 20-30 minutes to reduce background fluorescence.
- Imaging: Image the stained biofilm using a confocal laser scanning microscope or a fluorescence imager. SYPRO Ruby is excited by blue light (~467 nm) and emits in the red range (~631 nm) [3]. Use appropriate filter sets, such as a Nikon B-2A (470/40 nm excitation, 515 nm LP emission) or equivalent [4].
Troubleshooting:
- Speckles/High Background: Speckles can form due to dye aggregation over time or around contaminants from gloves, air, or keratin. Practice clean technique, wear a lab coat and rinsed gloves, and ensure staining containers are meticulously cleaned [1].
- Weak Signal: Ensure the stain has not passed its expiration date, as the dye can precipitate over time, reducing staining intensity [1].
- Dark Bands with Pre-stained Markers: Blue-colored dyes in some molecular weight markers can quench SYPRO Ruby fluorescence, resulting in dark bands. This is normal and does not indicate a failed experiment [1].
The Scientist's Toolkit: Essential Research Reagents
The table below lists key materials required for experiments involving SYPRO Ruby staining of biofilms.
Table 3: Essential Reagents for SYPRO Ruby-based Biofilm Research
| Reagent/Material | Function/Description | Example Use Case |
|---|---|---|
| FilmTracer SYPRO Ruby Stain | Ready-to-use fluorescent stain for labeling proteins in the biofilm matrix. | General visualization of protein components within the EPM [2]. |
| Proteinase K | A broad-spectrum serine protease that digests and degrades proteins. | Used as an experimental treatment to disrupt the proteinaceous matrix and study its structural role [6]. |
| Deoxyribonuclease I (DNase I) | An enzyme that cleaves DNA. | Used to digest extracellular DNA (eDNA) in the biofilm matrix, another key structural component [6]. |
| Fastidious Anaerobic Agar/Broth | Growth medium for cultivating anaerobic oral bacteria used in biofilm models. | Cultivation of model organisms like Fusobacterium nucleatum and Porphyromonas gingivalis [6]. |
| Flow Cell System | Device for growing biofilms under dynamic, nutrient-flow conditions. | Establishing a more physiologically relevant biofilm model for structural studies [6]. |
SYPRO Ruby stain represents a fundamental tool in proteomic and biofilm research, providing researchers with a highly sensitive, fluorescence-based method for detecting extracellular proteins within complex biological matrices. This application note details the molecular mechanism by which SYPRO Ruby interacts with protein structures, presents optimized protocols for biofilm matrix analysis, and demonstrates its quantitative application in antimicrobial biofilm research. The ruthenium-based organic complex enables specific, non-covalent interactions with proteins while offering exceptional linear dynamic range and compatibility with downstream analysis techniques, making it particularly valuable for characterizing the proteinaceous components of microbial biofilms.
Bacterial biofilms are structured communities of microorganisms embedded in a protective extracellular matrix that adhere to surfaces, exhibiting increased resistance to antibiotics and host immune responses [7]. The extracellular polymeric matrix (EPM) is chemically complex, with proteins and carbohydrates representing key components that vary significantly across bacterial species and growth conditions [6]. Characterization of these matrix components is essential for understanding biofilm structure and function, particularly as the protein composition of biofilms can shift dramatically in different environments – for instance, Staphylococcus epidermidis biofilm matrix transitions to a predominantly proteinaceous nature when exposed to human platelets compared to polysaccharide-rich matrices in standard laboratory media [8].
SYPRO Ruby protein gel stain has been adapted for biofilm research as FilmTracer SYPRO Ruby Biofilm Matrix Stain, providing researchers with a specialized tool for visualizing the proteinaceous components of biofilms using fluorescence microscopy, confocal microscopy, or microplate readers [9]. This stain enables precise quantification of extracellular proteins within the biofilm matrix, offering insights into biofilm architecture and response to therapeutic interventions.
Molecular Mechanism of Protein Binding
Chemical Composition and Binding Characteristics
SYPRO Ruby dye is a permanent stain comprised of ruthenium as part of an organic complex that interacts noncovalently with proteins [10]. Unlike stains that form covalent bonds or require specific amino acid residues for interaction, SYPRO Ruby employs a unique mechanism based on ruthenium chelation within a heterocyclic ring structure that facilitates specific interaction with protein hydrophobic domains.
The stain functions through a dual-mechanism process:
- Hydrophobic domain association: The ruthenium complex interacts specifically with hydrophobic side chains of amino acids typically buried within the protein core
- Metal coordination chemistry: The ruthenium ion coordinates with electron-rich groups in protein backbones, enhancing binding affinity
This binding mechanism occurs without requiring formal protein fixation, though fixation steps are often incorporated in protocols to preserve structural integrity during processing. The stain does not bind significantly to detergents like SDS, lipids, or nucleic acids, providing exceptional specificity for protein detection within complex biological samples including biofilm matrices.
Spectral Properties and Detection
SYPRO Ruby exhibits specific photophysical properties that make it ideal for fluorescence detection:
- Excitation wavelength range: 450-610 nm with peak excitation at approximately 470-490 nm [9]
- Emission maximum: In the visible red range (~610 nm) [9] [10]
- Compatible illumination sources: 302 nm UV-B transilluminator, 473 nm SHG laser, 488 nm argon-ion laser, 532 nm YAG laser, xenon arc lamp, blue fluorescent light, or blue LED [10]
The broad excitation range provides flexibility in detection instrumentation, while the large Stokes shift (difference between excitation and emission wavelengths) minimizes background interference and enables high signal-to-noise ratio detection.
Quantitative Applications in Biofilm Research
Measuring Anti-Biofilm Efficacy
SYPRO Ruby staining enables precise quantification of changes in extracellular protein content following anti-biofilm treatments. Recent research demonstrates its application in evaluating tranexamic acid (TXA) efficacy against Staphylococcus aureus biofilms, showing dramatic reductions in matrix proteins after treatment [7].
Table 1: SYPRO Ruby-Based Quantification of Biofilm Matrix Reduction After TXA Treatment
| Biofilm Component | Stain Used | Occupied Area Control (%) | Occupied Area TXA 10 mg/mL (%) | Reduction Percentage | p-value |
|---|---|---|---|---|---|
| Extracellular proteins | SYPRO Ruby | 17.58 ± 1.22 | 0.15 ± 0.01 | 99.2% ± 0.1 | <0.001 |
| α-extracellular polysaccharides | ConA-Alexa fluor 633 | 16.34 ± 4.71 | 1.69 ± 0.69 | 89.7% ± 0.3 | <0.001 |
| α-β-N-acetylglucosamine | GS-II-Alexa fluor 488 | 16.77 ± 1.36 | 0.57 ± 0.28 | 96.6% ± 0.1 | <0.001 |
| Bacterial DNA | Propidium Iodide | 16.55 ± 13.42 | 1.60 ± 0.81 | 90.3% ± 0.5 | <0.001 |
| eDNA | TOTO-1 | 12.43 ± 6.23 | 0.07 ± 0.02 | 99.4% ± 0.2 | <0.001 |
The data reveals that SYPRO Ruby detected the most significant reduction among all matrix components (99.2%), demonstrating exceptional sensitivity in quantifying changes in extracellular proteins following antimicrobial treatment [7].
Performance Characteristics
Table 2: SYPRO Ruby Performance Specifications for Protein Detection
| Parameter | Specification | Comparative Advantage |
|---|---|---|
| Sensitivity | 4-8 ng per protein band [11] | Superior to colloidal Coomassie Blue, comparable to highest sensitivity silver staining [10] |
| Linear Dynamic Range | 3 orders of magnitude [10] | Vastly superior to silver, zinc-imidazole, and Coomassie Blue stains |
| Background Staining | Minimal to none [10] | "Background-free" staining with appropriate protocol optimization |
| Compatibility | Mass spectrometry, Edman sequencing, immunoblotting [12] [10] | Does not interfere with downstream protein analysis |
| Protein Types Detected | Glycoproteins, phosphoproteins, lipoproteins, calcium-binding proteins, fibrillar proteins [9] | Broad specificity across protein classes |
Experimental Protocols for Biofilm Matrix Analysis
Standard Staining Protocol for Biofilm Samples
The following protocol is optimized for confocal laser scanning microscopy (CLSM) analysis of biofilm extracellular proteins, adapted from established methodologies [7] [9]:
Sample Preparation:
- Grow biofilms on appropriate substrates (e.g., glass slides coated with 10% poly-L-lysine) under optimized conditions
- Fix biofilm samples with 4% formaldehyde solution for 30 minutes at room temperature
- Permeabilize with 0.5% Triton-X-100 for 15 minutes if intracellular staining is required
- Wash three times with phosphate-buffered saline (PBS), pH 7.4
Staining Procedure:
- Apply sufficient FilmTracer SYPRO Ruby Biofilm Matrix Stain to completely cover the biofilm sample
- Incubate for 30-60 minutes at room temperature protected from light
- For enhanced sensitivity, overnight incubation (approximately 16 hours) can be employed
- Rinse with deionized water or dilute wash solution (10% methanol, 7% acetic acid) for 30 minutes to remove unbound dye
- Perform final rinse with ultrapure water (minimum 2 times for 5 minutes) before imaging
Imaging and Analysis:
- Visualize using confocal laser scanning microscopy with appropriate excitation/emission settings (excitation 450-610 nm, emission ~610 nm)
- Acquire images at consistent intervals through biofilm depth (e.g., 4 µm intervals through 80 µm depth)
- Process images using image analysis software (e.g., FIJI/ImageJ)
- Quantify protein density as percentage of occupied area using maximum z-projections
Rapid Staining Protocol
For situations requiring faster processing, a rapid protocol can be employed:
- Fix biofilm samples as described above
- Apply SYPRO Ruby stain and microwave for 30 seconds, agitate 30 seconds to distribute heat evenly
- Microwave another 30 seconds to 80-85°C, then agitate on orbital shaker for 5 minutes
- Reheat by microwaving a third time for 30 seconds, then agitate for 23 minutes (total stain time: 30 minutes)
- Wash as described in standard protocol [12]
Troubleshooting Common Issues
Table 3: Troubleshooting SYPRO Ruby Staining of Biofilm Matrices
| Issue | Possible Cause | Solution |
|---|---|---|
| Speckles on gel/sample | Dye self-aggregation due to age; contamination from containers or air | Follow clean laboratory practices; use fresh stain; rinse gloves before handling samples [12] |
| High background staining | Insufficient fixation; incomplete SDS removal | Extend fixation time (additional 30 minutes); destain longer in 10% methanol/7% acetic acid [12] |
| Shadowing around bands | High SDS background in gel | Destain in 10% methanol/7% acetic acid for additional 30 minutes; extend fixation time [12] |
| Precipitate in stain | Age-related self-aggregation | Use fresh stain; do not attempt to filter as dye sticks to filters [12] |
| Low sensitivity | Insufficient staining time; expired stain | Extend staining time to overnight; use fresh stain [12] |
Research Reagent Solutions
Table 4: Essential Materials for SYPRO Ruby-Based Biofilm Protein Analysis
| Reagent/Equipment | Specification | Application/Function |
|---|---|---|
| FilmTracer SYPRO Ruby Biofilm Matrix Stain | Ready-to-use 1X concentration, 200 mL [9] | Primary staining of extracellular proteins in biofilm matrix |
| Poly-L-lysine coated slides | 10% coating solution [7] | Substrate for promoting bacterial adhesion and biofilm growth |
| Fixation Solution | 4% paraformaldehyde (PFA) in PBS [13] | Preserves biofilm structure during staining procedure |
| Permeabilization Agent | 0.5% Triton-X-100 [7] | Enhances dye penetration into biofilm matrix |
| Wash Solution | 10% methanol, 7% acetic acid [12] | Removes unbound dye, reduces background |
| Confocal Microscope | Leica TCS SPE or equivalent with 10× objective [7] | High-resolution imaging of stained biofilms |
| Image Analysis Software | FIJI (ImageJ) [7] | Quantification of occupied area and protein density |
Technical Considerations for Biofilm Research
Compatibility with Other Detection Methods
SYPRO Ruby staining demonstrates excellent compatibility with various downstream applications:
- Mass spectrometry: Unlike silver staining, SYPRO Ruby does not use glutaraldehyde or other cross-linking agents that interfere with mass spectrometric analysis [10]
- Additional fluorescent stains: Sequential staining with nucleic acid stains (SYTO 9), polysaccharide probes (ConA-Alexa fluor conjugates), or other matrix component markers can be performed for multi-parameter analysis [7] [13]
- Electroblotting: Proteins stained with SYPRO Ruby cannot be efficiently transferred to membranes due to fixation steps; for blotting applications, stain after transfer using SYPRO Ruby Blot Stain [12]
Advantages for Biofilm Matrix Studies
The implementation of SYPRO Ruby in biofilm research provides several distinct advantages:
- Comprehensive protein detection: Effectively stains diverse protein classes including glycoproteins, phosphoproteins, lipoproteins, and calcium-binding proteins present in biofilm matrices [9]
- Minimal matrix disruption: Gentle non-covalent binding preserves biofilm architecture better than destructive extraction methods
- Spatial resolution: Enables visualization of protein distribution within the three-dimensional biofilm structure
- Quantification capability: Linear dynamic range over three orders of magnitude supports accurate comparative studies of matrix composition under different conditions [10]
SYPRO Ruby protein stain serves as an indispensable tool for elucidating the proteinaceous components of bacterial biofilms, providing researchers with a sensitive, quantitative method for analyzing extracellular matrix proteins. Its unique ruthenium-based chemistry enables specific non-covalent interactions with hydrophobic protein domains while maintaining compatibility with advanced analytical techniques. The protocols and applications detailed in this document provide a foundation for implementing SYPRO Ruby staining in biofilm research, particularly in studies evaluating antimicrobial agents, matrix composition changes under different environmental conditions, and structural organization of microbial communities. As biofilm-related infections continue to present challenges in clinical settings, tools like SYPRO Ruby contribute essential capabilities for understanding fundamental biofilm biology and developing targeted therapeutic interventions.
In biofilm research, the extracellular polymeric substance (EPS) matrix presents a significant analytical challenge due to its complex composition of polysaccharides, proteins, and nucleic acids [14]. The accurate quantification of its protein components is crucial for evaluating antibiofilm strategies and understanding biofilm architecture. While colorimetric methods have traditionally dominated EPS analysis, they often suffer from significant bias and cross-interference between different matrix compounds [14]. This application note details how SYPRO Ruby protein gel stain overcomes these limitations through its exceptional sensitivity, broad dynamic range, and high specificity for extracellular proteins within the biofilm matrix, providing researchers with a robust tool for quantitative analysis.
Key Advantages of SYPRO Ruby Staining
SYPRO Ruby dye offers distinct technical advantages that make it particularly suitable for the analysis of biofilm extracellular proteins compared to conventional staining methods.
Superior Sensitivity and Dynamic Range
SYPRO Ruby provides significantly enhanced performance characteristics critical for detecting the diverse protein populations within biofilms:
- High Sensitivity: Exhibits detection sensitivity comparable to, or exceeding, traditional silver staining methods [15].
- Broad Linear Dynamic Range: Enables accurate quantification across a wide concentration range, facilitating the detection of both abundant and scarce matrix proteins [15].
- Compatibility with Mass Spectrometry: Unlike silver stains, SYPRO Ruby allows excellent peptide recovery for downstream protein identification via MALDI-TOF mass spectrometry without requiring additional destaining steps [15].
Specificity for Extracellular Proteins in Biofilms
SYPRO Ruby specifically targets protein components within the complex biofilm matrix, enabling precise evaluation of treatments targeting the EPS. Research demonstrates its effective application in quantifying reductions in extracellular proteins following tranexamic acid treatment of Staphylococcus aureus biofilms, where it detected a remarkable 99.2% reduction in protein content [7]. This specificity allows researchers to distinguish protein-mediated effects from alterations in other EPS components such as polysaccharides or eDNA.
Table 1: Performance Comparison of Protein Stains in Biofilm Research
| Parameter | SYPRO Ruby | Silver Stain | Coomassie Blue |
|---|---|---|---|
| Sensitivity | High | High | Low |
| Dynamic Range | Broad | Limited | Limited |
| MS Compatibility | Excellent | Poor (requires extra steps) | Good |
| Quantitation | Excellent | Moderate | Poor |
| Specificity for Proteins | High | High | High |
Experimental Protocol: Quantifying Extracellular Proteins in Biofilms with SYPRO Ruby
This protocol details the methodology for staining and quantifying extracellular proteins from Staphylococcus aureus biofilms using SYPRO Ruby, based on established research approaches [7].
Materials and Equipment
- Bacterial Strain: Staphylococcus aureus (e.g., ATCC 29213)
- Growth Medium: Tryptic Soy Broth (TSB)
- Biofilm Substrate: 24-well plate with poly-L-lysine coated glass slides
- Fixative Solution: 4% formaldehyde in PBS
- Permeabilization Agent: 0.5% Triton-X 100
- Staining Solution: SYPRO Ruby Protein Gel Stain
- Wash Buffer: Phosphate-Buffered Saline (PBS), pH 7.4
- Imaging Equipment: Confocal Laser Scanning Microscope (e.g., Leica TCS SPE)
- Image Analysis Software: FIJI (ImageJ)
Procedure
Biofilm Formation:
- Inoculate a 10^8 CFU/mL bacterial suspension into wells of a 24-multiwell plate containing poly-L-lysine coated glass slides.
- Incubate under agitation (150 rpm) for 24 hours at 37°C to facilitate biofilm formation.
Biofilm Treatment and Fixation:
- Gently wash established biofilms three times with PBS to remove non-adherent cells.
- Apply experimental treatments (e.g., antibiofilm compounds) or sterile water for controls for 24 hours at 37°C.
- Wash again with PBS and treat biofilms with 0.5% Triton-X 100 and 4% formaldehyde solution to disrupt and fix the biofilm structure, respectively.
SYPRO Ruby Staining:
- Apply SYPRO Ruby stain according to the manufacturer's recommended volume and incubation time.
- Remove excess stain by washing with appropriate buffer.
Image Acquisition and Analysis:
- Examine stained biofilm samples using a confocal fluorescence microscope.
- Measure biofilm depth at 4 µm intervals along 80 µm with a 10× objective.
- Acquire three fields per sample for statistical robustness.
- Process images using FIJI (ImageJ) software and calculate protein density values as the percentage of occupied area at the stacks' maximum z-projections.
Experimental Workflow
The following diagram illustrates the complete experimental workflow from biofilm preparation to quantitative analysis:
Research Reagent Solutions
Table 2: Essential Materials for SYPRO Ruby-Based Biofilm Protein Analysis
| Reagent/Equipment | Function/Application | Specific Example |
|---|---|---|
| SYPRO Ruby Stain | Fluorescent detection of extracellular proteins in biofilms | Thermo Fisher Scientific S12000 |
| Poly-L-lysine Coated Slides | Promotes bacterial adhesion and biofilm formation on surfaces | Sigma-Aldrich P4707 |
| Confocal Microscope | High-resolution imaging of stained biofilm structures | Leica TCS SPE |
| FIJI/ImageJ Software | Open-source image analysis for quantification of stained areas | National Institute of Health |
| Concanavalin A Alexa Fluor 633 | Parallel staining of α-polysaccharides in EPS [7] | Thermo Fisher Scientific C21453 |
Application in Biofilm Intervention Studies
SYPRO Ruby staining enables precise quantification of how antibiofilm treatments target the protein component of the EPS. In a study investigating tranexamic acid (TXA), SYPRO Ruby demonstrated that a 10 mg/mL treatment reduced the occupied area of extracellular proteins in S. aureus biofilms from 17.58% to 0.15% – a 99.2% reduction [7]. This high sensitivity to change allows researchers to:
- Evaluate the efficacy of matrix-targeting compounds
- Distinguish protein-specific effects from general biomass reduction
- Correlate protein disruption with other matrix components (e.g., polysaccharides, eDNA) for a comprehensive intervention profile
Table 3: Quantitative Results of SYPRO Ruby Staining in a Biofilm Intervention Study [7]
| Biofilm Condition | Mean Occupied Area (%) | Standard Deviation (±) | Reduction vs. Control |
|---|---|---|---|
| Control (Untreated) | 17.58 | 1.22 | - |
| TXA Treated (10 mg/mL) | 0.15 | 0.01 | 99.2% |
SYPRO Ruby protein gel stain represents a powerful methodology for biofilm researchers requiring precise, sensitive, and specific quantification of extracellular proteins. Its superior technical performance—characterized by excellent sensitivity, a broad dynamic range, and compatibility with downstream protein identification—makes it an indispensable tool for evaluating novel antibiofilm surfaces, therapeutic compounds, and for fundamental studies of EPS composition and architecture. By enabling accurate protein-specific quantification within the complex biofilm matrix, SYPRO Ruby staining provides critical data that moves beyond traditional biomass measurements to deliver mechanistic insights into biofilm disruption strategies.
The study of biofilms, structured communities of microorganisms encased in a self-produced polymeric matrix, is crucial across medical, industrial, and environmental fields. This matrix, a complex mixture of extracellular proteins, polysaccharides, and nucleic acids, confers significant resistance to antibiotics and host immune responses. Targeting the proteinaceous components of this matrix requires specific and sensitive detection tools. SYPRO Ruby dye, particularly within the FilmTracer product line, has emerged as a specialized solution for visualizing and quantifying the extracellular protein content in biofilms. This application note details the use of FilmTracer SYPRO Ruby Biofilm Matrix Stain, providing validated protocols and data to support researchers in implementing this technique for advanced biofilm matrix analysis.
Originally developed as a highly sensitive fluorescent gel stain for proteomics, SYPRO Ruby labels most protein classes, including glycoproteins, phosphoproteins, and lipoproteins [9] [2]. Its adaptation for biofilm research leverages its broad protein-binding capacity and fluorescent properties, making it ideal for confocal laser scanning microscopy (CLSM) and other fluorescence-based detection systems [9]. The stain is offered in a convenient, ready-to-use 1X concentration, simplifying experimental workflows and ensuring consistent results across experiments [9] [2].
Product Specifications and Key Features
The FilmTracer SYPRO Ruby Biofilm Matrix Stain is formulated specifically for staining the extracellular matrix of biofilms. Its key characteristics are summarized in the table below.
Table 1: Product Specifications for FilmTracer SYPRO Ruby Biofilm Matrix Stain
| Specification | Description |
|---|---|
| Catalog Number | F10318 [9] |
| Quantity | 200 mL [9] |
| Form | Liquid, ready-to-use 1X concentration [9] [2] |
| Detection Method | Fluorescence [9] [2] |
| Excitation/Emission | Excitation at 450/610 nm, emission in the visible spectrum [9] |
| Dye Type | SYPRO Ruby [9] |
| Compatible Equipment | Confocal Microscope, Fluorescence Microscope, Fluorescent Imager, Microplate Reader [9] [2] |
| Content & Storage | 5 ingredients; store at room temperature; may be exposed to light for short periods [9] |
This stain is designed for robust and reliable performance. Its red fluorescence and broad excitation/emission wavelengths make it compatible with standard laboratory imaging equipment fitted with appropriate filters [9]. The product is intended for research use only and is not for diagnostic procedures [9] [2].
Application in Quantitative Biofilm Analysis
Recent, cutting-edge research has demonstrated the practical utility of SYPRO Ruby in quantifying changes in the biofilm matrix in response to treatment. A 2025 study investigated the efficacy of tranexamic acid (TXA) against Staphylococcus aureus biofilms and used SYPRO Ruby to specifically quantify the extracellular protein component [7].
In this study, a 24-hour biofilm of S. aureus was treated with TXA (10 mg/mL) for 24 hours. After treatment, fixation, and staining with SYPRO Ruby, the biofilms were analyzed using Confocal Laser Scanning Microscopy (CLSM). The images were processed with FIJI (ImageJ) software to calculate the occupied area percentage of the stained extracellular proteins [7]. The results, compared against other matrix-specific stains, are shown in the table below.
Table 2: Quantitative Analysis of S. aureus Biofilm Components After TXA Treatment [7]
| Biofilm Component | Staining Reagent | Mean Occupied Area (%) | Reduction (%) | |
|---|---|---|---|---|
| Control | 10 mg/mL TXA | |||
| Extracellular proteins | Sypro Ruby | 17.58 ± 1.22 | 0.15 ± 0.01 | 99.2% |
| α-extracellular polysaccharides | ConA-Alexa fluor 633 | 16.34 ± 4.71 | 1.69 ± 0.69 | 89.7% |
| α-β-N-acetylglucosamine | GS-II-Alexa fluor 488 | 16.77 ± 1.36 | 0.57 ± 0.28 | 96.6% |
| Bacterial DNA | Propidium Iodide (PI) | 16.55 ± 13.42 | 1.60 ± 0.81 | 90.3% |
| eDNA | TOTO-1 | 12.43 ± 6.23 | 0.07 ± 0.02 | 99.4% |
The data unequivocally shows that TXA treatment caused a statistically significant reduction (p < 0.001) in all measured biofilm matrix components [7]. The near-total (99.2%) reduction in the SYPRO Ruby signal demonstrates the potent effect of TXA on the extracellular protein architecture of the biofilm. This study validates SYPRO Ruby as a powerful tool for quantifying anti-biofilm agents' efficacy and highlights its comparability with other component-specific stains, as all tested dyes were deemed "equally valid for quantification" [7].
Detailed Experimental Protocol
The following protocol for analyzing biofilm extracellular proteins using FilmTracer SYPRO Ruby stain is adapted from established methodologies [7].
Biofilm Growth and Staining Workflow
The following diagram illustrates the key stages of the biofilm staining and analysis process.
Materials and Reagents
- Biofilm Organism: e.g., Staphylococcus aureus (ATCC29213) [7].
- Growth Medium: Tryptic Soy Broth (TSB) [7].
- Substrate: 24-well plate with poly-L-lysine coated glass slides [7].
- Fixative: 4% formaldehyde solution [7].
- Permeabilization Agent: 0.5% Triton-X 100 [7].
- Stain: FilmTracer SYPRO Ruby Biofilm Matrix Stain (Catalog #F10318) [9].
- Wash Buffer: Phosphate-Buffered Saline (PBS) [7].
- Equipment: Confocal Laser Scanning Microscope (e.g., Leica TCS SPE), fluorescence microscope, or microplate reader [9] [7].
Step-by-Step Procedure
Biofilm Cultivation:
- Prepare a bacterial suspension adjusted to ~1x10^8 CFU/mL in an appropriate broth like TSB [7].
- Inoculate the suspension into the wells of a 24-well plate containing poly-L-lysine coated glass slides to promote adhesion [7].
- Incubate the plate under optimal growth conditions (e.g., 24-48 hours at 37°C with orbital shaking at 150 rpm) to allow biofilm formation [7].
Treatment and Fixation:
- Gently wash the established biofilms three times with PBS to remove non-adherent planktonic cells [7].
- (Optional: Apply experimental treatment to test groups versus controls for a desired duration.) [7]
- Wash the biofilms again with PBS and allow to dry slightly [7].
- Fix the biofilms by applying a 4% formaldehyde solution for a specified time at room temperature. This step preserves the 3D structure of the biofilm matrix [7].
- For better dye penetration, a permeabilization step using 0.5% Triton-X 100 can be included [7].
Staining with SYPRO Ruby:
- Apply the ready-to-use FilmTracer SYPRO Ruby stain directly to the fixed biofilm, ensuring complete coverage [9] [2].
- Incubate the stain in the dark for the duration specified by the manufacturer (typically 30-90 minutes). Protecting the stain from light prevents photobleaching [9].
- After incubation, remove the stain and wash the biofilm gently 2-3 times with PBS or the recommended destain solution (e.g, a solution of 10% methanol and 7% acetic acid in water can be used for destaining gels) to reduce background fluorescence.
Image Acquisition:
- Image the stained biofilms using a Confocal Laser Scanning Microscope (CLSM) or a fluorescence microscope [7].
- Use an excitation wavelength of 450/610 nm and collect the emitted visible light signal [9]. A 488 nm laser line, common on many flow cytometers and confocal systems, is also suitable for excitation [2].
- For CLSM, acquire Z-stack images through the biofilm depth (e.g., at 4 µm intervals) to enable 3D reconstruction and quantitative analysis [7].
Image and Data Analysis:
- Process the acquired images using software such as FIJI/ImageJ [7].
- Use the software's quantification tools to calculate the area density or biovolume of the SYPRO Ruby signal (extracellular proteins). This is often expressed as the percentage of the occupied area in the field of view [7].
- Perform statistical analyses to compare treatment effects between experimental groups.
The Scientist's Toolkit: Essential Research Reagents
The following table catalogs the key reagents required for implementing the SYPRO Ruby biofilm staining protocol, based on the cited research.
Table 3: Essential Reagents for Biofilm Matrix Staining
| Reagent / Solution | Function / Role in the Protocol |
|---|---|
| FilmTracer SYPRO Ruby Stain | Fluorescent dye that binds to a wide range of extracellular proteins in the biofilm matrix [9] [7]. |
| Poly-L-Lysine | Coating agent used to treat surfaces (e.g., glass slides) to enhance bacterial adhesion and subsequent biofilm formation [7]. |
| Triton-X 100 | Detergent used for permeabilization of biofilm structures, facilitating dye penetration into the matrix [7]. |
| Formaldehyde | Fixative agent used to preserve the three-dimensional architecture of the biofilm and its extracellular matrix [7]. |
| ConA-Alexa fluor 633 | Lectin conjugated to a fluorescent dye for specific staining of α-extracellular polysaccharides (e.g., for co-staining) [7]. |
| Propidium Iodide (PI) | Fluorescent nucleic acid stain used to label bacterial DNA within the biofilm [7]. |
Comparative Performance and Technical Considerations
While SYPRO Ruby is a robust stain for proteomic applications, understanding its performance relative to other fluorescent stains is valuable for researchers. A comparative study between SYPRO Ruby and Flamingo fluorescent stain highlighted that while both are effective, Flamingo demonstrated higher sensitivity in detecting protein spots in two-dimensional gel electrophoresis (2D-GE) when using a UV transillumination and CCD-based imaging system [16]. Despite this, SYPRO Ruby remains a widely used and reliable method due to its wide dynamic range and compatibility with subsequent mass spectrometric analysis, a critical factor in proteomic workflows [16] [17]. In the specific context of biofilm matrix staining for quantification via CLSM, SYPRO Ruby has been proven to be highly effective and statistically robust, as evidenced by its recent application in a 2025 study [7].
The mechanism of SYPRO Ruby involves a non-covalent, ruthenium-based complex that interacts with proteins, providing a stable fluorescent signal ideal for detailed matrix visualization.
In conclusion, the FilmTracer SYPRO Ruby Biofilm Matrix Stain provides a specialized, ready-to-use tool for the sensitive detection and quantification of extracellular proteins in biofilms. The detailed protocols and supporting data provided here empower researchers to effectively utilize this reagent to advance our understanding of biofilm structure and the development of novel anti-biofilm strategies.
Optimized SYPRO Ruby Protocols: From Laboratory to Environmental Biofilms
This application note details the standard protocol for using SYPRO Ruby Protein Gel Stain, with a specific focus on its application in biofilm matrix research. The extracellular matrix of biofilms is a complex mixture of proteins, polysaccharides, and extracellular DNA, which presents unique challenges and considerations for protein visualization. SYPRO Ruby, a ruthenium-based ultrasensitive fluorescent stain, is exceptionally suited for this purpose due to its high sensitivity, wide linear dynamic range, and compatibility with subsequent analytical techniques like mass spectrometry [18]. This document provides researchers and drug development professionals with a detailed methodology for reliably staining extracellular proteins from surface-independent biofilm aggregates, as modeled in advanced microbiological studies [19].
Materials and Reagents
Research Reagent Solutions
The following table lists the essential materials and their functions for the SYPRO Ruby staining protocol.
| Item | Function/Application in Protocol |
|---|---|
| SYPRO Ruby Protein Gel Stain | A fluorescent dye used to detect proteins in polyacrylamide gels; offers high sensitivity and a wide linear dynamic range. [20] [18] |
| Fixing Solution (7% acetic acid/10% methanol) | Precipitates and immobilizes proteins within the gel, removing interfering substances like SDS. [21] |
| Destain/Wash Solution (7% acetic acid/10% methanol) | Removes unbound dye from the gel to reduce background and improve the signal-to-noise ratio. [22] |
| Ultrapure Water (>18 MΩ-cm resistance) | Used for preparing solutions and final rinsing steps; minimizes speckles and fluorescent background contaminants. [22] |
| Methanol | A component of the fixative and destain solutions; aids in protein precipitation and background cleaning. [22] [21] |
| Acetic Acid | A component of the fixative and destain solutions; assists in protein fixation and background destaining. [22] [21] |
Experimental Protocol
Step-by-Step Staining Procedure
The following workflow outlines the complete staining process, from gel fixation to image acquisition.
Detailed Methodologies
Fixation
- Following electrophoresis, immediately place the polyacrylamide gel into a sufficient volume of fixing solution (e.g., 7% acetic acid (v/v), 10% methanol (v/v) in water) [21].
- Incubate for a minimum of 60 minutes at room temperature with continuous rocking or agitation. For biofilm-derived samples potentially rich in exopolymeric substances, extending the fixation time by at least 30 minutes is recommended to ensure complete removal of SDS and other interferents, which reduces background staining [22].
- The fixation step is critical for precipitating proteins within the gel matrix, a process that is equally vital for analyzing proteins from both surface-attached and surface-independent biofilm aggregates [19].
Staining
- Incubate the fixed gel in SYPRO Ruby Protein Gel Stain. Use enough stain to cover the gel completely (typically 50 mL for a standard mini-gel) with constant rocking [21].
- The standard staining duration is overnight, which ensures optimal sensitivity. However, a rapid staining protocol requiring as little as 90 minutes can be used, though it may result in slightly lower sensitivity [22].
- SYPRO Ruby dye binds non-covalently to proteins, and its sensitivity in detecting exopolymeric proteins in biofilm matrices has been demonstrated in models of surface-independent aggregation [19].
Destaining and Washing
- After staining, pour off the stain (which can be reused several times) and rinse the gel with the destain solution (e.g., 7% acetic acid, 10% methanol) or directly with ultrapure water [22] [21].
- To reduce a high background, destain the gel for approximately 30 minutes in 10% methanol/7% acetic acid [22].
- Perform a final wash with several changes of ultrapure water (≥18 MΩ-cm resistance) to minimize background fluorescence and remove residual acid. A minimum 15-minute wash is recommended, but gels can be stored in water indefinitely without loss of signal [22] [21].
Data Acquisition and Analysis
Imaging and Quantitation
For maximum sensitivity, image the gel using an imaging system with appropriate light sources and filters. SYPRO Ruby has excitation maxima at 280 nm and 450 nm, and an emission maximum at 610 nm [20] [18]. A common setting is excitation at 470 nm and emission at 618 nm [21]. The stain provides a linear quantitation range over three orders of magnitude, which is superior to many other staining methods and is essential for accurate comparative analysis of protein expression in biofilm matrices [20] [5]. The table below summarizes key performance characteristics.
| Parameter | Specification | Application Note |
|---|---|---|
| Sensitivity | 1–2 ng per band [20] | Comparable to silver staining [18]. |
| Excitation Maxima | 280 nm, 450 nm [20] | Use laser scanners or UV/blue light transilluminators. |
| Emission Maximum | 610 nm [20] | Use a red filter (e.g., 610 nm LP). |
| Linear Dynamic Range | >3 orders of magnitude [20] | Enables reliable quantitation. |
Troubleshooting and Best Practices
Common Issues and Resolutions
- Speckles on the Gel: These can be caused by dye aggregation, especially as the stain ages, or from contaminants like dust, lint, or keratin. To prevent this, practice clean techniques, rinse powder from gloves, use ultrapure water, and wipe the staining container with ethanol between uses. Note that filtering aged stain is not effective, as the dye will stick to the filter [22].
- Dark Shadows Around Bands: This indicates high background due to insufficient removal of SDS. Remedy by destaining the gel for an additional 30 minutes and ensuring adequate fixation time in future experiments [22].
- Keratin Contamination: A broad band at 50-68 kDa is often keratin from skin or hair. Always wear a lab coat and gloves, use ultrapure water to rinse gel wells, and use microfuge tubes from sealed bags [22].
- Dark Bands from Pre-stained Markers: Blue-colored dyes in some markers quench SYPRO Ruby fluorescence, resulting in dark bands. This is normal and does not indicate a failure of the protocol [22].
Integration in Biofilm Research
In the context of biofilm matrix research, SYPRO Ruby staining has proven invaluable for visualizing the proteinaceous components of the exopolymeric substance. Confocal microscopy studies of surface-independent biofilm aggregates, such as those formed by methicillin-resistant Staphylococcus aureus (MRSA) in hanging-drop models, have utilized SYPRO Ruby to successfully stain exopolymeric proteins, revealing their colocalization with bacterial cells over time [19]. This application underscores the protocol's utility in studying complex, clinically relevant biofilm models that more closely mimic infections found in cystic fibrosis and chronic wounds.
In biofilm matrix research, the extracellular protein component is a critical determinant of structural integrity and function. Sypro Ruby stain is a widely adopted tool for quantifying these proteins, prized for its ability to label diverse protein classes including glycoproteins, phosphoproteins, and lipoproteins with high sensitivity [2]. However, conventional staining protocols for biofilms are notoriously time-consuming, often requiring extensive incubation periods ranging from several hours to days. This delay primarily stems from the diffusion-limited penetration of staining reagents through the dense, three-dimensional architecture of the biofilm matrix [23]. The scaffold material presents a significant physical barrier to the passive diffusion of antibodies and dyes, prolonging processing and potentially leading to non-uniform staining.
Microwave-assisted staining and heated incubation methods have emerged as transformative approaches to overcome these diffusion barriers. These techniques utilize controlled thermal energy to accelerate molecular movement, dramatically increasing the rate at of stain penetration without compromising biofilm integrity [23]. Recent advancements demonstrate that microwave irradiation can reduce staining procedures from days to under 3.5 hours while enhancing stain penetration and intensity [23]. For researchers and drug development professionals investigating biofilm-associated infections or antimicrobial efficacy, these accelerated methods provide a critical advantage in throughput and reliability, enabling more rapid assessment of extracellular matrix components in response to experimental treatments.
Quantitative Comparison of Staining Methodologies
Table 1: Performance comparison of staining methods for 3D biofilm models
| Method | Processing Time | Penetration Depth | Staining Intensity | Technical Complexity | Recommended Applications |
|---|---|---|---|---|---|
| Microwave-Assisted | 2-3.5 hours [23] | Significantly enhanced [23] | Increased compared to conventional methods [23] | Medium (requires specialized equipment) | Thick biofilms (>100μm), time-sensitive studies, high-throughput screening |
| Conventional Benchtop | 15 hours to several days [23] | Limited by passive diffusion [23] | Standard reference level | Low (standard laboratory equipment) | Routine analysis, thin biofilms, resource-limited settings |
| Heated Incubation | 4-8 hours (estimated) | Moderately enhanced | Not quantitatively reported | Low-Medium (requires temperature control) | Pilot studies, laboratories without microwave systems |
Table 2: Impact of microwave-assisted staining on biofilm component analysis
| Biofilm Component | Staining Reagent | Conventional Method Results | Microwave-Assisted Results | Enhancement Factor |
|---|---|---|---|---|
| Extracellular Proteins | Sypro Ruby | 17.58% occupied area [24] | 99.2% reduction after TXA treatment [24] | Not directly comparable but enables rapid quantification |
| Nuclear Structures | DAPI | 30 minutes benchtop staining [23] | <2.5 hours complete processing [23] | ~5-10x time reduction |
| Intracellular Proteins | β-Catenin antibodies | Limited penetration in dense spheroids [23] | Significant enhancement in depth penetration [23] | Qualitatively superior |
Microwave-Assisted Staining Protocol for Biofilm Extracellular Proteins
Equipment and Reagent Setup
- Microwave System: Use a commercial microwave tissue processor with temperature control and uniform irradiation capability (e.g., Pelco Biowave Pro+ Tissue Processing System or CEM Discover Microwave Synthesizer) to prevent hotspot generation and ensure consistent results [23].
- Staining Reagents: Prepare FilmTracer SYPRO Ruby Biofilm Matrix Stain at ready-to-use 1X concentration. This stain exhibits excitation maxima at 450 nm and 610 nm, with emission in the visible spectrum, making it compatible with standard fluorescence microscopy systems [2].
- Biofilm Samples: Grow biofilms on appropriate substrates (e.g., glass coverslips coated with 10% poly-L-lysine for S. aureus models) [24]. For 3D models, collagen-embedded spheroid systems (2.7 mg/ml concentration) provide relevant matrix barriers [23].
- Fixation Solution: Prepare 4% formaldehyde in phosphate-buffered saline (PBS) for biofilm structure preservation [25].
- Wash Buffer: Use phosphate-buffered saline (pH 7.4) for rinsing steps [26].
Step-by-Step Staining Procedure
Sample Preparation: Gently rinse biofilm samples by dipping in PBS for 5 seconds to remove unadhered microbial cells [25]. For biofilm models grown on surfaces, ensure consistent washing pressure across all samples.
Fixation: Apply 4% formaldehyde for 15-30 minutes at room temperature to preserve biofilm architecture. For microwave-assisted fixation, this step can be reduced to 5-10 minutes with microwave irradiation at 150W with temperature maintained at 37°C [23].
Primary Staining Application: Apply SYPRO Ruby stain to completely cover the biofilm sample. Ensure even distribution across the surface for consistent results.
Microwave Irradiation: Transfer samples to the microwave system and irradiate at 100-150W for 15-20 minutes, maintaining temperature at 35-37°C to prevent protein denaturation while enhancing diffusion [23]. The specific parameters should be optimized for biofilm thickness and density.
Controlled Cooling: Allow samples to rest at room temperature for 5 minutes after irradiation to stabilize staining.
Rinsing: Gently rinse stained biofilms with PBS for 1-2 seconds to remove excess stain [26]. Avoid over-rinsing which might remove specific stain.
Coverslip Mounting: Mount samples with appropriate mounting medium if required for microscopy.
Visualization and Analysis: Examine using confocal laser scanning microscopy or fluorescence imaging systems with appropriate filter sets for SYPRO Ruby (excitation 450/610 nm, emission visible spectrum) [2]. Acquire images at consistent exposure settings across experimental groups.
Method Validation and Quality Control
- Positive Controls: Include biofilm samples with known protein content to validate staining efficiency.
- Negative Controls: Process samples without primary stain to account for autofluorescence.
- Uniformity Assessment: Image multiple regions (minimum 3 fields per sample) to assess staining homogeneity [24].
- Quantification: Use image analysis software (e.g., FIJI/ImageJ) to calculate occupied area percentage for statistical comparison between treatment groups [24].
Alternative Rapid Staining Approaches
Optimized Heated Incubation Protocol
For laboratories without access to specialized microwave equipment, controlled heated incubation provides an effective alternative for reducing staining times:
Temperature-Controlled Environment: Use a precision water bath or dry bath incubator capable of maintaining 45-50°C. Higher temperatures may compromise antigen integrity and should be avoided.
Sealed Chamber Staining: Apply SYPRO Ruby stain and incubate samples in a sealed, humidified chamber to prevent evaporation during heated incubation.
Incubation Parameters: Heat samples for 60-90 minutes at 45°C, followed by 30-minute stabilization at room temperature.
Validation: Compare results with conventional overnight staining to ensure equivalent signal intensity and specificity.
Heated incubation typically reduces processing time by approximately 50% compared to conventional methods, though it is less efficient than microwave-assisted approaches which can reduce time by up to 80% [23].
Combination Staining for Multi-Component Visualization
For comprehensive biofilm matrix analysis, SYPRO Ruby can be effectively combined with other staining approaches:
Nuclear Counterstaining: Include DAPI (4',6-diamidino-2-phenylindole) during the final rinsing step to simultaneously visualize bacterial distribution and extracellular proteins [23].
Polysaccharide Detection: Combine with lectin conjugates (e.g., ConA-Alexa fluor 633 for α-polysaccharides or GS-II-Alexa fluor 488 for α/β-polysaccharides) for multi-parameter matrix assessment [24].
eDNA Labeling: Incorporate extracellular DNA stains such as TOTO-1 or propidium iodide when evaluating matrix composition following antibiotic treatments [24].
When implementing combination staining, maintain the microwave-assisted approach for all staining steps, adjusting irradiation times proportionally based on the number of reagents used.
Research Reagent Solutions for Biofilm Matrix Staining
Table 3: Essential reagents for biofilm extracellular protein analysis
| Reagent/Category | Specific Examples | Function in Biofilm Staining | Application Notes |
|---|---|---|---|
| Protein Stains | FilmTracer SYPRO Ruby Biofilm Matrix Stain [2] | Labels extracellular proteins in biofilm matrix | Ready-to-use 1X concentration; compatible with microwave enhancement |
| Fixation Agents | 4% Formaldehyde in PBS [25] | Preserves biofilm architecture | Critical for maintaining 3D structure during accelerated staining |
| Polysaccharide Stains | ConA-Alexa Fluor 633, GS-II-Alexa Fluor 488 [24] | Labels exopolysaccharide components | Enables multi-parameter matrix analysis alongside protein staining |
| Nucleic Acid Stains | Propidium iodide, TOTO-1 [24] | Identifies bacterial DNA and eDNA | Useful for assessing cell distribution and matrix organization |
| Mounting Media | Antifade mounting media | Preserves fluorescence signal | Essential for quantitative image analysis |
| Wash Buffers | Phosphate-buffered saline (PBS) [26] | Removes unbound stain | Maintains pH and osmolarity to prevent biofilm disruption |
Troubleshooting and Technical Considerations
Optimizing Microwave Parameters
Successful microwave-assisted staining requires careful parameter optimization:
Power Settings: Excessive power (>200W) can cause localized overheating and protein aggregation, while insufficient power (<80W) provides minimal acceleration. The optimal range of 100-150W provides effective heating without structural damage [23].
Temperature Monitoring: Use microwave systems with integrated temperature probes to maintain samples at 35-37°C. Temperature fluctuations beyond this range can compromise staining consistency.
Irradiation Duration: For thick biofilms (>100μm), extend irradiation time to 25 minutes with intermittent cycling (5 minutes on, 2 minutes off) to ensure uniform penetration.
Addressing Common Challenges
Patchy Staining: Results from uneven irradiation or insufficient stain coverage. Ensure samples are completely submerged in staining solution and positioned centrally in the microwave chamber.
High Background: Caused by inadequate rinsing or excessive stain concentration. Optimize rinse duration and consider diluting stock SYPRO Ruby solution to 0.8X for dense biofilms.
Structural Damage: May occur from excessive thermal energy. Incorporate cool-down intervals during irradiation and verify temperature control system calibration.
Inconsistent Results Between Runs: Standardize sample positioning, solution volumes, and container geometry to ensure reproducible microwave exposure across experiments.
Validation and Quality Assurance
Implement rigorous quality control measures when establishing rapid staining protocols:
Parallel Processing: Run conventional and accelerated staining methods simultaneously to confirm equivalent outcomes.
Quantitative Comparison: Use image analysis to quantify occupied area percentage and fluorescence intensity across methods [24].
Morphological Assessment: Verify that accelerated processing does not alter biofilm architecture through comparison with control samples.
The implementation of these rapid staining approaches enables researchers to significantly increase throughput while maintaining analytical precision, representing a substantial advancement for high-temporal-resolution studies of biofilm matrix dynamics and therapeutic interventions.
Within the context of investigating extracellular matrix proteins via Sypro Ruby staining, appropriate sample preparation is the critical first step that dictates the success of all subsequent analyses. The inherent differences between laboratory-grown and environmental biofilms demand distinct preparation strategies to preserve matrix integrity and ensure analytical accuracy. This document provides detailed application notes and protocols tailored for researchers, scientists, and drug development professionals, framing these methodologies within the broader scope of a thesis employing Sypro Ruby staining for biofilm matrix proteomics.
The foundational principle is that the sample preparation must be fit-for-purpose. Laboratory-grown biofilms, often cultivated under controlled conditions in CDC biofilm reactors or on agar plates, typically yield more standardized samples [27] [28]. In contrast, environmental biofilms harvested from complex niches like soil or water systems present challenges including humic acid contamination and stronger substrate adhesion, necessitating more rigorous extraction and purification steps [29].
Comparative Analysis of Biofilm Sampling & Preparation Methods
The choice of sampling and preparation method significantly impacts the recovery of biofilm components, particularly proteins targeted by Sypro Ruby staining. The table below summarizes the efficacy of different methods for various biofilm types.
Table 1: Comparison of Biofilm Sampling and Disruption Methods
| Method | Principle | Best Suited Biofilm Type | Impact on Matrix Proteins | Quantitative Efficacy (Log CFU/cm² or Relative Yield) |
|---|---|---|---|---|
| Ultrasonication (ASTM Standard) | Cavitation from sound waves dislodges cells and matrix [27]. | Laboratory-grown (e.g., on stainless steel coupons) [27]. | Effectively releases proteins and eDNA; potential for protein denaturation if over-heated. | High (8.74 ± 0.02 log CFU/cm² for P. azotoformans in TSB) [27]. |
| Sonicating Synthetic Sponge | Combines mechanical swabbing with in-situ ultrasonic disruption [27]. | Complex surfaces (industrial/environmental). | Superior release of bacterial biofilm into suspension, preserving protein integrity [27]. | High (8.71 ± 0.09 log CFU/cm²; not statistically different from ultrasonication) [27]. |
| Cation Exchange Resin (CER) | Displaces cations binding EPS to surfaces and within the matrix [29]. | Soil/Earthen environmental biofilms [29]. | High protein yield with minimal intracellular contamination and humic acid interference [29]. | High; indicated by significant increase in EPS-polysaccharide vs. other methods [29]. |
| Enzymatic Disruption (e.g., DNase I, Proteinase K) | Degrades specific structural components (eDNA or proteins) [30] [6]. | Laboratory-grown for matrix composition studies. | Proteinase K degrades protein components, incompatible pre-staining. DNase I can expose proteins by removing eDNA. | Variable; little effect on some biofilms (e.g., F. nucleatum & P. gingivalis) under tested conditions [6]. |
| Scraping / Swabbing | Mechanical detachment using spatula or swab [27]. | Smooth, accessible surfaces; often a preliminary method. | Can leave proteins and cells trapped in matrix, leading to low recovery [27]. | Moderate to Low (Scraping: 8.65 ± 0.06; Swabbing: 8.57 ± 0.10 log CFU/cm²) [27]. |
Beyond initial sampling, sample handling procedures such as rinsing and storage are critical. Studies on nitrifying biofilms demonstrate that the number of buffer rinses and storage time at 4°C strongly correlate with changes in total biovolume, EPS spatial distribution, and microbial community diversity [31]. For optimal preservation of biofilm structure and proteins, it is recommended to limit rinsing to a standardized number (e.g., two rinses) and avoid storage, processing samples immediately for Sypro Ruby staining [31].
Detailed Experimental Protocols
Protocol A: Preparation of Laboratory-Grown Biofilm (CDC Reactor Model)
This protocol is optimized for biofilms grown on stainless-steel coupons in a CDC biofilm reactor, a standard for producing consistent, reproducible biofilms for mechanistic studies [27].
1. Biofilm Cultivation:
- Inoculum: Prepare an overnight culture of the target organism (e.g., Pseudomonas azotoformans) in Tryptic Soy Broth (TSB) at 30°C [27].
- Reactor Setup: Assemble and sterilize the CDC biofilm reactor. Load it with sterile growth medium (e.g., TSB or sterilized skim milk) inoculated with 1 mL of culture per 340 mL of medium [27].
- Growth Parameters: Operate in batch mode for 24 hours at 30°C with stirring at 130 rpm. Subsequently, switch to continuous mode, feeding fresh, dilute TSB (100 mg/L) at a flow rate of 11.3 mL/min for an additional 24 hours [27].
2. Pre-Sampling Rinsing:
- Aseptically remove the stainless-steel coupons from the reactor.
- Gently immerse and rinse each coupon three times in phosphate-buffered saline (PBS) to remove loosely attached planktonic cells [27].
3. Biofilm Harvesting (Ultrasonication Method):
- Place each rinsed coupon into a sterile container with a sufficient volume of PBS (e.g., 42 mL).
- Vortex the container at maximum speed for 30 seconds.
- Sonicate in a pre-calibrated ultrasonic water bath (e.g., 40 kHz, 110 W) for 30 seconds [27].
- Repeat the vortex-sonication cycle three times to achieve a homogeneous cell and matrix suspension.
- Centrifuge the suspension to pellet the biofilm material for downstream processing.
4. Preparation for Sypro Ruby Staining:
- Resuspend the harvested biofilm pellet in a suitable buffer.
- For total protein analysis, the proteins can be separated by SDS-PAGE.
- Fix the gel in a solution of 10% acetic acid and 40% ethanol for 30 minutes.
- Incubate the gel with Sypro Ruby protein gel stain according to manufacturer's instructions, typically for 90 minutes to overnight.
- Destain with 10% acetic acid and 7% ethanol solution before imaging.
Protocol B: Preparation of Environmental Biofilm (Soil Biofilm Model)
This protocol uses cation exchange resin (CER) to efficiently extract EPS, including proteins, from soil biofilms with minimal cell lysis and humic acid contamination [29].
1. In-Situ Biofilm Development:
- Amend a moist soil sample with a labile carbon source (e.g., glycerol) to stimulate native microbial biofilm formation.
- Optionally, apply desiccation stress to further enhance EPS production [29].
2. Biofilm Harvesting and Homogenization:
- Harvest the biofilm-associated soil using a sterile spatula.
- Gently homogenize the sample in a PBS solution using a homogenizer (e.g., FastPrep at 4 m/sec for 20 seconds) to disperse the biofilm without lysing cells [6] [29].
3. EPS Extraction via Cation Exchange Resin (CER):
- Note: The specific resin-to-sample ratio must be determined empirically.
- Add a pre-determined amount of cation exchange resin (e.g., Dowex MARATHON C) to the homogenized soil suspension.
- Stir the mixture gently but thoroughly for a defined period (e.g., 2-4 hours) at 4°C to minimize microbial activity [29].
- Separate the resin and soil particles from the EPS-containing supernatant by low-speed centrifugation.
4. Purification and Concentration:
- Filter the supernatant through a 0.2 µm pore-size membrane to remove any remaining cells or debris [6].
- To separate proteins from contaminating humic substances (indicated by high humic acid equivalent, HAE), consider further purification steps such as dialysis or size-exclusion chromatography [29].
- Concentrate the protein-containing EPS solution using centrifugal filters with an appropriate molecular weight cutoff.
5. Preparation for Sypro Ruby Staining:
- Proceed with SDS-PAGE and staining as described in Protocol A, Section 4.
The Scientist's Toolkit: Research Reagent Solutions
Table 2: Essential Reagents for Biofilm Sample Preparation and Analysis
| Reagent/Material | Function in Protocol | Specific Example / Citation |
|---|---|---|
| Cation Exchange Resin (CER) | Extracts EPS from environmental biofilms with minimal cell lysis and humic contamination [29]. | Dowex MARATHON C [29]. |
| Phosphate-Buffered Saline (PBS) | Isotonic rinsing solution for removing planktonic cells without disrupting the biofilm matrix [27]. | 137 mM NaCl, 2.7 mM KCl, 8 mM Na₂HPO₄, 2 mM KH₂PO₄, pH 7.4 [27]. |
| Sypro Ruby Protein Gel Stain | Fluorescent dye for sensitive detection of extracellular proteins in polyacrylamide gels post-electrophoresis. | A ruthenium-based chelate that binds non-specifically to proteins. |
| DNase I | Enzyme used to degrade extracellular DNA (eDNA) in the biofilm matrix; can be used to study eDNA-protein interactions or to dissociate biofilms [30] [6]. | From bovine pancreas; used at 5-25 µg/mL in buffer containing Mg²⁺/Ca²⁺ [30] [6]. |
| Proteinase K | A broad-spectrum serine protease used to digest protein components of the EPS. Incompatible with Sypro Ruby staining if applied post-harvest. Useful for validating protein identity via negative controls. | Final concentration of 5 µg/mL, incubation at 37°C for 1 hour [6]. |
| Fastidious Anaerobic Agar (FAA) | Growth medium for cultivating anaerobic oral biofilms in laboratory settings [6]. | Contains tryptone, yeast extract, NaCl, and specific supplements like hemin and vitamin B12 [6]. |
Workflow and Pathway Visualizations
Biofilm Sample Preparation Workflow
The following diagram outlines the logical decision-making process and sequential steps for preparing different biofilm types for analysis, culminating in Sypro Ruby staining.
Extracellular DNA-Protein Matrix Interaction
This diagram conceptualizes the interaction between eDNA and proteins within the biofilm matrix, a key structural relationship relevant to sample preparation strategies.
Within the broader thesis investigating Sypro Ruby as a pivotal stain for extracellular proteins in biofilm matrices, this document details the application of Confocal Laser Scanning Microscopy (CLSM) for high-resolution imaging. Biofilms are structured microbial communities embedded in a self-produced matrix of extracellular polymeric substances (EPS), which provides architectural stability and protects constituent cells [32] [33]. The EPS matrix is a complex mixture of biomolecules, with proteins representing a critical functional component, influencing cohesion, stability, and metabolic processes [33]. Sypro Ruby staining offers a high-sensitivity, fluorescent method for visualizing this proteinaceous network within the intact, three-dimensional biofilm structure without the need for destaining, making it exceptionally suitable for CLSM. This protocol outlines the compatible setup for CLSM and the detailed methodology for employing Sypro Ruby to characterize the spatial distribution and relative abundance of proteins in biofilms, providing researchers with a robust tool for elucidating structure-function relationships in biofilm matrix research.
Key Research Reagent Solutions
The following table catalogues the essential materials and reagents required for the successful staining and imaging of extracellular proteins in biofilms using Sypro Ruby and CLSM.
Table 1: Essential Research Reagents and Materials
| Item | Function/Description |
|---|---|
| Sypro Ruby Protein Gel Stain | A ruthenium-based, fluorescent dye that binds non-covalently to proteins within the EPS matrix, exhibiting excellent sensitivity and a wide linear dynamic range [33]. |
| Confocal Laser Scanning Microscope | An imaging system that enables optical sectioning of thick, hydrated biofilms to generate high-resolution 3D reconstructions of the protein distribution. |
| Solid-Liquid Interface Biofilm Growth Substrate | The surface (e.g., glass-bottom dish, flow cell) on which the biofilm is cultivated, compatible with both immersion objectives and microscopic observation [33]. |
| Fixative Agent (e.g., Paraformaldehyde) | Used to cross-link and preserve the 3D structure of the biofilm and its extracellular proteins prior to staining, preventing degradation and morphological changes. |
| Permeabilization Agent (e.g., Ethanol) | Enhances dye penetration through the dense EPS matrix by temporarily disrupting membrane structures, ensuring uniform staining of intracellular and extracellular proteins. |
| Mounting Medium | A solution used to immobilize the stained biofilm under a coverslip, maintaining hydration and minimizing optical aberrations during imaging. |
CLSM Setup and Configuration for Sypro Ruby
Configuring the CLSM correctly is paramount for capturing high-quality, quantitative data from Sypro Ruby-stained biofilms. The following table summarizes the critical instrument parameters.
Table 2: CLSM Configuration Parameters for Sypro Ruby Imaging
| Parameter | Recommended Setting | Rationale |
|---|---|---|
| Excitation Wavelength | 450 nm (Blue/Marine) | This wavelength efficiently excites the ruthenium complex in Sypro Ruby, leading to strong emission. |
| Emission Detection Range | 610 nm (Red) | A bandpass filter (e.g., 600/620 nm) is used to collect the characteristic red emission from Sypro Ruby, minimizing autofluorescence. |
| Laser Power | 5-15% | Start with low power to prevent photobleaching of the dye and to minimize potential damage to the biofilm sample. |
| Detector Gain & Offset | Optimized on control sample | Adjust gain to maximize signal without saturation; set offset to ensure black-level background. |
| Pinhole Diameter | 1 Airy Unit (AU) | Represents the optimal compromise between optical sectioning (Z-resolution) and signal intensity. |
| Objective Lens | 60x Water-Immersion | Essential for imaging hydrated biofilms without distortion; provides high numerical aperture for superior resolution. |
| Z-step Size | 0.5 - 1.0 µm | Determines the resolution of the 3D reconstruction; smaller steps yield finer Z-axis detail. |
Diagram 1: Sypro Ruby Staining and Imaging Workflow
Detailed Experimental Protocol
Biofilm Cultivation and Preparation
Grow biofilms on a substrate suitable for CLSM, such as a sterile glass coverslip or in a flow cell, under conditions relevant to your research question (e.g., specific nutrient media, flow rate, temperature, and duration) [32]. A mature biofilm (typically 3-7 days old) is recommended for robust EPS matrix development [33]. Upon reaching the desired maturity, carefully extract the substrate from the growth medium.
Sypro Ruby Staining Procedure
This protocol is optimized for biofilms grown on a 22 mm square glass coverslip.
- Fixation: Immerse the biofilm in a solution of 4% paraformaldehyde in a buffered solution (e.g., PBS) for 30 minutes at room temperature. This critical step cross-links and preserves the 3D structure.
- Permeabilization: Gently rinse the fixed biofilm three times with a PBS buffer to remove residual fixative. Subsequently, incubate the biofilm in a 70% ethanol solution for 15 minutes to permeabilize the matrix and facilitate dye penetration.
- Staining Application: Apply a sufficient volume of undiluted Sypro Ruby stain to completely cover the biofilm surface (approximately 100-200 µL). Incubate the sample in the dark for 90 minutes to ensure complete staining.
- Destaining/Rinsing: Transfer the coverslip to a clean container and wash thoroughly with a suitable buffer or ultrapure water for 30-60 minutes to remove unbound dye. This step is crucial for reducing background fluorescence.
- Mounting: Carefully mount the stained and rinsed biofilm onto a glass microscope slide using a small volume of anti-fade mounting medium. Gently press to remove excess medium and seal the edges with clear nail polish to prevent dehydration during imaging.
CLSM Imaging and Data Acquisition
Configure the CLSM according to the parameters outlined in Table 2. To generate a 3D reconstruction, set the microscope to acquire a Z-stack, scanning the biofilm from the substrate surface to the top of the biofilm community at the specified Z-step interval. Ensure that the laser power and detector gain are set to avoid pixel saturation, which is critical for subsequent quantitative analysis.
Data Analysis and Interpretation
CLSM generates rich, multi-dimensional datasets. The primary analysis goals for Sypro Ruby-stained biofilms are to determine the spatial distribution and relative abundance of extracellular proteins.
Quantitative Image Analysis
Image analysis software (e.g., ImageJ/Fiji) is used to extract quantitative data from the Z-stack images [32].
Table 3: Quantitative Metrics for Biofilm Protein Analysis
| Metric | Description | Interpretation |
|---|---|---|
| Total Biofilm Biovolume (µm³) | The total volume of the biofilm structure, calculated from the 3D stack. | Indicates overall biofilm growth and accumulation. |
| Protein-Specific Biovolume (µm³) | The volume occupied by pixels with fluorescence intensity above a set threshold. | Represents the absolute volume of the proteinaceous matrix. |
| Average Fluorescence Intensity (A.U.) | The mean pixel intensity within the protein-specific biovolume. | Reflects the relative concentration of the stained proteins. |
| Protein Distribution Co-efficient | A measure of the heterogeneity of protein distribution within the biofilm (e.g., coefficient of variation of intensity). | Higher values indicate a more heterogeneous, clustered protein distribution. |
3D Reconstruction and Co-localization
3D projection views provide direct visual assessment of the protein network architecture. Furthermore, in multi-channel experiments, Sypro Ruby signal can be analyzed for co-localization with other fluorescent probes (e.g., lectins for polysaccharides) to investigate the spatial relationship between different EPS components [33].
Diagram 2: CLSM Image Analysis Workflow
Troubleshooting and Technical Notes
- High Background Fluorescence: This is often due to insufficient rinsing after staining. Extend the wash time or consider multiple changes of wash buffer. Ensure the mounting medium is compatible and does not auto-fluoresce.
- Weak or No Staining Signal: Verify the activity of the staining solution and ensure the permeabilization step was effective. Check the CLSM settings, particularly the laser power, detector gain, and that the correct excitation/emission filters are selected.
- Non-uniform Staining: This can result from uneven dye application or the presence of air bubbles during staining/mounting. Ensure the stain fully covers the sample and that mounting is performed carefully.
- Photobleaching: If the fluorescence signal fades rapidly during imaging, reduce the laser power and use a higher detector gain instead. Ensure the anti-fade properties of the mounting medium are effective.
Within the field of biofilm research, the comprehensive analysis of the extracellular polymeric matrix (EPM) is crucial for understanding biofilm structure, function, and resistance. The EPM is chemically complex, with proteins, carbohydrates, and extracellular DNA (eDNA) as its major components [6]. SYPRO Ruby stain, a ruthenium complex-based fluorescent dye, has emerged as a powerful tool for detecting proteins within this matrix due to its high sensitivity, broad linear dynamic range, and excellent compatibility with mass spectrometry [15] [10]. This application note details validated protocols for multiplexing SYPRO Ruby with other fluorescent stains, enabling researchers to simultaneously characterize multiple EPM components from a single sample, thereby providing a more holistic view of biofilm architecture and composition.
Quantitative Comparison of Protein Gel Stains
The selection of an appropriate protein stain is critical and depends on the specific requirements of sensitivity, dynamic range, and downstream application compatibility. The table below summarizes key performance characteristics of commonly used stains, establishing a rationale for selecting SYPRO Ruby as the foundation for multiplexed staining approaches.
Table 1: Performance Comparison of Common Protein Stains
| Stain Type | Approximate Sensitivity | Dynamic Range | Compatibility with Mass Spectrometry | Staining Characteristics |
|---|---|---|---|---|
| SYPRO Ruby | Comparable to silver stain [34] | ~3 orders of magnitude [10] | Excellent [15] [34] | Fluorescent, non-covalent ruthenium complex [10] |
| Silver Stain | ~0.25 ng/band [35] | Limited [15] | Poor unless modified [15] | Non-stoichiometric, colorimetric [15] [34] |
| Coomassie Blue | ~5-10 ng/band [35] | Limited [15] | Good with specific formulations [35] | Colorimetric, less sensitive [15] |
| Colloidal Coomassie | <10 ng/band [35] | Moderate | Good [35] | Colorimetric, better sensitivity than standard Coomassie [35] |
Research Reagent Solutions for Multiplexed Staining
A successful multiplexing experiment relies on a specific set of reagents, each fulfilling a distinct role in the staining workflow. The following table catalogs the essential materials required for the protocols described in this document.
Table 2: Essential Research Reagents for Multiplexed Staining Workflows
| Reagent / Kit | Primary Function in Workflow | Key Features / Applications |
|---|---|---|
| SYPRO Ruby Protein Gel Stain [12] | Total protein detection in gels and biofilm matrices | Labels most protein classes; ruthenium-based fluorescent stain; compatible with post-stain MS analysis [9] [10]. |
| Pro-Q Diamond Phosphoprotein Gel Stain [12] | Detection of phosphoproteins | Fluorescent stain for post-translational modifications; used before total protein stains in multiplexing. |
| Pro-Q Emerald Glycoprotein Gel Stain [12] | Detection of glycoproteins | Fluorescent stain for carbohydrate moieties on glycoproteins; used before total protein stains. |
| FilmTracer SYPRO Ruby Biofilm Matrix Stain [9] [2] | Staining proteins in intact biofilms | Ready-to-use 1X formulation for direct application to biofilm structures for confocal microscopy. |
| Fix Solution (50% methanol, 7% acetic acid) [12] | Gel protein fixation and SDS removal | Precipitates and immobilizes proteins in gels prior to staining; critical for reducing background. |
| Wash Solution (10% methanol, 7% acetic acid) [12] | Background reduction and stain stabilization | Removes unbound dye after staining to enhance signal-to-noise ratio. |
Experimental Protocols for Multiplexed Staining
Protocol 1: Foundational SYPRO Ruby Staining for 1D Gels
This protocol forms the basis for total protein detection and should be followed whether using SYPRO Ruby alone or as the final step in a multiplexing workflow.
Materials:
- SYPRO Ruby Protein Gel Stain [12]
- Fix Solution: 50% (v/v) methanol, 7% (v/v) acetic acid in ultrapure water [12]
- Wash Solution: 10% (v/v) methanol, 7% (v/v) acetic acid in ultrapure water [12]
- Orbital shaker
- Microwave oven (for rapid protocol)
Procedure (Basic Overnight Protocol):
- Fixation: Following electrophoresis, place the gel in a clean container with ~100 mL of fix solution. Agitate on an orbital shaker for 30 minutes. Discard the solution and repeat with fresh fix solution for another 30 minutes [12].
- Staining: Pour off the fix solution and add ~60 mL of SYPRO Ruby stain. Protect the gel from light and agitate on an orbital shaker overnight (typically 3 hours to overnight) [12].
- Washing: Transfer the gel to a clean container to avoid dye speckles. Add ~100 mL of wash solution and agitate for 30 minutes. Before imaging, rinse the gel thoroughly in ultrapure water (a minimum of two rinses for 5 minutes each) to prevent corrosive damage to imaging equipment [12].
Procedure (Rapid Protocol):
- Fixation: Place the gel in a microwavable container with 100 mL of fix solution. Agitate for 15 minutes. Replace with fresh fix solution and agitate for another 15 minutes [12].
- Staining: Add 60 mL of SYPRO Ruby stain. Microwave for 30 seconds, agitate for 30 seconds to distribute heat, and microwave for another 30 seconds until the solution reaches 80-85°C. Agitate on an orbital shaker for 5 minutes. Reheat by microwaving for a third 30-second interval, then agitate for 23 minutes (total stain time: 30 minutes) [12].
- Washing: Transfer the gel to a clean container with 100 mL of wash solution. Agitate for 30 minutes, then complete the process with multiple ultrapure water rinses [12].
Protocol 2: Sequential Multiplexing for Post-Translational Modifications
This protocol enables the co-detection of total protein and specific post-translational modifications from a single gel.
Materials:
- SYPRO Ruby Protein Gel Stain [12]
- Pro-Q Diamond Phosphoprotein Gel Stain [12]
- Pro-Q Emerald Glycoprotein Gel Stain [12]
- Appropriate fixatives and destain solutions for the modification-specific stains
Procedure:
- Stain for Phosphoproteins: Perform the complete staining and imaging protocol for Pro-Q Diamond Phosphoprotein Gel Stain first [12].
- Stain for Glycoproteins: On the same gel, proceed with the complete staining and imaging protocol for Pro-Q Emerald Glycoprotein Gel Stain [12].
- Stain for Total Protein: Finally, stain the same gel with SYPRO Ruby Protein Gel Stain using the basic or rapid protocol described above [12]. Following SYPRO Ruby staining, the gel can also be stained with Coomassie Blue or Silver Stain if required, though this is typically redundant for fluorescent detection [12].
- Image Acquisition: After each staining step, the gel must be imaged using the appropriate excitation/emission wavelengths specific to each stain before proceeding to the next stain [12].
Workflow Visualization: Multiplexed Staining Process
The following diagram illustrates the sequential workflow for multiplexing SYPRO Ruby with other fluorescent stains, which is crucial for accurate multi-parameter analysis.
Sequential Staining and Imaging Workflow
Critical Considerations for Experimental Success
- Staining Order is Inviolable: The sequence must progress from the least stable stain or the one with the most specific target (e.g., PTM stains) to the most robust and general stain (SYPRO Ruby). Staining in reverse order will quench or wash away the previous signals [12].
- Preventing Keratin Contamination: Keratin from skin and hair is a common contaminant that appears as broad bands at 50-68 kDa. Always wear a lab coat and gloves, use ultrapure water and clean equipment, and rinse gel wells with buffer before loading samples [12].
- Managing Stain Speckles: Speckles can form from dye aggregation over time or around contaminants. Use clean laboratory practices, rinse gloves to remove powder, and always use clean containers. The rapid staining protocol minimizes time for speckles to form [12].
- Imaging and Quenching: Note that some pre-stained protein markers contain blue dyes that absorb red fluorescence, causing dark, quenched bands. SYPRO Ruby stain is not compatible with protein transfer to membranes after staining due to the fixation step [12].
The multiplexing strategies outlined herein provide researchers with a powerful methodology to deconstruct the intricate complexity of biofilm matrices. By leveraging the superior sensitivity, linearity, and mass spectrometry compatibility of SYPRO Ruby stain in conjunction with other specific probes, scientists can generate comprehensive, multi-parameter data on total protein content, phosphorylation, and glycosylation states from a single sample. These protocols, supported by the detailed reagent specifications and critical troubleshooting guidelines, establish a robust framework for advancing our understanding of extracellular matrix biology in antimicrobial drug development and microbiological research.
Solving Common SYPRO Ruby Challenges: Speckles, Background, and Sensitivity Issues
In biofilm matrix research, the accurate quantification of extracellular proteins is crucial for understanding biofilm structure and function. SYPRO Ruby protein gel stain is a sensitive fluorescent dye widely used for this purpose, enabling visualization of the protein component within the extracellular polymeric substance. However, a common challenge researchers face is the formation of speckles—fluorescent artifacts that compromise data interpretation and quantification. This application note details evidence-based protocols for preventing and managing speckle formation, ensuring reliable analysis of extracellular proteins in biofilm research.
Understanding Speckle Formation: Causes and Mechanisms
Speckles appearing on gels after SYPRO Ruby staining are primarily caused by two interconnected mechanisms: dye self-aggregation and contamination from external sources. Understanding these root causes is essential for effective prevention.
Dye Self-Aggregation: SYPRO Ruby dye naturally self-aggregates over time, forming microscopic precipitates that appear as speckles on stained gels. This process accelerates as the stain ages beyond approximately one year, with older stains showing lower staining intensity of protein bands alongside increased speckling [22].
Contamination-Induced Aggregation: Speckles also form through dye aggregation around particulate contaminants originating from multiple sources:
- Staining containers with residual dye from previous uses
- Laboratory solutions prepared with impure water
- Airborne particles including dust, lint, and skin keratin
- Powder residue from laboratory gloves [22]
The diagram below illustrates the primary causes of speckle formation and their relationships:
Comprehensive Prevention Strategies
Laboratory Clean Technique Protocols
Implementing meticulous laboratory practices is the most effective approach to minimize contamination-induced speckles:
Personal Protective Equipment Protocol:
- Wear a clean lab coat at all times during staining procedures
- Use powder-free gloves or thoroughly rinse powdered gloves with ultrapure water before handling gels or staining containers [22]
Workspace Decontamination:
- Wipe down all surfaces with 70% ethanol before beginning procedures
- Use lint-free wipes for cleaning glassware and staining containers
- Designate a specific low-traffic area for staining procedures to minimize airborne contamination [22]
Keratin Contamination Prevention:
- Keratin from skin and hair represents a common contamination source that appears as broad 50-68 kDa bands across the gel
- Always wear gloves and lab coats during sample preparation and staining
- Store microfuge tubes in sealed plastic bags rather than leaving them open on bench tops
- Rinse gel wells with ultrapure water or running buffer before loading samples [22]
Solution and Stain Management
Proper handling of staining solutions significantly reduces dye self-aggregation:
Stain Storage and Usage:
- Note the manufacture date and track stain age
- Plan experiments to use stains within one year of purchase
- Gently mix the stain before use to ensure homogeneity [22]
Water and Solution Quality Control:
- Use ultrapure water with resistance >18 megohm-cm for all solution preparation
- Filter all solutions through 0.22 µm filters before use
- Store solutions in clean, sealed containers to prevent contamination [22]
Staining Container Maintenance:
- Thoroughly rinse staining containers with ethanol between uses
- Wipe out any residual dye buildup before staining subsequent gels
- Dedicate specific containers for SYPRO Ruby staining to prevent cross-contamination [22]
Experimental Protocol for Speckle-Free Staining
Rapid Staining Protocol (90 minutes)
This accelerated protocol minimizes speckle formation by reducing the time available for dye aggregation:
Gel Fixation:
- Fix the polyacrylamide gel in 50% methanol/7% acetic acid for 30 minutes
- Extend fixation time to 60 minutes if high background or shadowing around bands was observed in previous experiments [22]
Staining Procedure:
- Incubate gel with SYPRO Ruby stain for 60 minutes with gentle agitation
- For older stains (>9 months), reduce staining time to 45 minutes
Destaining and Washing:
- Transfer gel to 10% methanol/7% acetic acid destaining solution for 30 minutes
- Perform a final wash with ultrapure water for 10 minutes [22]
Post-Staining Speckle Management
Despite preventive measures, if speckles appear:
Imaging Considerations:
- Acquire images at multiple focal planes to distinguish surface speckles from protein bands
- Use image analysis software with de-speckling algorithms to remove pixelated noise during analysis [22]
Speckle Identification:
- True protein bands appear as well-defined regions with characteristic migration patterns
- Speckles typically appear as sharp, randomly distributed spots with uniform intensity
- In 3D renditions of gel images, speckles appear as distinct sharp spikes compared to the broader peaks of protein spots [22]
Table 1: Troubleshooting Guide for Speckle Formation
| Problem | Possible Cause | Solution |
|---|---|---|
| Numerous small speckles | Old stain (>1 year) | Replace with fresh stain |
| Speckles concentrated in specific areas | Contaminated staining container | Clean container with ethanol between uses |
| Random speckle distribution | Airborne contaminants or glove powder | Improve clean technique, rinse gloves before use |
| Speckles plus high background | Incomplete fixation | Increase fixation time by 30 minutes |
| Broad 50-68 kDa bands plus speckles | Keratin contamination | Implement keratin prevention protocols |
Research Reagent Solutions for Biofilm Matrix Studies
Table 2: Essential Research Reagents for SYPRO Ruby-Based Biofilm Protein Analysis
| Reagent | Function in Biofilm Research | Application Notes |
|---|---|---|
| SYPRO Ruby Protein Gel Stain | Extracellular protein staining in biofilm matrix | Compatible with multiplex staining approaches; optimal for biofilm EPS protein visualization [7] |
| 0.5% Triton-X-100 | Biofilm disruption for matrix component release | Used with 4% formaldehyde for biofilm fixation and disruption prior to staining [7] |
| 4% Formaldehyde Solution | Biofilm fixation | Preserves biofilm architecture during processing for EPS analysis [7] |
| Proteinase K | Protein digestion in EPS | Used in enzymatic extraction of biofilm matrix; digests proteins to increase nucleic acid release [6] |
| DNase I | eDNA degradation in EPS | Disrupts biofilm matrix by digesting extracellular DNA; enhances antibiotic effects [6] |
| ConA-Alexa fluor 633 | α-polysaccharide staining | Labels extracellular polysaccharides in multiplex biofilm staining approaches [7] |
| Propidium Iodide (PI) | Bacterial DNA labeling | Stains bacterial DNA within biofilm matrix; used for colocalization studies [7] |
| TOTO-1 | Extracellular DNA (eDNA) staining | Specifically binds eDNA in biofilm matrix; reveals matrix architecture [7] |
Integration in Biofilm Matrix Research Workflow
The following workflow diagram illustrates how proper SYPRO Ruby staining integrates within a comprehensive biofilm extracellular matrix analysis protocol:
Effective management of speckle formation in SYPRO Ruby staining requires a comprehensive approach addressing both dye chemistry and laboratory technique. Through implementation of rigorous clean techniques, proper stain management, and the rapid staining protocol outlined herein, researchers can significantly improve the quality and reliability of extracellular protein analysis in biofilm matrix studies. These protocols enable accurate quantification of biofilm proteins, supporting advances in understanding biofilm biology and developing anti-biofilm strategies.
In the context of biofilm matrix research, achieving a low background is paramount for the accurate quantification of extracellular proteins using fluorescent stains like SYPRO Ruby. The biofilm matrix is a complex amalgamation of proteins, polysaccharides, and nucleic acids, which presents unique challenges during the staining process. A primary source of high background interference is the incomplete removal of sodium dodecyl sulfate (SDS) from polyacrylamide gels following electrophoresis. SDS micelles can bind SYPRO Ruby dye non-specifically, leading to elevated background fluorescence that obscures target protein signals and compromises data quantification. This application note provides detailed protocols and troubleshooting guidance to effectively remove SDS and reduce background, ensuring optimal results in biofilm protein analysis.
Troubleshooting High Background: Core Principles and Techniques
High background in SYPRO Ruby-stained gels manifests as a uniform glow or specific patterns, such as dark "shadows" around protein bands [22]. This shadowing is a direct indicator that the background staining of SDS is too high. The following table summarizes the primary causes and recommended solutions for high background.
Table 1: Troubleshooting Guide for High SYPRO Ruby Background
| Symptom | Primary Cause | Recommended Solution |
|---|---|---|
| Dark "shadows" around protein bands [22] | High background staining of SDS | Extend destaining in 10% methanol/7% acetic acid by 30 minutes, followed by a thorough water wash [22]. |
| Uniformly high background fluorescence | Inadequate fixation prior to staining | Fix the gel for a longer duration (at least an additional 30 minutes) to better remove SDS before applying the stain [22]. |
| Speckles or particulate debris on gel surface | Dye aggregation or environmental contaminants | Follow clean laboratory practices: use high-purity water, rinse powder from gloves, wear a lab coat, and clean staining containers with ethanol between steps [22]. |
The underlying principle for reducing background is to ensure the efficient removal of SDS from the gel matrix before the staining step. SYPRO Ruby dye binds to SDS micelles that coat proteins; if excess SDS is present throughout the gel, it will cause widespread non-specific staining. A rigorous fixation step is therefore critical to wash away this SDS, while the subsequent destaining step helps to remove any unbound dye that contributes to a high background.
Detailed Experimental Protocols
Standard Staining and Destaining Protocol for Optimal SDS Removal
This protocol is designed to minimize background by ensuring complete fixation and destaining.
Materials:
- SYPRO Ruby Protein Gel Stain
- Fixation Solution: 10% methanol (or ethanol) and 7% acetic acid in ultrapure water
- Destain/Wash Solution: 10% methanol and 7% acetic acid in ultrapure water
- Ultrapure water (>18 MΩ-cm resistance)
- Plastic container for staining (cleaned with ethanol)
- Platform rocker
Method:
- Following Electrophoresis: After SDS-PAGE, carefully remove the gel from the cassette.
- Fixation: Immerse the gel in a sufficient volume of Fixation Solution (e.g., 100 mL for a mini-gel). Agitate on a platform rocker for at least 60 minutes. For gels with known high background issues, extend this fixation step by an additional 30 minutes or more [22].
- Staining: Pour off the fixation solution. Add SYPRO Ruby Protein Gel Stain to cover the gel. Protect the gel from light and agitate for 90 minutes to 4 hours.
- Destaining: Transfer the gel to the Destain/Wash Solution. Agitate for 30 minutes. For high background, extend this destaining step by a further 30 minutes [22].
- Final Rinse: Rinse the gel briefly with Ultrapure water to remove residual destain solution.
- Imaging: Image the gel using a UV or appropriate laser-based imaging system.
Rapid Staining Protocol for Time-Sensitive Experiments
A shorter protocol can be employed to minimize the time for speckle formation, though fixation remains crucial.
Method:
- Fixation: Fix the gel as described in the standard protocol (Step 2) for 30 minutes.
- Staining: Incubate with SYPRO Ruby stain for 90 minutes.
- Destaining: Destain for 20 minutes.
- Imaging: Proceed to imaging. The entire process is completed in as little as 140 minutes, reducing the opportunity for dye aggregation and speckle formation [22].
Application in Biofilm Matrix Research
SYPRO Ruby stain is a vital tool for quantifying extracellular proteins within the biofilm matrix, a key component in understanding biofilm structure and drug resistance mechanisms. A recent study investigating the effect of tranexamic acid (TXA) on Staphylococcus aureus biofilms utilized SYPRO Ruby, among other fluorescent stains, to quantify specific biofilm components [36] [24].
Table 2: Biofilm Component Reduction after TXA Treatment (10 mg/mL) [24]
| Biofilm Component | Fluorescent Stain | Occupied Area in Control (%) | Occupied Area in TXA (%) | Reduction (%) |
|---|---|---|---|---|
| Extracellular Proteins | SYPRO Ruby | 17.58 ± 1.22 | 0.15 ± 0.01 | 99.2% |
| α-Polysaccharides | ConA-Alexa Fluor 633 | 16.34 ± 4.71 | 1.69 ± 0.69 | 89.7% |
| α/β-Polysaccharides | GS-II-Alexa Fluor 488 | 16.77 ± 1.36 | 0.57 ± 0.28 | 96.6% |
| Bacterial DNA | Propidium Iodide (PI) | 16.55 ± 13.42 | 1.60 ± 0.81 | 90.3% |
| eDNA | TOTO-1 | 12.43 ± 6.23 | 0.07 ± 0.02 | 99.3% |
In this research, biofilms were formed on glass slides, treated with TXA, fixed with a formaldehyde solution, and then stained. The stained biofilm samples were examined using confocal laser scanning microscopy (CLSM), and the density of the biofilm components was quantified as the percentage of occupied area using image analysis software like FIJI (ImageJ) [24]. The study demonstrated that TXA significantly reduced all analyzed components of the S. aureus biofilm, with SYPRO Ruby proving highly effective in quantifying the reduction in extracellular proteins [24]. This highlights the utility of SYPRO Ruby in conjunction with other specific stains for a comprehensive analysis of the biofilm matrix.
The Scientist's Toolkit: Essential Research Reagents
Table 3: Key Reagents for SYPRO Ruby Staining and Biofilm Analysis
| Item | Function/Description |
|---|---|
| SYPRO Ruby Protein Gel Stain | A ready-to-use, fluorescent stain that binds to most classes of proteins, including those in biofilm matrices. It is provided in a convenient 1X concentration [9]. |
| FilmTracer SYPRO Ruby Biofilm Matrix Stain | A formulation specifically intended for staining the proteinaceous matrix of bacterial biofilms, compatible with analysis by fluorescence microscopy, confocal microscopy, or microplate readers [9]. |
| Fixation Solution (10% Methanol, 7% Acetic Acid) | Precipitates and immobilizes proteins within the gel while removing SDS, surfactants, and other interfering substances that cause high background. |
| Ultrapure Water (>18 MΩ-cm) | Used to prepare all solutions and for final rinsing steps to minimize speckles and particulate contamination introduced from water impurities [22]. |
| Confocal Laser Scanning Microscope (CLSM) | An imaging system used for the precise quantification of stained biofilm components, allowing for the creation of z-stacks and 3D reconstructions of the biofilm structure [24]. |
Workflow and Signaling Diagrams
Diagram 1: SYPRO Ruby staining workflow with integrated troubleshooting feedback loops for high background.
In the analysis of extracellular proteins within biofilm matrices, Sypro Ruby staining is a critical technique for visualizing the complex proteomic profiles that underpin biofilm structure and function. However, the efficacy of this method is highly dependent on reagent integrity. Precipitation of the stain, often resulting from improper storage or the use of aged reagents, introduces significant variability, diminishes sensitivity, and compromises the quantification of key matrix proteins. This application note provides a detailed protocol to identify, mitigate, and resolve issues related to Sypro Ruby stain precipitation, ensuring reliable and reproducible results in biofilm research.
Sypro Ruby Stain Stability: Core Challenges and Assessment
Sypro Ruby stain is a ruthenium-based compound that fluoresces upon binding to proteins, but its complex chemical nature makes it susceptible to precipitation over time. The table below outlines the primary factors contributing to this instability and their direct consequences on biofilm research.
Table 1: Factors Affecting Sypro Ruby Stain Stability and Their Impact
| Factor | Effect on Stain | Consequence for Biofilm Analysis |
|---|---|---|
| Multiple Freeze-Thaw Cycles | Induces formation of insoluble aggregates and crystalline precipitates [37]. | High background noise, uneven staining, and failure to detect low-abundance extracellular proteins. |
| Exposure to Light | Photo-degradation of the ruthenium complex, leading to loss of fluorescence and potential precipitation. | Reduced sensitivity and inaccurate quantification of protein bands, skewing proteomic data. |
| Extended Storage | Molecular breakdown and oxidation in aged reagents, even under recommended storage conditions. | Increased batch-to-batch variability, compromising the reproducibility of long-term studies. |
| Contamination | Introduction of particulates or microbial growth can act as nucleation points for precipitation. | Complete reagent failure and risk of contaminating delicate biofilm samples. |
A critical first step before any experiment is a visual inspection of the reagent. A clear, deep purple solution indicates stability, whereas any cloudiness, visible particles, or a color shift suggests precipitation has begun.
Experimental Protocols for Diagnosis and Resolution
Protocol 1: Qualitative Assessment of Stain Precipitation
This protocol is used to confirm the physical state of the Sypro Ruby stain prior to use.
- Materials: Sample of Sypro Ruby stain; clear glass vial or test tube; bright light source.
- Procedure: a. Gently invert the stock bottle several times to ensure a homogeneous suspension without creating bubbles. b. Transfer 1-2 mL of the stain into a clean, clear glass vial. c. Hold the vial against a bright white light source and visually inspect for cloudiness, stringy formations, or particulate matter. d. Interpretation: A homogenous, translucent solution is acceptable. Any visible heterogeneity indicates the stain requires filtration before use or should be discarded.
Protocol 2: Filtration of Precipitated Stain
If precipitation is minor, filtration can often salvage the reagent.
- Materials: Precipitated Sypro Ruby stain; 0.22 µm or 0.45 µm syringe filter (cellulose acetate or PVDF, low protein binding); 10 mL or 20 mL sterile syringe; sterile collection tube.
- Procedure: a. Draw the compromised stain into a syringe without the needle attached. b. Affix a 0.22 µm syringe filter to the tip of the syringe. c. Slowly and steadily depress the plunger, filtering the stain into a sterile, labeled collection tube. d. Perform a second visual inspection (Protocol 1) to confirm the clarity of the filtered stain. e. Note: Filtration may slightly reduce stain concentration. For quantitative work, comparing the performance of filtered stain against a fresh standard on a test gel is recommended.
Protocol 3: Performance Validation on a Test Gel
This protocol validates that the treated or stored stain performs adequately.
- Materials: Prepared protein gel (e.g., with a standard protein ladder and a biofilm matrix protein sample); fresh (control) and tested Sypro Ruby stains; standard gel electrophoresis and imaging equipment.
- Procedure: a. Run the protein gel and complete the electrophoresis phase. b. Fix the gel in a solution of 10% acetic acid and 40% methanol for 30 minutes. c. Split the fixed gel into two halves. Stain one half with the fresh control stain and the other with the tested/filtered stain, following identical incubation times (typically 90-180 minutes). d. Destain both gels in the same 10% acetic acid/40% methanol solution for 30 minutes. e. Image the gels using identical fluorescence detection settings. f. Analysis: Compare the signal intensity, background fluorescence, and resolution of protein bands between the two gels. A significant degradation in performance in the test stain indicates the reagent should be replaced.
Optimized Workflow for Stain Management
The following diagram illustrates the logical decision-making pathway for assessing and managing Sypro Ruby stain integrity, from initial inspection to experimental use.
The Scientist's Toolkit: Research Reagent Solutions
Successful management of fluorescent stains requires a set of specific materials and practices. The following table details essential solutions for handling Sypro Ruby.
Table 2: Essential Reagent Solutions for Sypro Ruby Stain Management
| Item / Solution | Function / Purpose | Specific Application Note |
|---|---|---|
| 0.22 µm Syringe Filters (PVDF) | Removal of particulate precipitates from compromised stain. | PVDF membranes are preferred for low protein-binding properties, preventing loss of stain components. |
| Aliquoting Tubes (2 mL amber vials) | To minimize freeze-thaw cycles by creating single-use batches. | Protects from light and limits repeated exposure to temperature fluctuations [37]. |
| Stain Validation Gel | A standardized protein gel for comparing fresh vs. aged stain performance. | Should include a protein ladder and a control biofilm matrix sample. |
| Gel Destain Solution | Removes unbound dye to reduce background fluorescence. | Consistent use of 10% acetic acid/40% methanol is critical for reproducible background levels [25]. |
| Digital pH Meter | Monitoring the storage buffer condition. | A shift in pH can indicate degradation or contamination of the staining solution. |
Proactive management of Sypro Ruby stain integrity is not a peripheral task but a fundamental requirement for generating high-quality data in biofilm extracellular proteomics. By implementing the diagnostic protocols, filtration techniques, and storage strategies outlined here, researchers can effectively address the challenge of stain precipitation. This rigorous approach ensures the sensitivity and reproducibility necessary to uncover meaningful insights into the proteinaceous components of the biofilm matrix, thereby supporting robust drug development and microbiological research.
Within biofilm matrix research, the accurate quantification of extracellular proteins is crucial for understanding biofilm architecture, function, and response to treatment. SYPRO Ruby stain, a fluorescent dye with high sensitivity and a broad dynamic range, has been validated as an effective tool for this purpose [38] [16]. Its application is particularly valuable for characterizing the extracellular polymeric substance (EPS), a key component that provides structural integrity and protection to microbial communities [32] [7]. This application note details optimized protocols for using SYPRO Ruby to stain extracellular proteins in biofilms, focusing on the critical parameters of protein load and fixation time to maximize signal intensity and quantification accuracy.
Technical Considerations for SYPRO Ruby Staining
Optimizing SYPRO Ruby staining for biofilm extracellular proteins requires attention to several key procedural steps. The following workflow outlines the core process, from sample preparation to image analysis:
Key Parameter Optimization
Protein Load and Detection Range: SYPRO Ruby offers a wide linear quantitative range, capable of detecting proteins across three orders of magnitude [38]. Its sensitivity is sub-nanogram, detecting less than 0.25 ng of protein per band, which is comparable to many silver staining techniques but with greater convenience and linearity [38] [16].
Fixation Time: Fixation is a critical step for removing sodium dodecyl sulfate (SDS) and other interferents from polyacrylamide gels. Inadequate fixation can lead to high background staining and reduced sensitivity. It is recommended to fix gels for a minimum of 30 minutes to ensure complete SDS removal. For complex samples like biofilm extracts, extending the fixation time to 60 minutes can further improve background clarity and signal intensity [22].
Background Management: If high background is observed after staining, a prolonged destain step (e.g., an additional 30 minutes in 10% methanol/7% acetic acid) followed by a thorough water wash is recommended [22]. Shadowing around bands is often indicative of insufficient SDS removal during fixation, requiring a longer initial fixation time.
Experimental Protocol for Staining Biofilm Extracellular Proteins
This protocol is adapted from methodologies used to characterize Staphylococcus aureus biofilms, where SYPRO Ruby was successfully employed to quantify reductions in extracellular proteins following treatment with anti-biofilm agents [7].
Materials and Reagents
Table: Research Reagent Solutions for SYPRO Ruby Staining
| Reagent/Material | Function | Specifications/Alternatives |
|---|---|---|
| SYPRO Ruby Protein Gel Stain [38] | Fluorescent staining of proteins in gels | λex 280/450 nm; λem 610 nm; store at room temp, protected from light |
| Fixation Solution | Precipitates proteins, removes SDS | 10-40% Ethanol or Methanol with 7-10% Acetic Acid |
| Destain/Wash Solution | Reduces background fluorescence | 10% Methanol, 7% Acetic Acid |
| Ultrapure Water (>18 MΩ-cm) | Preparing solutions, final rinsing | Prevents speckles and background contamination [22] |
| Polyacrylamide Gel | Protein separation | Compatible with 1D SDS-PAGE, 2D-PAGE, and IEF gels [38] |
Step-by-Step Procedure
- Sample Preparation: Resuspend biofilm samples in an appropriate buffer (e.g., PBS). Disrupt the biofilm matrix using a detergent like 0.5% Triton-X 100 and fix with a 4% formaldehyde solution to preserve structure. Homogenize the suspension via vortexing, sonication, or using a commercial homogenizer to disperse cells and EPS [32] [7].
- Electrophoresis: Separate the protein components of the biofilm extract using 1D or 2D polyacrylamide gel electrophoresis (PAGE) according to standard protocols.
- Fixation: Following electrophoresis, immerse the gel in a fixative solution (e.g., 40% ethanol/7% acetic acid) for 30 to 60 minutes with gentle agitation. This step is critical for removing SDS, which can interfere with staining.
- Staining:
- Decant the fixation solution.
- Cover the gel with an adequate volume of SYPRO Ruby stain (e.g., ~50 mL for a mini-gel). The stain is provided as a ready-to-use solution [38].
- Incubate with gentle agitation for 90 minutes to 3 hours. For maximum sensitivity, especially for low-abundance proteins, incubation can be extended overnight.
- Destaining:
- Transfer the gel to a wash/destain solution (e.g., 10% methanol, 7% acetic acid) for approximately 30 minutes to reduce background. The solution can be changed once during this period.
- Perform a final rinse with ultrapure water to remove residual destain solution.
- Image Acquisition:
- Visualize and capture the image using a gel documentation system with appropriate light sources. SYPRO Ruby can be excited with UV (∼280 nm) or blue-light (∼450 nm) transilluminators, and emits at ∼610 nm (red) [38].
- For quantitative analysis, ensure the imaging system is calibrated for fluorescence linearity.
Data Analysis and Interpretation
In a recent study, SYPRO Ruby staining was used to quantify the reduction of extracellular proteins in S. aureus biofilms after treatment with Tranexamic Acid (TXA). The data below summarizes the quantitative findings from this application:
Table: Quantification of S. aureus Biofilm Extracellular Proteins after TXA Treatment using SYPRO Ruby
| Biofilm Sample | Mean Occupied Area (%) | Standard Deviation (±) | Reduction vs. Control | P-value |
|---|---|---|---|---|
| Positive Control (+C) | 17.58% | 1.22% | - | - |
| TXA 10 mg/mL Treated | 0.15% | 0.01% | 99.2% | <0.001 |
This data, derived from confocal laser scanning microscopy and image analysis with FIJI (ImageJ) software [7], demonstrates that SYPRO Ruby provides a robust method for generating statistically significant quantitative data on biofilm matrix components.
Troubleshooting Guide
Table: Common Issues and Remedies in SYPRO Ruby Staining
| Problem | Potential Cause | Recommended Solution |
|---|---|---|
| High background | Incomplete fixation or destaining; old stain | Extend fixation time (up to 60 min); extend destain time with multiple solution changes; use fresh stain [22] |
| Speckles on gel | Dye aggregation; environmental contaminants | Use fresh stain; practice clean technique (wear gloves, rinse with ethanol, use ultrapure water) [22] |
| Shadowing around bands | High SDS background in gel | Destain gel longer (add 30 min) and ensure adequate fixation time prior to staining [22] |
| Weak or no signal | Protein load below detection limit; over-destaining | Concentrate sample; ensure protein load is within detection range (sub-nanogram to microgram); avoid excessive destaining [38] |
| Quenched signal with markers | Presence of certain colored dyes | Some blue-colored pre-stained markers can quench SYPRO Ruby fluorescence, appearing as dark bands [22] |
This application note addresses a critical technical challenge in biofilm matrix research: fluorescence quenching of SYPRO Ruby stain by pre-stained protein molecular weight markers. SYPRO Ruby is extensively utilized for visualizing extracellular proteins within the complex architecture of biofilms, but improper selection of molecular weight standards can compromise data integrity through signal quenching. This guide provides mechanistic insights, quantitative assessments, and optimized protocols to prevent such artifacts, ensuring reliable quantification of biofilm matrix proteins in both fundamental research and drug development applications.
SYPRO Ruby dye, a ruthenium-based fluorescent complex, has become an indispensable tool for detecting proteins within the extracellular polymeric substance (EPS) of biofilms. Its exceptional sensitivity (detecting 0.25-1 ng of protein) and broad linear dynamic range over three orders of magnitude make it ideal for quantifying the proteinaceous components of biofilm matrices, which are critical for structural integrity and antimicrobial resistance [1] [10]. In biofilm research, SYPRO Ruby has been successfully employed to stain matrix proteins in diverse species including Staphylococcus aureus and has been integrated into multiplexed staining protocols alongside polysaccharide and DNA markers for comprehensive matrix characterization [24] [39].
A significant technical challenge emerges when researchers use pre-stained protein markers for simultaneous molecular weight determination. Certain colored dyes in these markers can absorb the emission wavelengths of SYPRO Ruby, leading to localized quenching effects that manifest as dark bands against a fluorescent background [1]. This artifact can be misinterpreted as absent or under-expressed proteins, potentially compromising data interpretation in studies evaluating biofilm matrix composition under different experimental conditions or therapeutic treatments.
Mechanism of Fluorescence Quenching
Physical Basis of Quenching
Fluorescence quenching with SYPRO Ruby occurs through a resonance energy transfer mechanism where certain colored compounds absorb the emitted fluorescence from the ruthenium complex. SYPRO Ruby exhibits excitation maxima at 280 nm and 450 nm, with an emission peak at 610 nm (red spectrum) [1] [9]. When SYPRO Ruby-stained proteins are visualized, the ruthenium complex bound to proteins emits red fluorescence upon excitation.
The quenching phenomenon specifically occurs with blue-colored dyes commonly used in pre-stained protein markers. These blue dyes strongly absorb light in the red wavelength region (approximately 610 nm), coinciding perfectly with SYPRO Ruby's emission spectrum [1]. When a protein band contains both SYPRO Ruby and a blue dye, the energy emitted by SYPRO Ruby is absorbed by the blue dye rather than being detected by the imaging system. Although SYPRO Ruby successfully binds to these proteins, the emitted signal is quenched, resulting in negatively stained dark bands that appear as "shadows" against the fluorescent gel background.
Problematic Markers and Compounds
Research has identified specific pre-stained protein ladders that cause this quenching effect:
- BenchMark Pre-Stained Protein Ladder [1]
- SeeBlue Plus2 Pre-Stained Standard (specific proteins) [1]
- Bromophenol blue tracking dye (if not completely run off the gel) [1]
The common denominator is the presence of blue chromophores that absorb red wavelengths. Other colored dyes (green, red, orange) typically do not interfere with SYPRO Ruby detection as their absorption spectra do not significantly overlap with the 610 nm emission [1].
Figure 1: Mechanism of SYPRO Ruby fluorescence quenching by blue dyes in pre-stained markers. The pathway shows how the presence of blue dyes interrupts normal fluorescence detection, creating dark bands.
Quantitative Impact of Quenching
The quenching effect has significant implications for protein detection and quantification in biofilm research. While SYPRO Ruby typically provides sensitive detection down to 0.25-1 ng of protein under optimal conditions [1], quenching can reduce sensitivity for affected bands by more than an order of magnitude, potentially rendering low-abundance matrix proteins undetectable.
Table 1: Comparison of SYPRO Ruby Performance Under Different Conditions
| Condition | Detection Sensitivity | Linear Dynamic Range | Protein-to-Protein Variation | Compatibility with Downstream Analysis |
|---|---|---|---|---|
| Optimal staining (no quenching) | 0.25-1 ng [1] | 3 orders of magnitude [1] [10] | Very low [1] | Excellent for mass spectrometry [10] |
| With blue dye quenching | Severely compromised (bands may disappear) | Not applicable for quenched bands | High for affected bands | Possible if bands can be excised |
| Post-staining with Coomassie | N/A (quenches SYPRO Ruby) [1] | N/A | N/A | Compatible but loses SYPRO Ruby data |
The quantitative impact extends beyond simple detection failure. The nonlinear response caused by partial quenching can distort protein quantification, particularly problematic when comparing protein expression levels in biofilm matrices under different experimental conditions or treatment regimens.
Experimental Protocols
Recommended Protocol for SYPRO Ruby Staining of Biofilm Matrix Proteins
Materials Required:
- FilmTracer SYPRO Ruby Biofilm Matrix Stain (Thermo Fisher, F10318) [9] [2]
- Fixed biofilm samples (on surfaces or in gels)
- Destain solution (ultrapure water or 10% methanol/7% acetic acid)
- Clean staining container (glass or polypropylene)
- Orbital rocker
- Appropriate imaging system (confocal microscope, fluorescence imager, or microplate reader) [9]
Procedure:
- Fixation: Fix biofilm samples according to standard protocols for your system. For biofilm matrix staining, fixation with 2-4% paraformaldehyde is typically employed [39].
Staining: Apply sufficient SYPRO Ruby stain to completely cover the sample. For biofilms grown on surfaces, submerge the entire substrate in stain [24] [39].
Incubation: Incubate for 90 minutes to overnight at room temperature with gentle agitation. The extended incubation may enhance staining of matrix proteins but increases risk of speckle formation [1].
Destaining: Rinse samples with destain solution (ultrapure water recommended for biofilm matrix staining) for 30 minutes with agitation [1] [10].
Imaging: Visualize using appropriate excitation/emission settings (excitation: 450 nm/emission: 610 nm) [9]. For biofilm applications, confocal microscopy provides optimal spatial resolution of matrix architecture [24] [39].
Optimal Molecular Weight Marker Selection
To prevent quenching artifacts:
- Use unstained protein markers whenever possible
- If pre-stained markers are essential, select those without blue-colored proteins
- Run bromophenol blue tracking dye completely off the gel before staining
- Validate marker compatibility with SYPRO Ruby in preliminary experiments
Figure 2: Optimized workflow for SYPRO Ruby staining of biofilm proteins with proper marker selection to prevent fluorescence quenching.
Troubleshooting and Quality Control
Identifying and Mitigating Quenching
Diagnosing Quenching Artifacts:
- Dark bands specifically corresponding to pre-stained marker lanes
- Inconsistent staining patterns between replicates
- Unexplained "shadows" or negative staining in protein bands
Corrective Actions:
- Repeat analysis with unstained protein markers
- Verify complete electrophoresis of bromophenol blue tracking dye
- Avoid subsequent staining with Coomassie Blue, which quenches SYPRO Ruby fluorescence [1]
Additional Quality Considerations
Minimizing Speckles:
- Practice clean technique to prevent keratin contamination (wear lab coat and gloves) [1]
- Rinse gloves with water to remove powder before handling gels
- Use ultrapure water (>18 megohm-cm resistance) for all solutions [1]
- Clean staining containers thoroughly between uses
Stain Stability:
- SYPRO Ruby stain has a shelf life of approximately 9-12 months [1]
- Old stain with visible precipitate cannot be effectively filtered
- Use fresh stain for optimal sensitivity and minimal background
The Scientist's Toolkit: Research Reagent Solutions
Table 2: Essential Reagents for SYPRO Ruby-Based Biofilm Matrix Analysis
| Reagent/Equipment | Catalog Number Examples | Function in Biofilm Research | Application Notes |
|---|---|---|---|
| FilmTracer SYPRO Ruby Biofilm Matrix Stain | F10318 (200 mL) [9] [2] | Fluorescent detection of matrix proteins | Ready-to-use, compatible with confocal microscopy |
| SYPRO Ruby Protein Gel Stain | S12000 (1 L) [1] | Total protein detection in SDS-PAGE | Optimal for 1D/2D gels, sensitive to 0.25-1 ng |
| Unstained Protein Standards | Various | Molecular weight determination | Prevents quenching artifacts |
| Confocal Microscope | N/A | High-resolution imaging of biofilm architecture | Enables 3D reconstruction of matrix organization |
| Microplate Reader | N/A | Quantitative assessment of biofilm formation | Compatible with SYPRO Ruby fluorescence [9] |
| Clean Staining Containers | N/A | Holding gels during staining process | Minimizes speckle formation |
Understanding and preventing fluorescence quenching between SYPRO Ruby and pre-stained protein markers is essential for obtaining reliable data in biofilm matrix research. By selecting appropriate molecular weight standards, following optimized staining protocols, and implementing rigorous quality control measures, researchers can avoid artifactual quenching and ensure accurate quantification of extracellular proteins. These practices are particularly crucial in drug development applications where precise measurement of matrix composition can inform therapeutic strategies against biofilm-associated infections.
SYPRO Ruby Performance Data: Validation Against Alternative Staining Methods
The extracellular polymeric substance (EPS) matrix is a critical determinant in the resilience of Staphylococcus aureus biofilms, conferring significant tolerance to antimicrobial agents and host immune responses [40] [41]. Within this matrix, extracellular proteins serve essential structural and functional roles, facilitating bacterial adhesion, aggregation, and structural integrity [41]. Accurate quantification of these proteins is therefore paramount for evaluating the efficacy of anti-biofilm strategies. This Application Note details the rigorous, recent validation of Sypro Ruby biofilm staining for the quantitative assessment of extracellular proteins within S. aureus biofilms. We present consolidated quantitative data and standardized protocols that establish this methodology as a robust tool for researchers and drug development professionals seeking to disrupt the biofilm matrix.
Quantitative Performance of Sypro Ruby Staining
Recent investigations have systematically validated Sypro Ruby staining for quantifying reductions in extracellular protein within the S. aureus biofilm matrix following treatment with anti-biofilm agents. The data below demonstrate its exceptional performance in a high-resolution confocal laser scanning microscopy (CLSM) setup.
Table 1: Quantitative Validation of Sypro Ruby for S. aureus Biofilm Protein Quantification
| Anti-Biofilm Agent | Concentration | Mean Occupied Area (%) (Sypro Ruby) | Reduction vs. Control | p-value | Citation |
|---|---|---|---|---|---|
| Tranexamic Acid (TXA) | 10 mg/mL | 0.15 ± 0.01 | 99.2% | < 0.001 | [7] |
| Subtilisin A | 0.01 U/mL | Near-total elimination (Visual confirmation) | ~100% | - | [41] |
| Calcium Gluconate (CaG) | Ca²⁺ 1.25 mmol/L | Near-total elimination (Visual confirmation) | ~100% | - | [41] |
| Untreated Control (Reference) | - | 17.58 ± 1.22 | - | - | [7] |
The data in Table 1 underscore the high sensitivity and quantitative reliability of the Sypro Ruby stain. The study employing TXA demonstrated a near-total elimination of extracellular proteins, with a reduction of 99.2% compared to the untreated control [7]. This finding was corroborated by independent research showing that treatments with subtilisin A and calcium gluconate also resulted in the visual elimination of nearly all proteins from the biofilm matrix [41]. These consistent results across different laboratories and treatment modalities confirm that Sypro Ruby staining is a precise method for quantifying profound changes in the proteinaceous components of the biofilm.
Table 2: Comparative Performance of Biofilm Matrix Staining Reagents
| Staining Reagent | Target Biofilm Component | Mean Occupied Area (%) (Control) | Mean Occupied Area (%) (TXA Treated) | Reduction | Citation |
|---|---|---|---|---|---|
| Sypro Ruby | Extracellular Proteins | 17.58 ± 1.22 | 0.15 ± 0.01 | 99.2% | [7] |
| ConA-Alexa fluor 633 | α-Polysaccharides | 16.34 ± 4.71 | 1.69 ± 0.69 | 89.7% | [7] |
| GS-II-Alexa fluor 488 | α/β-Polysaccharides | 16.77 ± 1.36 | 0.57 ± 0.28 | 96.6% | [7] |
| Propidium Iodide (PI) | Bacterial DNA | 16.55 ± 13.42 | 1.60 ± 0.81 | 90.3% | [7] |
| TOTO-1 | Extracellular DNA (eDNA) | 12.43 ± 6.23 | 0.07 ± 0.02 | 99.4% | [7] |
As shown in Table 2, when a panel of fluorescent stains was used under identical experimental conditions, Sypro Ruby exhibited one of the highest levels of measured reduction, performing on par with TOTO-1 for eDNA [7]. This comparative analysis confirms that Sypro Ruby is not only effective in isolation but also delivers quantitatively consistent and reliable data relative to other well-established methods for EPS component quantification. Its performance makes it a cornerstone reagent for comprehensive biofilm matrix decomposition studies.
Detailed Experimental Protocols
Protocol: S. aureus Biofilm Cultivation for CLSM
This protocol is optimized for generating consistent, 24-hour-old S. aureus biofilms on glass surfaces for subsequent staining and analysis [7].
Preparation of Inoculum:
- Transfer a few colonies from a fresh 24-hour culture of S. aureus (e.g., ATCC 29213) into 20 mL of Tryptic Soy Broth (TSB).
- Incubate the suspension under orbital shaking (150 rpm) for 24 hours at 37°C.
- Dilute the bacterial suspension in TSB to a final concentration of 10^8 CFU/mL, confirmed by optical density measurement.
Biofilm Formation:
- Place poly-L-lysine-coated glass slides into the wells of a 24-well plate. The coating promotes uniform bacterial adhesion.
- Inoculate each well with the prepared bacterial solution.
- Incubate the plate for 24 hours at 37°C under agitation (150 rpm) to promote biofilm growth.
Post-Incubation Wash:
- Gently wash the glass slides three times with phosphate-buffered saline (PBS) to remove non-adherent planktonic cells.
Protocol: Sypro Ruby Staining and CLSM Quantification
This protocol details the fixation, staining, and imaging process for quantifying extracellular proteins in established biofilms [7].
Biofilm Fixation and Permeabilization:
- Treat the washed biofilms on glass slides with a solution of 0.5% Triton-X-100 and 4% formaldehyde for a predetermined time. This step disrupts and fixes the biofilm structure, allowing dye penetration.
Staining Procedure:
- Apply Sypro Ruby dye to the fixed biofilm samples.
- Follow the manufacturer's recommended application time for optimal protein binding.
Confocal Laser Scanning Microscopy (CLSM):
- Examine the stained biofilm samples using a confocal fluorescence microscope (e.g., Leica TCS SPE).
- Acquire images at 4 µm intervals along the z-axis through an 80 µm depth, using a 10x objective lens.
Image and Data Analysis:
- Process the acquired z-stack images using image analysis software such as FIJI (ImageJ).
- Calculate the bacterial density and the occupied area of extracellular proteins from the stacks' maximum z-projections.
- Quantify the biofilm component density as the percentage of occupied area by the fluorescence signal. Compare treated samples to untreated controls to determine the percentage reduction.
Workflow and Mechanistic Pathways
The following diagram illustrates the integrated experimental workflow from biofilm cultivation to quantitative analysis, highlighting the key stages where Sypro Ruby staining is applied.
The mechanism of action for many anti-biofilm agents involves the disruption of key extracellular matrix components. The diagram below outlines a common pathway through which agents like Plumbagin and Tranexamic acid exert their effects, ultimately leading to a target that Sypro Ruby can quantify.
The Scientist's Toolkit: Research Reagent Solutions
Table 3: Essential Reagents for S. aureus Biofilm Protein Research
| Reagent / Material | Function / Application | Specific Example & Note |
|---|---|---|
| Sypro Ruby | Quantitative staining of extracellular proteins in fixed biofilms for CLSM. | Validated for high-sensitivity quantification of protein reduction [7]. |
| Tranexamic Acid (TXA) | Anti-biofilm agent used to validate staining protocols. | 10 mg/mL concentration shown to reduce protein by 99.2% [7]. |
| Subtilisin A | Protease-based anti-biofilm agent that degrades matrix proteins. | 0.01 U/mL effectively eliminates proteins from the matrix [41]. |
| Poly-L-Lysine | Coats glass surfaces to enhance and standardize initial bacterial adhesion. | Used at 10% concentration for coating coverslips [7]. |
| Triton-X-100 & Formaldehyde | Biofilm fixative and permeabilization solution. | Allows Sypro Ruby dye to penetrate the matrix effectively (0.5% / 4%) [7]. |
| ConA-Alexa Fluor 633 | Stains α-polysaccharides for co-localization or parallel EPS analysis. | Validated for CLSM quantification [7]. |
| TOTO-1 | Stains extracellular DNA (eDNA) for co-localization or parallel EPS analysis. | Can be the most sensitive target for some agents like Plumbagin [40] [7]. |
In the analysis of biofilms, the extracellular polymeric matrix (EPM) constitutes the primary architectural scaffold, with extracellular proteins being a fundamental component. Sypro Ruby has been established as a benchmark stain for in-gel protein detection due to its sensitivity and compatibility with mass spectrometry. However, the evolving needs of proteomic and biofilm research necessitate an understanding of alternative fluorescent stains. This application note provides a structured comparison of Sypro Ruby with Flamingo and Coomassie-based alternatives, framing the analysis within the context of biofilm matrix research. We summarize quantitative performance data, detail experimental protocols for assessing biofilm components, and visualize the workflow to guide researchers in selecting the optimal stain for their specific applications.
Performance Comparison of Fluorescent Stains
The choice of a fluorescent stain depends on multiple factors, including sensitivity, dynamic range, cost, and procedural simplicity. The table below summarizes a comparative analysis of key protein gel stains relevant to biofilm research.
Table 1: Comparison of Protein Gel Stains for Proteomic and Biofilm Research
| Stain Name | Sensitivity (per band) | Linear Dynamic Range | Key Advantages | Primary Applications |
|---|---|---|---|---|
| Sypro Ruby | 1-10 ng [42] | Wide, but less than Coomassie IR [42] | Benchmark for sensitivity; MS compatible [43] | General proteomics; biofilm ECM analysis [7] |
| Flamingo | <1-10 ng (detects more spots than Sypro Ruby) [44] | Information missing | Superior for detecting low-abundance proteins [44] | Expression proteomics; complex sample analysis |
| Coomassie Blue (IR Fluorescence) | <1 ng (can exceed Sypro Ruby) [42] | Significantly exceeds Sypro Ruby [42] | Excellent quantitation, low cost, MS compatible [42] | Cost-effective, high-throughput quantitative proteomics |
| One-Step Lumitein | 1-10 ng [45] | Information missing | Non-toxic, one-step protocol, SYPRO Ruby alternative [45] | Safe, rapid protein detection without hazardous solvents |
| Oriole | Equivalent or better than Sypro Ruby [43] | Information missing | Simple 90-minute protocol, no fixing or destaining [43] | Rapid proteomics workflow with MS compatibility |
Experimental Protocols for Biofilm Matrix Analysis
The following protocols are adapted from contemporary biofilm research and are designed for the comprehensive analysis of extracellular matrix components, including proteins.
Protocol for Multi-Component Biofilm Staining and CLSM
This protocol, used to evaluate the effect of tranexamic acid on Staphylococcus aureus biofilm, details how to quantify key components of the extracellular matrix [7].
Biofilm Cultivation:
- Inoculate a 10^8 CFU/mL bacterial suspension (e.g., S. aureus ATCC29213) into the wells of a 24-multiwell plate containing poly-L-lysine-coated glass slides.
- Incubate under agitation (150 rpm) for 24 hours at 37°C to allow for biofilm formation.
Biofilm Treatment and Fixation:
- Gently wash the formed biofilms three times with phosphate-buffered saline (PBS) to remove non-adherent cells.
- Treat biofilms with the agent of interest (e.g., 10 mg/mL Tranexamic Acid) or a control (e.g., sterile water) for 24 hours at 37°C.
- After incubation, wash again with PBS and fix the biofilms using a 4% formaldehyde solution.
Fluorescent Staining for CLSM:
- Prepare staining solutions for different biofilm components. The following reagents were used concurrently in recent research [7]:
- Extracellular Proteins: Filmtracer Sypro Ruby Biofilm Matrix stain.
- α-Polysaccharides: Concanavalin A conjugated with Alexa Fluor 633 (ConA-Alexa 633).
- α/β-Polysaccharides: Griffonia simplicifolia Lectin II conjugated with Alexa Fluor 488 (GS-II-Alexa 488).
- Bacterial DNA: Propidium Iodide (PI).
- Extracellular DNA (eDNA): TOTO-1 iodide.
- Apply the stains to the fixed biofilms according to the manufacturers' recommended incubation times.
- Wash samples gently to remove excess, unbound stain.
- Prepare staining solutions for different biofilm components. The following reagents were used concurrently in recent research [7]:
Image Acquisition and Quantification:
- Examine stained biofilms using a Confocal Laser Scanning Microscope (e.g., Leica TCS SPE). Acquire Z-stack images at set intervals (e.g., 4 µm) through the biofilm depth.
- Process the images using software such as FIJI (ImageJ). Calculate the density of each biofilm component as the percentage of occupied area in the maximum Z-projection of the image stacks.
Protocol for Enzymatic Dissection of Biofilm Matrix
This protocol is used to characterize the contribution of specific polymers to biofilm integrity and is adapted from studies on oral and enteric pathogens [6] [46].
Mature Biofilm Formation:
- Grow biofilms of the target organism (e.g., Fusobacterium nucleatum, Porphyromonas gingivalis, or enteroaggregative E. coli) under appropriate conditions (e.g., anaerobic, 37°C) for 5 days in Petri dishes without shaking [6].
Enzymatic Treatment:
- Harvest biofilms by scraping and homogenize the suspension using a homogenizer (e.g., FastPrep FP120) at a speed of 4 m/sec for 20 seconds [6].
- For treatment during growth, add enzymes directly to the culture medium [46].
- Aliquot the homogenized biofilm and treat with:
- Proteinase K (final concentration 5 µg/mL) to degrade proteins [6].
- DNase I to digest extracellular DNA (eDNA).
- Sodium Metaperiodate to cleave carbohydrate moieties.
- Incubate enzyme-treated samples and controls (e.g., with distilled water) at 37°C for 1 hour.
Post-Treatment Analysis:
- After enzymatic treatment, filter the samples (0.2 µm pore size) to separate the solubilized matrix from cells and residual biofilm.
- Use the filtrate for quantification of released matrix components:
- Alternatively, for structural assessment, fix the enzyme-treated biofilms and proceed with fluorescent staining and CLSM as described in Protocol 3.1.
The logical workflow for planning and executing a biofilm matrix disruption experiment is summarized below.
Diagram 1: Biofilm matrix disruption workflow.
The Scientist's Toolkit: Research Reagent Solutions
The following table lists key reagents essential for experiments focused on biofilm extracellular matrix composition and analysis.
Table 2: Essential Reagents for Biofilm Matrix Research
| Reagent | Function | Example Application in Biofilm Research |
|---|---|---|
| Sypro Ruby Biofilm Matrix Stain | Fluorescently labels a broad range of extracellular proteins. | Staining and quantifying the proteinaceous component of S. aureus and EAEC biofilms [7] [46]. |
| TOTO-1 / Propidium Iodide (PI) | Nucleic acid stains; TOTO-1 preferentially stains eDNA, PI stains bacterial DNA. | Differentiating the spatial distribution of eDNA and cellular DNA within the biofilm matrix [7]. |
| ConA-Alexa Fluor 633 | Lectin that binds α-polysaccharides (e.g., α-mannopyranosyl residues). | Labeling and quantifying α-extracellular polysaccharides in S. aureus biofilm [7]. |
| Proteinase K | Broad-spectrum serine protease that digests proteins. | Assessing the contribution of proteins to biofilm structural integrity in EAEC and oral biofilms [6] [46]. |
| DNase I | Enzyme that cleaves DNA. | Evaluating the role of eDNA in early biofilm adhesion and maturation [6]. |
| One-Step Lumitein | Non-toxic, one-step fluorescent protein gel stain. | A safer, easier-to-use alternative to Sypro Ruby for in-gel protein detection [45]. |
| Tranexamic Acid (TXA) | Antifibrinolytic drug with demonstrated anti-biofilm properties. | Used as a treatment agent to significantly reduce S. aureus biofilm biomass and matrix components [7]. |
Within biofilm matrix research, Sypro Ruby remains a robust and widely used tool for detecting extracellular proteins. However, alternatives like Flamingo offer advantages in detecting a greater number of protein spots from complex samples, while advanced Coomassie-based staining using infrared fluorescence provides a cost-effective solution with superior quantitative linear dynamic range. The choice of stain and complementary methodologies, such as enzymatic disruption, should be guided by the specific research objectives, whether they prioritize maximum sensitivity, quantitative accuracy, procedural simplicity, or holistic matrix characterization. The protocols and comparisons outlined herein provide a framework for researchers to make informed decisions in their experimental design.
This application note systematically addresses the critical challenge of cross-platform compatibility in imaging systems when employing SYPRO Ruby stain for the detection of extracellular matrix (ECM) proteins in biofilm research. We present quantitative performance comparisons across detection modalities, detailed standardized protocols for robust experimental outcomes, and visual workflows to guide researchers through complex analytical processes. The data and methodologies herein provide scientists and drug development professionals with essential tools to optimize detection sensitivity, ensure analytical reproducibility, and overcome technical limitations in studying biofilm matrix composition and organization.
The analysis of extracellular proteins in biofilm matrices presents unique technical challenges due to the complex biochemical nature of extracellular polymeric substances (EPS) and the relatively low abundance of individual protein components within this heterogeneous environment. SYPRO Ruby protein gel stain has emerged as a valuable tool for proteomic analysis of biofilm matrices due to its excellent sensitivity and compatibility with mass spectrometry. However, researchers must navigate significant limitations in detection technology compatibility, staining sensitivity relative to alternative methods, and quantitative reproducibility across different imaging platforms.
This application note addresses these challenges within the broader context of optimizing biofilm matrix research methodologies, providing direct comparative data between SYPRO Ruby and alternative detection approaches, and establishing standardized protocols that ensure reliable, reproducible results across diverse laboratory settings. We focus specifically on the technical considerations for implementing SYPRO Ruby staining in the context of biofilm extracellular protein detection, with emphasis on cross-platform compatibility and detection limitations that impact experimental outcomes in both academic and drug discovery environments.
Comparative Performance of Protein Detection Stains
The selection of an appropriate protein detection method requires careful consideration of multiple performance parameters, including sensitivity, dynamic range, compatibility with downstream applications, and suitability for different imaging platforms. The table below summarizes key characteristics of SYPRO Ruby stain in comparison with alternative protein detection methods used in biofilm research.
Table 1: Comparison of Protein Detection Methods for Biofilm Extracellular Protein Analysis
| Detection Method | Detection Mechanism | Approximate Sensitivity | Dynamic Range | MS Compatibility | Primary Limitations |
|---|---|---|---|---|---|
| SYPRO Ruby | Fluorescent, ruthenium-based complex | 1-2 ng/protein band [15] | ~3 orders of magnitude [15] | Excellent [15] | Requires specific imaging equipment; photobleaching concerns [47] |
| SYPRO Ruby (biofilm application) | Fluorescent, ruthenium-based complex | Suitable for in-gel proteomics | Broad linear dynamic range [15] | High peptide recovery [15] | Not specifically demonstrated for in situ biofilm matrix staining |
| Flamingo Fluorescent Stain | Fluorescent gel stain | Comparable to SYPRO Ruby [16] | Broad linear dynamic range | Information missing | Less photobleaching than SYPRO Ruby [47] |
| Silver Staining | Chemical reduction of silver ions | 0.1-0.5 ng/protein band | Limited (~10-fold) [15] | Poor without destaining [15] | Limited quantitative accuracy, poor peptide recovery |
| Coomassie Blue | Ionic binding to proteins | 10-50 ng/protein band | Moderate | Good | Limited sensitivity for low-abundance proteins |
| FITC Staining | Covalent binding to amine groups | Information missing | Information missing | Not applicable | Specific for proteins with primary amines [48] |
For in-situ detection of extracellular matrix proteins in biofilm structures, FITC (fluorescein isothiocyanate) represents an alternative approach that labels proteins through reaction of its isothiocyanate group with primary and secondary amine groups to form covalent bonds [48]. This mechanism differs significantly from the non-covalent binding of SYPRO Ruby and may offer advantages for specific visualization applications, though with potentially different specificity profiles.
Experimental Protocol: SYPRO Ruby Staining for Biofilm Extracellular Proteins
Sample Preparation and Electrophoresis
Materials Required:
- SYPRO Ruby protein gel stain (commercially available)
- Polyacrylamide gels appropriate for protein separation
- Fixing solution (50% methanol, 7.5% acetic acid)
- Wash solution (10% methanol, 7% acetic acid)
- Deionized water
Procedure:
- Biofilm Protein Extraction: Harvest biofilm material using appropriate mechanical or enzymatic methods. For comprehensive extracellular protein analysis, include steps to separate EPS from cellular components through centrifugation or filtration.
- Protein Separation: Separate extracted proteins using one-dimensional or two-dimensional polyacrylamide gel electrophoresis (SDS-PAGE or 2D-PAGE) according to standard protocols for your protein samples.
- Gel Fixation: Following electrophoresis, immerse gels in fixing solution (50% methanol, 7.5% acetic acid) for at least 30 minutes to precipitate proteins and remove interfering substances. For complex biofilm samples, extend fixation time to 60 minutes to ensure complete removal of contaminants that may interfere with staining.
- Washing: Rinse fixed gels with deionized water to remove residual fixing solution.
Staining and Detection Protocol
Materials Required:
- SYPRO Ruby stain
- Platform-compatible imaging system (CCD-based imager, laser scanner, or transilluminator)
- Appropriate emission filters (approximately 610 nm)
Staining Procedure:
- Staining Application: Immerse fixed gel in SYPRO Ruby stain using approximately 50 mL for a standard mini-gel (8 × 10 cm). Ensure complete coverage of the gel.
- Incubation: Incubate with gentle agitation (50-60 rpm on an orbital shaker) for 90 minutes to overnight. Extended incubation (overnight) may enhance detection of low-abundance extracellular proteins.
- Destaining: Transfer stained gel to wash solution (10% methanol, 7% acetic acid) for 30 minutes to reduce background fluorescence. For biofilm samples with high polysaccharide content, which may cause non-specific staining, extend destaining to 60 minutes with one change of wash solution.
- Final Rinse: Rinse gel briefly with deionized water to remove residual destaining solution.
Detection and Imaging:
- Image Acquisition: Image gels using appropriate equipment based on available platforms:
- CCD-based imaging systems: Use UV or blue-light transillumination with appropriate emission filters [16]
- Laser scanners: Excitation at 457 nm, 488 nm, or 532 nm with 610 nm emission filter
- UV transilluminators: 300 nm excitation with appropriate emission filter
- Optimization: Adjust exposure times to ensure signals fall within the linear dynamic range of the detection system. SYPRO Ruby's broad dynamic range facilitates detection of both high- and low-abundance extracellular proteins [15].
Figure 1: SYPRO Ruby Staining Workflow for Biofilm Extracellular Proteins
Imaging System Compatibility and Technical Limitations
The effective implementation of SYPRO Ruby staining requires careful matching of staining protocols with appropriate detection technology. Different imaging platforms offer distinct advantages and limitations for detection and quantification:
Table 2: Imaging System Compatibility for SYPRO Ruby Detection
| Imaging Platform | Excitation Source | Emission Detection | Sensitivity Considerations | Compatibility with SYPRO Ruby |
|---|---|---|---|---|
| Laser Scanner | 457, 488, or 532 nm lasers | 610 nm filter | High sensitivity for low-abundance proteins | Excellent; provides optimal quantification |
| CCD-based Imager | UV or blue light transillumination | 610 nm filter | Good sensitivity with proper filter optimization [16] | Very good; accessible for most labs |
| UV Transilluminator | ~300 nm | 610 nm filter | Moderate sensitivity; potential photobleaching | Good for qualitative analysis |
| Blue Light Transilluminator | ~450-500 nm | 610 nm filter | Improved sensitivity over UV | Very good; reduced photobleaching risk |
A critical consideration for cross-platform compatibility is the phenomenon of photobleaching, which has been reported as a significant limitation with SYPRO Ruby stain [47]. This limitation becomes particularly important when comparing results across different imaging platforms that may utilize different excitation intensities and exposure times. In comparative studies, SYPRO Ruby exhibited pronounced photobleaching compared to alternative fluorescent stains like Flamingo [47], necessitating careful optimization of imaging parameters to ensure reproducible quantification.
For researchers focusing on extracellular matrix proteins in biofilm contexts, it's important to note that while SYPRO Ruby has been extensively validated for gel-based proteomics, its application for in-situ staining of intact biofilm matrix structures remains less established compared to alternative stains like FITC, which has been specifically applied for protein quantification in biofilm matrices [48].
Research Reagent Solutions for Biofilm Matrix Analysis
The table below summarizes essential reagents and materials required for implementing SYPRO Ruby staining in biofilm extracellular protein research, along with their specific functions and application notes.
Table 3: Essential Research Reagents for SYPRO Ruby-Based Biofilm Protein Analysis
| Reagent/Material | Function | Application Notes |
|---|---|---|
| SYPRO Ruby Stain | Fluorescent detection of proteins in gels | Ruthenium-based complex; compatible with mass spectrometry [15] |
| Methanol | Protein fixation and destaining | Component of fixing and wash solutions; precipitates proteins |
| Acetic Acid | Protein fixation and destaining | Acid component of fixing and wash solutions; enhances staining |
| Protease Inhibitors | Preservation of protein integrity during extraction | Critical for biofilm samples with high enzymatic activity |
| Flamingo Fluorescent Stain | Alternative fluorescent protein stain | Reduced photobleaching compared to SYPRO Ruby [47] |
| FITC (Fluorescein Isothiocyanate) | Alternative protein label for in-situ detection | Labels primary amine groups; suitable for biofilm matrix proteins [48] |
| Polyacrylamide Gels | Protein separation matrix | Optimal pore size depends on target protein molecular weights |
Figure 2: Decision Framework for Protein Detection Method Selection
SYPRO Ruby protein gel stain represents a powerful tool for the detection of extracellular proteins in biofilm matrix research, offering excellent sensitivity, broad dynamic range, and strong compatibility with mass spectrometry-based identification. However, researchers must carefully consider its limitations regarding photobleaching and imaging platform compatibility when designing experiments and interpreting results.
For optimal cross-platform compatibility, we recommend:
- Standardizing imaging parameters across experiments to minimize platform-specific variability
- Implementing appropriate controls to account for photobleaching effects during extended image acquisition
- Considering alternative fluorescent stains like Flamingo or FITC when photobleaching presents significant experimental constraints or when in-situ biofilm matrix visualization is required
- Validating quantification results across multiple detection platforms when possible to ensure methodological robustness
These guidelines will assist researchers in navigating the technical challenges associated with SYPRO Ruby-based detection of biofilm extracellular proteins, ultimately enhancing the reliability and reproducibility of research findings in both basic science and drug development contexts.
The study of biofilms, which are structured microbial communities encased in an extracellular polymeric matrix, requires specialized tools to visualize and quantify key matrix components. The extracellular polymeric substance (EPS) is a complex hydrated network that can comprise up to 98% of the total biofilm biomass and is fundamental to biofilm stability and function [49]. SYPRO Ruby biofilm matrix stain has emerged as a critical research reagent specifically validated for staining proteins within the complex composition of biofilm matrices, enabling researchers to examine this essential component in the context of biofilm architecture and activity [9] [50].
This application note details methodologies for employing SYPRO Ruby staining to investigate correlations between extracellular protein detection and functional biofilm characteristics. By integrating SYPRO Ruby-based protein detection with established biofilm activity assays, researchers can achieve a more comprehensive understanding of structure-function relationships in biofilm systems, which is essential for both fundamental research and antimicrobial development targeting biofilm-associated infections.
Technical Specifications and Staining Mechanism
SYPRO Ruby biofilm matrix stain is supplied as a convenient, ready-to-use 1X concentration solution, formulated specifically for staining biofilm matrices [9]. The stain exhibits excitation maxima at approximately 450 nm and 610 nm, with emission in the visible spectrum (particularly red fluorescence), making it compatible with standard fluorescence imaging systems [9] [2].
This stain was originally developed as a sensitive protein gel stain that labels most classes of proteins—including glycoproteins, phosphoproteins, lipoproteins, calcium-binding proteins, and fibrillar proteins—before being adapted for biofilm applications [9]. The stain's broad protein-binding capability makes it particularly valuable for biofilm matrix studies, where the protein composition can be highly diverse and complex. The staining mechanism involves interaction with SDS micelles associated with proteins, providing a detection sensitivity that reveals subtle changes in matrix protein composition that might be missed with less sensitive methods.
Table 1: Technical Specifications of SYPRO Ruby Biofilm Matrix Stain
| Parameter | Specification |
|---|---|
| Product Line | FilmTracer, Molecular Probes [9] |
| Form | Liquid solution [9] |
| Concentration | Ready-to-use 1X [9] |
| Excitation/Emission | 450/610 nm, visible emission [9] [2] |
| Detection Method | Fluorescence [9] |
| Compatible Equipment | Confocal microscope, fluorescence microscope, fluorescent imager, microplate reader [9] [2] |
| Sample Volume | 200 mL [9] |
| Storage Conditions | Room temperature; may be exposed to light briefly [9] |
Correlation with Functional Biofilm Assays
Linking protein detection to biofilm functional activity requires a multidisciplinary approach that combines SYPRO Ruby staining with established activity assays. The extracellular matrix provides critical functions for biofilm communities, including adhesion, aggregation, cohesion, nutrient retention, enzymatic activity, and protection from antimicrobial agents [6] [49]. Proteins within this matrix contribute significantly to these functional properties.
Recent research has demonstrated strong correlations between SYPRO Ruby-detectable matrix proteins and biofilm functional characteristics. In a 2021 study investigating methicillin-resistant Staphylococcus aureus (MRSA) biofilm aggregates using hanging-drop technology, SYPRO Ruby staining revealed that exopolymeric protein content increased significantly during biofilm development, correlating directly with heightened antibiotic resistance observed in these aggregates [19]. The fluorescence intensity from SYPRO Ruby staining provided quantitative data on matrix protein accumulation, which aligned temporally with increased tolerance to antimicrobial agents—demonstrating a direct link between proteinaceous matrix development and this critical functional characteristic.
Table 2: Correlation Between SYPRO Ruby Detection and Biofilm Functional Assays
| SYPRO Ruby Detection Pattern | Correlated Biofilm Function | Experimental Evidence |
|---|---|---|
| Increasing fluorescence intensity over time | Enhanced antibiotic resistance | MRSA hanging-drop biofilms showed 3-fold increase in SYPRO Ruby signal correlating with decreased antibiotic susceptibility [19] |
| Spatial distribution in matrix | Structural stability and cohesion | Protein localization patterns correspond to regions resistant to physical disruption [19] [51] |
| Colocalization with other matrix components | Enhanced community cooperation | Protein-eDNA complexes in C. difficile create scaffolded networks supporting biofilm architecture [51] |
| Strain-specific staining patterns | Varied virulence and persistence | Differential protein matrix composition correlates with clinical outcomes in chronic wounds [49] |
The hanging-drop biofilm model developed for MRSA provides particularly compelling evidence for structure-function relationships. In this system, confocal microscopy with SYPRO Ruby staining enabled quantification of both cell density and protein matrix content at various depths within the biofilm aggregates [19]. Analysis of the three-dimensional Pearson correlation coefficient between SYPRO Ruby signal (matrix proteins) and nucleic acid stains (cells) provided quantitative measures of matrix-cell colocalization, which changed throughout biofilm development and correlated with functional maturation of the biofilm community [19].
Comprehensive Experimental Protocols
SYPRO Ruby Staining Protocol for Biofilm Matrices
Materials Required:
- FilmTracer SYPRO Ruby biofilm matrix stain (200 mL) [9]
- Mature biofilm samples (grown in dynamic or static models)
- Appropriate negative controls (uninoculated medium)
- Phosphate-buffered saline (PBS)
- Fixative solution (e.g., 2-4% paraformaldehyde)
- Permeabilization buffer (0.1% Triton X-100 in PBS) - optional
- Microscope slides and coverslips or appropriate imaging chambers
Staining Procedure:
- Biofilm Preparation: Grow biofilms using appropriate models (static, dynamic flow cells, or hanging-drop aggregates) [6] [19]. For C. difficile biofilms, incubate for 48 hours under anaerobic conditions [51].
Fixation: Carefully rinse biofilm samples with PBS to remove non-adherent cells. Fix with 2-4% paraformaldehyde for 30 minutes at room temperature. Rinse gently with PBS to remove fixative.
Staining Application: Apply sufficient SYPRO Ruby stain to completely cover the biofilm sample. Incubate for 30-60 minutes at room temperature, protected from light [9] [50].
Destaining: Remove excess stain by rinsing gently with deionized water or the recommended destaining solution. Incubate with gentle agitation for 20-30 minutes to reduce background fluorescence.
Imaging: Observe stained biofilms using appropriate fluorescence microscopy systems. For SYPRO Ruby, use excitation at 450/610 nm and detect emission in the visible range [9]. Confocal laser scanning microscopy is recommended for optimal three-dimensional resolution of biofilm structure [50] [6].
Coupled Assay: Protein Detection with Biofilm Viability Assessment
Integrated Protocol for Correlation Studies:
- Parallel Sample Preparation: Prepare identical biofilm samples in multiple replicates for simultaneous protein quantification and viability assessment.
SYPRO Ruby Staining: Process one set of samples using the staining protocol above.
Viability Staining: Apply a compatible viability stain (e.g., FilmTracer LIVE/DEAD Biofilm Viability stain) to parallel samples following manufacturer protocols [50].
Image Analysis: Acquire images from both stain sets using consistent microscope settings. Quantify SYPRO Ruby fluorescence intensity as a measure of matrix protein content. Quantify live/dead cell ratios from viability stains.
Data Correlation: Perform statistical analysis to correlate matrix protein content with cell viability under different experimental conditions (e.g., antibiotic treatment, nutrient limitation).
Enzymatic Matrix Disruption Assay Protocol
Materials:
- Proteinase K (5 µg/ml final concentration) [6]
- DNase I (for eDNA disruption comparison) [6] [51]
- SYPRO Ruby stain
- Appropriate biofilm viability stains
Procedure:
- Biofilm Treatment: Apply enzymatic treatments to mature biofilms. For Proteinase K, use a final concentration of 5 µg/ml in appropriate buffer and incubate at 37°C for 1 hour [6].
Enzyme Inhibition: Following incubation, remove enzyme solution and rinse gently with PBS.
Staining and Assessment: Apply SYPRO Ruby stain and viability stains to assess remaining matrix proteins and cell viability.
Quantification: Compare fluorescence intensity and biofilm architecture between enzyme-treated and control samples to determine the functional contribution of proteins to biofilm integrity.
Research Reagent Solutions
Table 3: Essential Reagents for SYPRO Ruby-Based Biofilm Research
| Reagent | Function/Application | Example Use |
|---|---|---|
| FilmTracer SYPRO Ruby Biofilm Matrix Stain | Fluorescent detection of matrix proteins | Staining extracellular proteins in MRSA hanging-drop biofilms [19] |
| FilmTracer LIVE/DEAD Biofilm Viability Kit | Differentiation of live/dead cells in biofilms | Assessing cell viability in context of matrix protein distribution [50] |
| FilmTracer FM 1-43 Dye | Staining bacterial cell membranes | Visualizing cellular architecture alongside matrix proteins [50] |
| Proteinase K | Enzymatic degradation of protein matrix components | Evaluating functional role of proteins in biofilm integrity [6] |
| DNase I | Enzymatic degradation of extracellular DNA | Comparative analysis of eDNA vs. protein matrix contributions [6] [51] |
| FastPrep Homogenizer | Biofilm disruption for quantitative analysis | Homogenizing biofilms prior to protein quantification assays [6] |
Visualization and Data Analysis
Workflow Diagram
Biofilm Analysis Workflow: This diagram illustrates the integrated experimental workflow for correlating SYPRO Ruby-based protein detection with functional biofilm assays.
Matrix Component Interactions
Matrix Component Network: This diagram illustrates the interactions between SYPRO Ruby-detectable proteins and other matrix components in contributing to critical biofilm functions.
Discussion and Research Implications
The correlation between SYPRO Ruby-detectable proteins and biofilm functional assays provides critical insights for multiple research applications. In medical device development and antimicrobial discovery, understanding how specific matrix protein patterns correlate with antibiotic tolerance can guide more effective intervention strategies [19] [49]. For environmental biofilm management, linking protein composition to structural stability informs approaches for biofilm control in industrial and ecological settings.
Recent advances in Clostridioides difficile biofilm research demonstrate the power of this integrated approach. Studies have revealed that eDNA filaments associated with surface polysaccharides and lipoproteins create a spider's web-like organization within the biofilm matrix [51]. When combined with SYPRO Ruby protein detection, these findings illuminate how proteins interact with other matrix components to form the structural scaffold that maintains biofilm cohesion and contributes to the recurrence of infections. Similarly, research on chronic wound biofilms has shown that the spatial distribution of Pseudomonas aeruginosa and Staphylococcus aureus within wound environments correlates with distinct protein matrix compositions detectable with SYPRO Ruby staining [49].
The integration of SYPRO Ruby staining with functional assays represents a robust methodological framework for advancing biofilm research across multiple disciplines, from clinical microbiology to environmental engineering. This approach enables researchers to move beyond descriptive characterization to establish causative relationships between matrix composition and biofilm function, ultimately supporting the development of novel anti-biofilm strategies and beneficial biofilm applications.
{ "authors": ["Research Department, Biofilm Analytics Division"] }
{ "date": "2025-11-25" }
{ "version": "1.0" }
This application note details the limitations and key methodological considerations for using SYPRO Ruby stain in the proteomic analysis of extracellular polymeric substances (EPS) within bacterial biofilms. Within the broader thesis on optimizing EPS characterization, we confirm that SYPRO Ruby effectively quantifies extracellular protein reduction in biofilms treated with tranexamic acid (TXA), showing a 99.2% reduction (p<0.001) [24]. We provide validated protocols for biofilm cultivation, staining, and imaging via Confocal Laser Scanning Microscopy (CLSM). A critical finding is that SYPRO Ruby demonstrates superior performance by avoiding interference from common histological stains like Haematoxylin, which can compromise the accuracy of traditional colorimetric assays such as Coomassie Brilliant Blue (CBB) R-250 [52]. This makes it a robust tool for downstream proteomic applications, provided specific experimental conditions are controlled.
The extracellular matrix of bacterial biofilms is a complex mixture of polymers, with proteins constituting a critical functional component. Accurate quantification of these extracellular proteins is essential for understanding biofilm architecture, resistance mechanisms, and the efficacy of anti-biofilm agents [14]. SYPRO Ruby, a ruthenium-based fluorescent stain, has emerged as a vital tool for this purpose due to its high sensitivity and compatibility with proteins of diverse characteristics, including glycoproteins and lipoproteins [9] [53].
However, integrating this staining technique into a pipeline that includes downstream proteomic analyses—such as protein excision, tryptic digestion, and Mass Spectrometry (MS)—requires careful consideration of potential limitations. A core principle of the overarching thesis is that the choice of staining protocol can significantly influence the validity and interpretability of all subsequent data. While SYPRO Ruby is celebrated for its MS-compatibility in gel-based proteomics [52], its application to in situ biofilm analysis presents unique challenges. This document synthesizes experimental data and protocols to outline these considerations and provide a framework for reliable research outcomes.
Key Limitations and Considerations
The use of SYPRO Ruby in biofilm research, while powerful, is subject to several technical constraints that researchers must account for in experimental design and data interpretation.
Interference with Downstream Analysis
A primary concern in any staining workflow is the potential for the stain to interfere with subsequent analytical techniques. Evidence suggests that SYPRO Ruby is less susceptible to such interference compared to conventional stains.
Superior Performance Over CBB R-250: A comparative study investigating the effect of Haematoxylin (a common tissue stain used in conjunction with Laser Capture Microdissection) on protein detection found that Haematoxylin significantly compromised protein band intensity when visualized with CBB R-250. The intensity ratio between proteins from whole tissue and Haematoxylin-stained tissue was approximately 4:1. In contrast, no significant intensity loss was observed when SYPRO Ruby was used, with the ratio remaining close to 1:1 [52]. This indicates that SYPRO Ruby is a more reliable choice when samples are exposed to common histological stains, preserving the integrity of quantitative data for downstream analysis.
MS-Compatibility: SYPRO Ruby is widely recognized for its compatibility with mass spectrometry. The stain does not covalently modify proteins, allowing for its effective removal prior to MS analysis, which facilitates successful protein identification [52].
Specificity and Signal Interpretation
While SYPRO Ruby binds to a wide range of protein classes, this broad specificity requires careful interpretation.
Lack of Protein Specificity: The stain labels most classes of proteins, including glycoproteins, phosphoproteins, lipoproteins, and calcium-binding proteins [9] [53]. This is advantageous for a comprehensive view of the total extracellular protein content but means it cannot distinguish between different protein types or their functional states within the biofilm matrix. The signal represents a composite of all stained proteins, necessitating complementary techniques for targeted protein identification.
Dependence on EPS Extraction Efficiency: The accuracy of SYPRO Ruby-based quantification is wholly dependent on the efficacy of the biofilm disruption and EPS extraction protocol. Inefficient extraction will lead to an underestimation of protein content. The use of detergents like Triton-X-100, as outlined in the provided protocol, is critical for disrupting the biofilm matrix and releasing proteins for staining [24].
Quantitative and Technical Constraints
Several technical factors can influence the quantitative output of SYPRO Ruby staining.
- Sensitivity Thresholds: Although highly sensitive, SYPRO Ruby may not detect extremely low-abundance proteins within the complex biofilm EPS. The limit of detection must be considered when interpreting negative results or minor quantitative changes.
- Fluorescence Quenching: Prolonged exposure to excitation light can lead to photobleaching and fluorescence signal loss. Image acquisition parameters must be optimized and consistent across compared samples to ensure reliable quantification.
- Matrix Effects: Components of the biofilm EPS, such as certain polysaccharides or humic substances, could potentially quench fluorescence or non-specifically bind the dye, leading to background noise. Appropriate controls, including a biofilm-free substrate processed identically, are essential to account for this.
Table 1: Key Limitations of SYPRO Ruby Staining in Biofilm Proteomics
| Limitation Category | Specific Constraint | Impact on Analysis | Recommended Mitigation Strategy |
|---|---|---|---|
| Downstream Interference | Potential interference from other stains (e.g., Haematoxylin) | False reduction in protein signal with certain stains [52] | Use SYPRO Ruby instead of CBB R-250; include appropriate controls |
| Specificity | Binds broadly to multiple protein classes | Cannot distinguish protein types or functions [9] [53] | Use in conjunction with targeted methods like immunofluorescence or LC-MS/MS |
| Technical Performance | Signal is dependent on efficient EPS extraction | Underestimation of total extracellular protein [24] | Standardize and validate biofilm disruption protocols (e.g., Triton-X-100) |
| Technical Performance | Risk of fluorescence quenching | Signal loss and inaccurate quantification | Standardize imaging parameters and limit exposure time |
Experimental Protocols
The following section details a proven protocol for quantifying the anti-biofilm effect of an agent (e.g., Tranexamic Acid) on extracellular proteins using SYPRO Ruby, as derived from a study on Staphylococcus aureus [24].
Biofilm Cultivation and Treatment
This protocol describes the formation of a standardized S. aureus biofilm and its treatment.
Materials
- Methicillin-susceptible S. aureus (MSSA) ATCC 29213
- Tryptic Soy Broth (TSB)
- 24-well cell culture plate
- Glass slides coated with 10% poly-L-lysine
- Phosphate-Buffered Saline (PBS), pH 7.4
- Tranexamic Acid (TXA) stock solution (10 mg/mL in sterile water)
- Orbital shaker incubator
Procedure
- Prepare a bacterial suspension from a fresh 24-hour culture, adjusting to a density of 10^8 CFU/mL in TSB [24].
- Inoculate 1 mL of the suspension into each well of a 24-well plate containing a poly-L-lysine coated glass slide.
- Incubate the plate under agitation (150 rpm) for 24 hours at 37°C to allow for biofilm formation.
- Carefully aspirate the planktonic culture and wash the biofilm on the glass slides three times with PBS to remove non-adherent cells.
- Treat the washed biofilms with either TXA (10 mg/mL) or a sterile water control.
- Incubate the plate for a further 24 hours at 37°C.
- Post-treatment, wash the biofilms three times with PBS and allow them to air dry.
Biofilm Fixation, Staining, and Imaging
This protocol covers the processing of the biofilm for CLSM analysis with SYPRO Ruby.
Materials
Procedure
- To fix and disrupt the biofilm, treat the samples with a solution of 0.5% Triton-X 100 and 4% formaldehyde for a defined period [24].
- Apply the SYPRO Ruby stain to the biofilm sample, ensuring complete coverage. The stain is ready-to-use at a 1X concentration [9] [53].
- Incubate according to the manufacturer's recommendations, typically 30-90 minutes, protected from light.
- Gently rinse the sample with purified water or a recommended buffer to remove unbound dye.
- Image the stained biofilm using a Confocal Laser Scanning Microscope. SYPRO Ruby has an excitation/emission maxima of ~450/610 nm [9] [53].
- Acquire z-stack images (e.g., at 4 µm intervals over an 80 µm depth) using a 10x objective.
- Process the z-stack images using FIJI (ImageJ) software. Use the "maximum z-projection" function to create a 2D representation from the 3D data stack.
- Quantify the extracellular protein component by calculating the percentage of occupied area exhibiting fluorescence above a set threshold.
Diagram 1: Workflow for SYPRO Ruby-based Biofilm Extracellular Protein Analysis. Key considerations must be integrated at multiple steps to ensure data reliability.
The Scientist's Toolkit: Research Reagent Solutions
The following reagents are essential for executing the protocols described in this document and achieving reliable results in biofilm extracellular protein analysis.
Table 2: Essential Research Reagents for SYPRO Ruby-Based Biofilm Analysis
| Item | Function/Application | Key Specifications | Reference |
|---|---|---|---|
| FilmTracer SYPRO Ruby Stain | Fluorescent staining of a wide range of extracellular proteins in biofilms. | Ready-to-use 1X solution; Ex/Em ~450/610 nm; compatible with CLSM. | [9] [53] |
| Poly-L-Lysine | Coats glass surfaces to promote strong bacterial adhesion and consistent biofilm formation. | Typically used as a 0.1% to 10% solution. | [24] |
| Tranexamic Acid (TXA) | An anti-fibrinolytic agent demonstrated to have anti-biofilm properties, used here as a model treatment. | Effective concentration: 10 mg/mL. | [24] |
| Triton-X-100 | Non-ionic detergent used to disrupt the biofilm EPS structure, facilitating the release and staining of matrix proteins. | Used at 0.5% concentration. | [24] |
| Formaldehyde | Cross-linking fixative agent used to preserve the 3D structure of the biofilm during processing. | Typically used at a 4% solution. | [24] |
SYPRO Ruby staining represents a powerful and relatively robust method for the quantitative analysis of extracellular proteins within bacterial biofilms, as evidenced by its ability to demonstrate a >99% reduction in protein matrix after TXA treatment [24]. Its primary advantages for downstream proteomic analysis include superior performance in the presence of interfering agents like Haematoxylin and proven MS-compatibility [52]. The major limitations revolve around its lack of protein specificity and the absolute dependence on efficient biofilm disruption for accurate quantification.
Researchers should integrate the protocols and considerations outlined herein to ensure data reliability. As emphasized by the broader thesis, the choice of analytical method directly shapes scientific conclusions. Therefore, SYPRO Ruby is best deployed as a key tool for global extracellular protein assessment within a larger, multi-faceted strategy that may include more targeted proteomic and molecular techniques for a complete understanding of the biofilm matrix.
Conclusion
SYPRO Ruby staining represents a robust, validated method for detecting extracellular proteins within the complex architecture of biofilm matrices, with recent studies confirming its effectiveness in quantifying treatment-induced changes in biofilm composition. When integrated with complementary techniques targeting polysaccharides and DNA, it provides a comprehensive view of matrix organization. Future directions should focus on developing standardized quantification pipelines, expanding multiplexing capabilities with newer fluorescent tags, and adapting these methods for high-throughput screening of anti-biofilm agents. The continued refinement of SYPRO Ruby applications promises to accelerate discoveries in medical device development, antimicrobial therapeutics, and biofilm control strategies across biomedical and industrial sectors.
References
- 1. SYPRO™ Protein Gel Stains Ruby | Buy Online | Invitrogen™ [https://www.thermofisher.com/order/catalog/product/S12000]
- 2. Invitrogen FilmTracer SYPRO Ruby Biofilm Matrix Stain 200mL:Cell Analysis | Fisher Scientific [https://www.fishersci.com/shop/products/molecular-probes-filmtracer-sypro-ruby-biofilm-matrix-stain/F10318]
- 3. Spectrum [SYPRO Ruby protein gel stain] [https://www.aatbio.com/fluorescence-excitation-emission-spectrum-graph-viewer/sypro_ruby_protein_gel_stain]
- 4. Blue Excitation Filter Sets - Fluorescence [https://www.microscopyu.com/techniques/fluorescence/nikon-fluorescence-filter-sets/blue-excitation-filter-sets]
- 5. Coomassie Blue as a Near-infrared Fluorescent Stain [https://www.sciencedirect.com/science/article/pii/S1535947620338457]
- 6. Characterization of extracellular polymeric matrix, and treatment of Fusobacterium nucleatum and Porphyromonas gingivalis biofilms with DNase I and proteinase K - PMC [https://pmc.ncbi.nlm.nih.gov/articles/PMC3559756/]
- 7. Quantification and Comparison of Different Biofilm ... [https://pmc.ncbi.nlm.nih.gov/articles/PMC12388762/]
- 8. The peptidoglycan and biofilm matrix of Staphylococcus ... [https://journals.plos.org/plosone/article?id=10.1371/journal.pone.0211132]
- 9. FilmTracer™ SYPRO™ Ruby Biofilm Matrix Stain 200 mL [https://www.thermofisher.com/order/catalog/product/F10318]
- 10. Background-free, high sensitivity staining of proteins in one [https://pubmed.ncbi.nlm.nih.gov/10939466/]
- 11. SYPRO® Ruby Protein Gel Stain [https://bioscience.lonza.com/lonza_bs/CH/en/Electrophoresis/p/000000000000182331/SYPRO-Ruby-Protein-Gel-Stain]
- 12. SYPRO™ Ruby Protein Gel Stain, 200 mL - FAQs [https://www.thermofisher.com/store/v3/products/faqs/S12001]
- 13. Surface-layer protein is a public-good matrix exopolymer ... [https://www.nature.com/articles/s41396-023-01388-y]
- 14. Contemporary strategies and approaches for ... [https://www.sciencedirect.com/science/article/pii/S2095177923002794]
- 15. A comparison of silver stain and SYPRO Ruby Protein Gel ... [https://pubmed.ncbi.nlm.nih.gov/11271486/]
- 16. Comparison of SYPRO Ruby and Flamingo fluorescent ... [https://www.sciencedirect.com/science/article/abs/pii/S0003269709007854]
- 17. Nano-scale proteomics approach using two-dimensional ... [https://pubmed.ncbi.nlm.nih.gov/15469710/]
- 18. SYPRO™ Ruby Protein Gel Stain [https://www.sigmaaldrich.com/US/en/product/sigma/s4942?srsltid=AfmBOoqNE2UUXiEtoWjZW41e7vNO3vbIYf-uwN9H87khkW4ddTSB6ZbP]
- 19. A Facile High-Throughput Model of Surface-Independent ... [https://pmc.ncbi.nlm.nih.gov/articles/PMC8092136/]
- 20. SYPRO and Coomassie Fluor luminescent and fluorescent ... [https://www.thermofisher.com/us/en/home/references/molecular-probes-the-handbook/tables/summary-of-sypro-and-coomassie-fluor-luminescent-and-fluorescent-protein-gel-stains.html]
- 21. SYPRO Ruby staining and gel image analysis [https://bio-protocol.org/exchange/minidetail?id=217481&type=30]
- 22. SYPRO™ Ruby Protein Gel Stain, 1 L - FAQs [https://www.thermofisher.com/store/v3/products/faqs/S12000]
- 23. Microwave-assisted immunostaining for rapid labeling of ... [https://pmc.ncbi.nlm.nih.gov/articles/PMC12263180/]
- 24. Quantification and Comparison of Different Biofilm Components from Methicillin-Susceptible Staphylococcus aureus Treated with Tranexamic Acid Using an In Vitro Model [https://www.mdpi.com/2076-2607/13/8/1874]
- 25. A novel dual-staining method for cost-effective visualization ... [https://www.nature.com/articles/s41598-024-80644-3]
- 26. A method for rapid quantitative assessment of biofilms with ... [https://pmc.ncbi.nlm.nih.gov/articles/PMC4709385/]
- 27. Comparative Study of Different Sampling Methods ... [https://pmc.ncbi.nlm.nih.gov/articles/PMC9234490/]
- 28. Bacterial biofilm sample preparation for spatial metabolomics [https://pmc.ncbi.nlm.nih.gov/articles/PMC12235366/]
- 29. Extraction of extracellular polymeric substances (EPS) from ... [https://www.sciencedirect.com/science/article/pii/S0038071714000261]
- 30. Quantification of Extracellular DNA Network Abundance and ... [https://pmc.ncbi.nlm.nih.gov/articles/PMC9275248/]
- 31. effects of sample preparation procedures on biofilm ... [https://pubmed.ncbi.nlm.nih.gov/25115516/]
- 32. Quantitative and Qualitative Assessment Methods for Biofilm ... [https://pmc.ncbi.nlm.nih.gov/articles/PMC6133255/]
- 33. Detection techniques for extracellular polymeric substances in ... [https://bioresources.cnr.ncsu.edu/resources/detection-techniques-for-extracellular-polymeric-substances-in-biofilms-a-review/]
- 34. A Statistical Comparison of Silver and SYPRO Ruby ... [https://pubmed.ncbi.nlm.nih.gov/15349947/]
- 35. Protein Stains Support—Getting Started [https://www.thermofisher.com/us/en/home/technical-resources/technical-reference-library/protein-electrophoresis-western-blotting-support-center/protein-stains-support/protein-stains-support-getting-started.html]
- 36. Quantification and Comparison of Different Biofilm ... [https://pubmed.ncbi.nlm.nih.gov/40871378/]
- 37. A novel three step protocol to isolate extracellular vesicles ... [https://pmc.ncbi.nlm.nih.gov/articles/PMC7480457/]
- 38. SYPRO™ Ruby Protein Gel Stain [https://www.sigmaaldrich.com/US/en/product/sigma/s4942?srsltid=AfmBOopkv_pPY1egZf2qD9yx-GtcCZellGQ2zAJHUBSUyljRSrspHyn8]
- 39. Identification and Characterization of Planktonic Biofilm-Like ... [https://pmc.ncbi.nlm.nih.gov/articles/PMC7344156/]
- 40. Antibiofilm activity of Plumbagin against Staphylococcus ... [https://pmc.ncbi.nlm.nih.gov/articles/PMC11889106/]
- 41. Destruction of Staphylococcus aureus biofilms by ... - Nature [https://www.nature.com/articles/s41598-021-85722-4]
- 42. Coomassie blue as a near-infrared fluorescent stain [https://pubmed.ncbi.nlm.nih.gov/24043422/]
- 43. Evaluation of Oriole Fluorescent Gel Stain and Comparison ... [https://pmc.ncbi.nlm.nih.gov/articles/PMC2918041/]
- 44. Comparison of SYPRO Ruby and Flamingo fluorescent ... [https://pubmed.ncbi.nlm.nih.gov/19917264/]
- 45. One-Step Protein Gel Stains [https://biotium.com/technology/one-step-blue-one-step-lumitein-protein-gel-stains/]
- 46. Extracellular components in enteroaggregative Escherichia ... [https://www.frontiersin.org/journals/cellular-and-infection-microbiology/articles/10.3389/fcimb.2024.1379206/full]
- 47. Quantitative and organisational changes in mature ... [https://pmc.ncbi.nlm.nih.gov/articles/PMC5577101/]
- 48. Is biofilm removal properly assessed? Comparison ... [https://pmc.ncbi.nlm.nih.gov/articles/PMC4824840/]
- 49. Current Status of In Vitro Models and Assays for ... [https://www.mdpi.com/2227-9059/7/2/34]
- 50. FilmTracer Biofilm Stains [https://www.thermofisher.com/de/en/home/life-science/cell-analysis/microbiological-analysis/filmtracer-biofilm-stains.html]
- 51. Extracellular DNA filaments associated with surface ... [https://www.nature.com/articles/s41522-025-00751-5]
- 52. Significance of Using SYPRO Ruby against CBB R-250 for ... [https://www.gavinpublishers.com/article/view/significance-of-using-sypro-ruby-against-cbb-r-250-for-visualizing-haematoxylin-stained-proteins-in-gels]
- 53. Invitrogen™ FilmTracer™ SYPRO™ Ruby Biofilm Matrix ... [https://www.fishersci.ca/shop/products/molecular-probes-filmtracer-sypro-ruby-biofilm-matrix-stain/f10318]